Removing clutch discs of a car with an engine model ZMZ-405, ZMZ-406
Remove the clutch housing (see article - Removing the clutch housing (ZMZ-406 engine)
We use a core to mark the relative position of the casing and flywheel.

Holding the flywheel from turning with a screwdriver or mounting spudger, wrench or 12mm socket, unscrew 6 bolts

Remove the drive disk assembly (basket) and driven disk
After disassembling, the clutch parts should be washed in kerosene and inspected.
Cracks, burrs and deep grooves are not allowed on the surface of the drive disks.
If present, replace the flywheel and basket assembly.
We replace the driven disk with linings worn to the rivets, warped, cracked, oiled and burnt.
The protrusion of the ends of the diaphragm spring petals is controlled using a spacer.
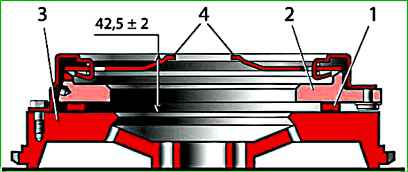
When moving the ends of the petals 8.5 mm down, the pressure plate offset must be at least 1.3 mm, otherwise we change the drive disk (basket) assembly.
No cracks or breaks are allowed on the crankcase.
During assembly, we coat the rubbing surfaces of the fork, coupling, pushers and shaft splines with CV joint-4 lubricant.
Install the disks in the following sequence

Insert the centering mandrel into the engine flywheel bearing.

Put the driven disk on it.
On one side the disk hub protrudes less than on the other. This side should be facing the flywheel.

Attach the basket to the flywheel and secure it with 6 bolts (the holes match only in one position).
After tightening the bolts, remove the mandrel
Disassembling the clutch of a car with an engine model ZMZ-402
We carry out the work in an inspection ditch.
Remove the gearbox.
Remove the hydraulic clutch slave cylinder (see article - Replacing the master and slave cylinders of the clutch of a Gazelle car)

Use a 10mm wrench to unscrew the fastening bolt

Take out the clutch release fork along with the protective cover.

Remove the clutch release bearing (release bearing).

Use a 12mm wrench to unscrew the two lower bolts

Using a 14mm wrench, loosen the two upper bolts securing the clutch housing amplifier.
We similarly loosen the amplifier mount on the other side of the engine.

Using a 12mm wrench, unscrew the four bolts securing the lower part of the clutch housing

Using a mounting spatula, remove the lower part.
A cardboard gasket is installed between the pan and the crankcase.

In order not to disturb the joint balancing of the flywheel and the clutch drive disk when assembling the unit, we mark their relative position with a chisel or center punch

Holding the flywheel from turning with a mounting blade, use a 12mm wrench to unscrew the six bolts securing the “basket” to the flywheel.

Semicircular plates are installed between them.
To facilitate access to the bolts, periodically rotate the flywheel.

Remove the “basket” and the driven disc

Install the clutch parts in reverse order, centering the clutch driven disc with a special mandrel
If there is no mandrel, you can center the clutch driven disc using the input shaft of the gearbox.
To do this, when installing the clutch “basket”, we only tighten its fastening bolts, leaving the driven disk free to move.
Having installed the box and tightened the nuts securing it, rotate the flywheel, evenly tightening the bolts securing the “basket”.
")

")
")
")
")
")
")
")