Replacing the tie rod end
We replace the outer tie rod end if we detect play in the ball joint of the tie rod or damage to the joint boot
Usually this defect is detected when there is a large free play of the steering wheel and a characteristic knock.
You can check the play by shaking the wheel with both hands in a horizontal plane, before this you need to raise the car on a jack or lift.
Tools needed for the work: keys for 16, 19, 21, Torx T30, wheel wrench, ball joint puller.
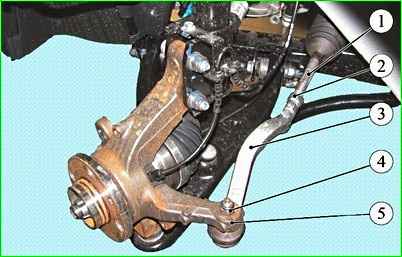
When performing the work, keep in mind that the left end has a right-hand thread, and the right end of the steering rod has a left-hand thread
Raise the front of the car on the side of the work being performed and install it on reliable stops
Remove the corresponding front wheel
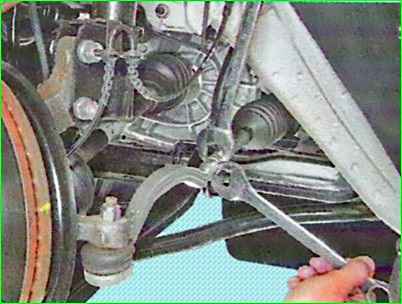
Loosen the tightening of the steering rod end lock nut
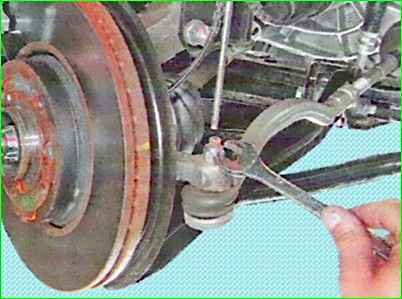
Unscrew the nut securing the ball joint pin to the steering knuckle arm, holding the pin from turning
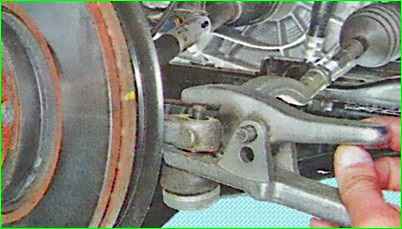
Install the ball joint puller and we press the pin out of the pivot pin boss
If there is no puller, the ball joint pin can be knocked out by sharp blows of a hammer on the end of the pivot arm boss, striking along the axis of the lever
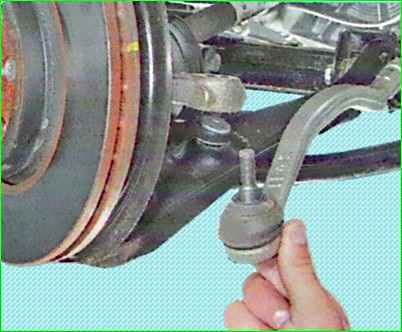
We take the pin out of the pivot arm boss
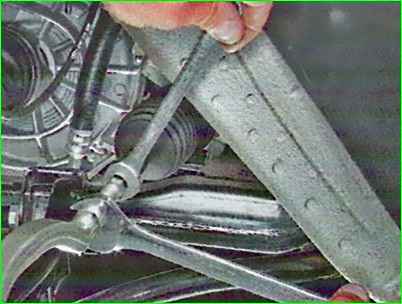
Unscrew the end from the tie rod
When unscrewing, you need to count the number of turns so as not to knock the wheel alignment off (it is advisable to put a mark before unscrewing)
If necessary, hold the rod from turning by the flats
Install the new end in the reverse order
Screw the end onto the rod, taking into account the number of turns.
Tighten the lock nut to 50 Nm
Tighten the ball joint pin nut of the tie rod end to 35 Nm
If necessary, adjust the wheel alignment angles
Replacing the steering boot traction
We replace the protective cover of the steering gear if it is cracked, has lost elasticity or is torn.
We prepare the car for the work. Place the car on a lift or inspection pit.
Remove the wheel from the side of the boot being replaced.
Remove the outer tie rod end as described above
Unscrew and remove the wheel alignment lock nut.
To prevent dirt and dust from getting into the steering gear, clean and blow out the boot surface with compressed air before removing the protective boot.
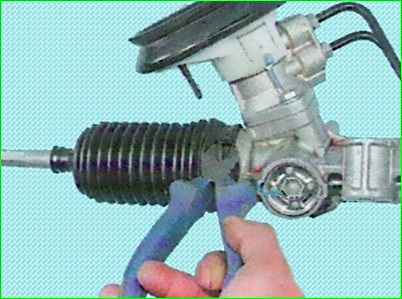
Using side cutters, cut the plastic clamp
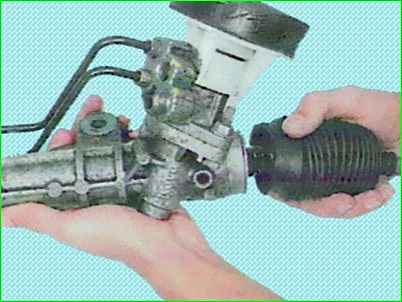
Removing the steering gear boot
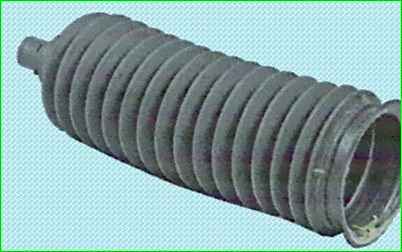
Installation
Repeat The use of the protective cover of the inner joint of the steering rod is not allowed. After dismantling, use a new cover.
Clean the seating surfaces under the protective cover of the inner joint.
Apply silicone-containing grease to the seating surfaces of the protective cover.
Before installing the cover, set the steering gear to a position corresponding to the straight-line movement of the car. This position of the mechanism allows for an equal amount of air in the internal volumes under the right and left protective covers.
Install a new protective cover and secure it to the steering gear housing with a new clamp.
Install the wheel alignment lock nut on the steering rod.
Install the outer steering rod end.
Install the front wheel.
Check and, if necessary, adjust the wheel alignment angles.
Replacing the steering rod
You will need the same tools as when removing the steering rod ends, plus a 32 key, Torx T30, side cutters
Raise the front of the car and install it on a support
Remove the wheel
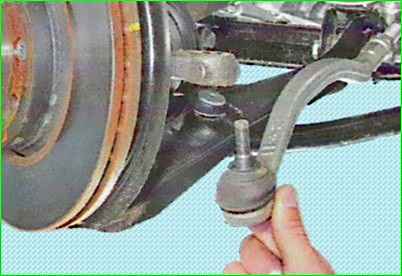
Disconnect from the lever and remove the steering rod end, as described at the beginning of the article
Remove the protective cover
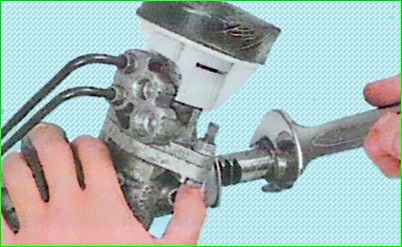
Put the key on flats on the hinge housing and unscrew the end of the tie rod from the steering rack
To make it clearer, we show on the removed steering gear
To make it easier to install the key on the hinge, when removing the left tie rod, you need to turn the steering wheel to the right, and when removing the right tie rod, respectively, to the left
Apply anaerobic thread locker to the threaded part of the inner hinge housing
Install the tie rod in the reverse order
Tighten the tie rod joint to the rack with a torque of 80 Nm
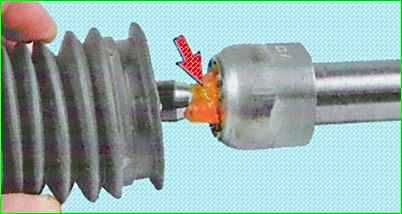
Before installing the cover, apply silicone-containing grease to the teeth of the steering rack and the working surface of the tie rod joint
If necessary, adjust the wheel alignment.


