Remove the front wheel from the side of the tie rod end being replaced
Turn the steering wheel all the way in the direction opposite to the tip being removed

Unbend with pliers and remove the cotter pin

Using a 19mm spanner, partially unscrew the ball pin fastening nut.

Using a 17 socket, loosen the tightening of the tie rod end bolt.

Inserting a mounting spatula between the swing arm and the tip, press the tip away from the lever and, striking the end of the swing arm with a hammer, press the ball pin out of the lever.
You can use a puller to press the pin out of the hole in the swing arm.

Finally unscrew the nut securing the ball pin.

We remove the ball pin from the hole in the swing arm.

Use a screwdriver to open the groove of the tie rod end.

Holding the adjusting threaded bushing with a 27 wrench, unscrew the tip, counting the number of turns, so that the new tip is screwed in the same number of turns
At the same time, we maintain the position of the threaded bushing on the steering rod. This will help approximately maintain the same wheel toe angle.

Remove the tie rod end.
Right and left tie rod ends are not interchangeable

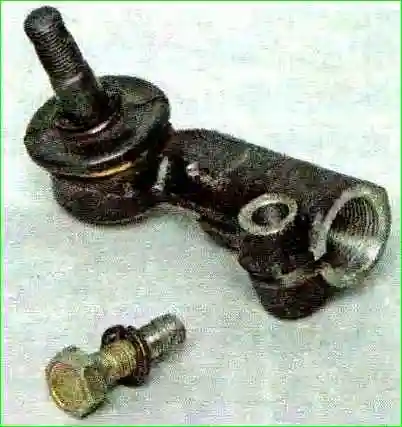
Pry up the spring ring of the boot with a screwdriver

Remove the spring ring of the cover
Remove the cover with the sealing ring (Fig. 13).

Before installing the boot, lubricate the ball pin with grease and put the grease into the boot.
Install the outer tie rod end in the reverse order.
We screw the new tip into the threaded bushing at a number of turns equal to the number of revolutions counted when removing the tip.
Tighten the castle nut to a torque of 27.1 - 33.4 Nm (2.8-3.4 kgcm).
Align the hole in the pin with the nearest slot in the nut. We pin the nut and move the ends of the cotter pin in different directions.
Tighten the tie rod end bolt to torque 19.1-30.9 Nm (2.0-3.1 kgcm). Adjusting the toe angle.
Replacing the steering rod
Disconnect the outer tie rod end from the swing arm.

Use a screwdriver and remove the locking plate of the steering linkage bolts.

Using a 15mm spanner, unscrew the bolt securing the steering rod to the rack.
Use the same wrench to loosen the bolt securing the other steering rod.

Remove the steering rod. We remove the second rod in the same way
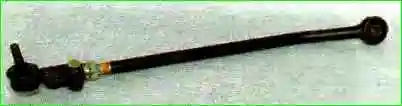
Measure the length of the removed rod (the distance between the center of the hole in the rubber-metal bushing of the inner end of the rod and the center of the ball pin hole plug).

Use a 17 mm socket wrench to loosen the tension bolt of the new rod.
By rotating the adjusting insert with a 27 mm wrench, we make the length of the new rod equal to the length of the removed rod.
Before adjusting the length of the tie rod, make sure that the adjusting insert and tip are screwed onto the tie rod until it stops.
Install the thrust in the reverse order.
Tighten the tie rod bolt to a torque of 19-30.9 Nm (2.0-3.2 kgf.m).
Tighten and cotter the bolt securing the rod end pin to a torque of 27.1-33.4 Nm (2.8-3.4 kgcm).
Tighten the bolts securing the rods to the steering mechanism to a torque of 70-86 Nm (7.1-8.6 kgcm) after installing the car on the wheels.
Put a locking plate on the bolts.
Installing the steering rod in reverse order
If necessary, adjust the wheel toe angle.