Checking the effectiveness of the brake system
In accordance with clause 1.1 of the “List of malfunctions and conditions under which the operation of vehicles is prohibited,” the braking distance of a vehicle when pressing the brake pedal once from a speed of 40 km/h should be no more than 12.2 m
The test is carried out on a dry, clean, horizontal section of the road with a concrete or asphalt surface. The car's brake system must be sealed.
The brake fluid level in the reservoir should be at the MAX mark.
- 1. Accelerate your car to 40 km/h
- 2. Press the brake pedal all the way, blocking the wheels, and hold it in this position until the car comes to a complete stop.
- 3. Measure the braking distance of the car with a tape measure. If the length is more than 12.2 m, the braking system is not effective enough.
- 4. To eliminate the influence of side effects, the braking distance is checked by accelerating the car in two opposite directions in the same area
Checking the brake fluid level
The brake fluid level is checked periodically: daily during the operation of the vehicle, during each maintenance, after bleeding the brake system hydraulic drive and replacing the brake fluid, when a warning lamp lights up on the instrument panel, indicating an insufficient level of brake fluid in the main reservoir. brake cylinder.
- 1. We prepare the car for the job.
- 2. Use a rag to remove dirt from the master brake cylinder reservoir.
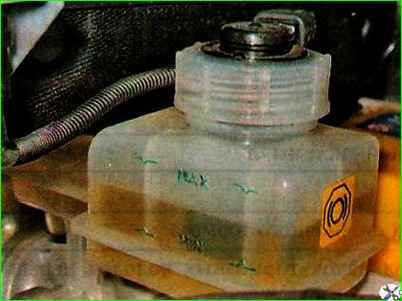
- 3. Visually check the brake fluid level in the reservoir. It should be between the MIN and MAX marks on the tank body.
- 4. We check the degree of wear of the brake pad linings of the front and rear brake mechanisms.
- 5. If the wear of the brake pads is within normal limits, and the fluid level in the reservoir is below the MIN mark, then disconnect the tip of the wiring harness from the emergency brake fluid level drop sensor, unscrew and remove the reservoir cap.
- 6. Add new brake fluid to the reservoir up to the MAX mark (when installing the reservoir cap, the sensor float will be immersed in the liquid and its level will increase).
- 7. Close the tank lid tightly.
- 8. Connect the wiring harness block to the sensor connector.
- 9. We check the operation of the emergency brake fluid level sensor: with the ignition on, press the rubber lining of the reservoir lid from above. If the sensor is working properly, the warning lamp on the instrument panel will light up.
Checking brake pad wear
We check the degree of wear of the brake pads of the front brake mechanisms in the following sequence.
- 1. We install the car on the inspection ditch.
- 2. Remove the front wheels.
- 3. When checking the pads of the left brake mechanism, turn the steering wheel completely to the left, and when checking the pads of the right brake mechanism, turn it to the right.
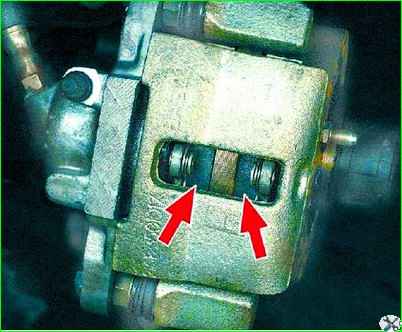
4. Through the inspection hole in the movable caliper bracket, we visually determine the thickness of the brake pads.
If the thickness of the lining of at least one pad is less than 1.5 mm, we replace all the brake pads of the brake mechanisms of the right and left wheels.
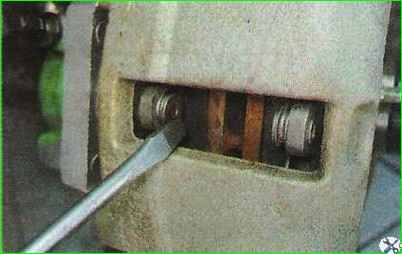
- 5. At the same time, we check the mobility of the brake cylinder pistons. If the piston becomes sour, replace the cylinder.
To check the degree of wear of the rear brake pads, you will need a flashlight.
- 1. We prepare the car for the job.
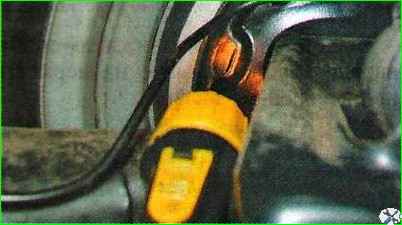
- 2. Using a slotted screwdriver, remove the rubber plug for the inspection hole in the support shield of the rear wheel brake mechanism.
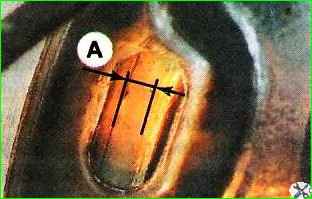
- 3. We illuminate the inspection hole with a flashlight. If the thickness of the brake pad lining is “A” less than 1.5 mm, change all brake pads of the brake mechanisms of the right and left wheels.
- 4. We install the plug in place.
Checking the vacuum brake booster
- 1. We prepare the car for work.
- 2. With the engine not running, press the brake pedal several times until the hissing noise in the brake booster stops.
- 3. Press the brake pedal and hold it down.
- 4. Without releasing the pedal, we start the engine.
- 5. If immediately after starting the engine the pedal moves down a little, the brake booster is working.
Otherwise, we check the integrity of the vacuum supply hose to the vacuum booster, the tightness of its connection to the inlet receiver and the booster check valve branch pipe. If the hose is intact and connected tightly, the vacuum booster is faulty.
Checking pedal free play
Free play of the brake pedal is the pedal travel from its top position until the brake mechanisms begin to operate. It should be 3-5 mm.
To complete the work you will need a ruler or tape measure.
Execution sequence
- 1. We prepare the car for the job.
- 2. Place a ruler or tape measure near the pedal and measure the distance from the floor to the outer surface of the brake pedal.
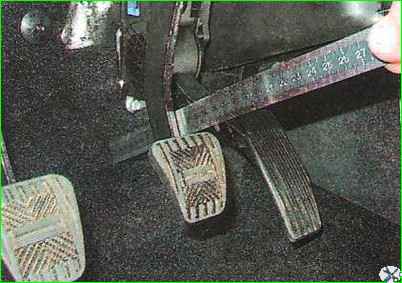
3. Pressing the pedal with your hand, lower it until we feel an increase in resistance to pedal movement.
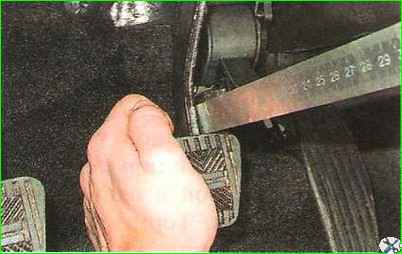
Repeat the measurements. Based on the difference between the obtained values, we determine the free play.
The presence of free play in the brake pedal ensures that after stopping braking, the pistons of the master cylinder will return to their original position, and as a result, there will be no excess pressure left in the brake hydraulic drive.
When the brake light switch is set so that it limits rearward travel of the brake pedal, pressure can be maintained in the brake system so that the brake pads will apply the brakes continuously.
If the free play of the brake pedal is less than the optimal value, it is necessary to adjust the position of the brake signal switch.
Increased free play of the brake pedal can be caused by play in the drive mechanism. Worn parts need to be replaced.
Also the cause of the malfunction may be the presence of air in the hydraulic brake drive or a malfunction of the master brake cylinder.
The identified malfunction must be eliminated.
Checking the parking brake
During the operation of the vehicle, due to wear of the rear brake pads and pulling of the drive cables, it periodically becomes necessary to adjust the travel of the parking brake lever.
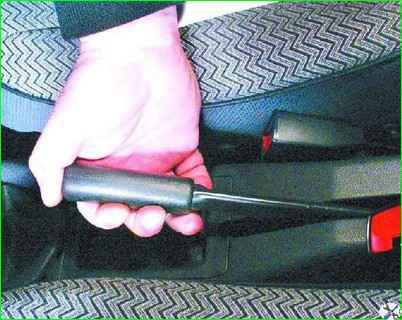
The parking brake lever travel should be 2-4 clicks. In this case, the braking system must reliably hold the equipped vehicle on a slope of 23%.
If this is not the case, check the condition of the parking brake system and, if necessary, adjust it and replace worn or damaged parts, then repeat the check.


