Removing the flywheel
Remove the screw securing the engine speed sensor (310204).
Remove the engine speed sensor (650.1130544).
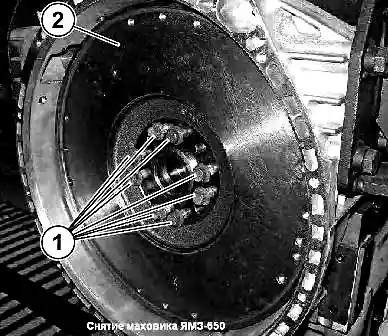
Remove the screws (1) (650.1005127).
Remove the flywheel (2) (650.1005118) (see Fig. 1).
Remove pin (313434).

Flywheel disassembly

Remove the circlip.
Compress the bearing.
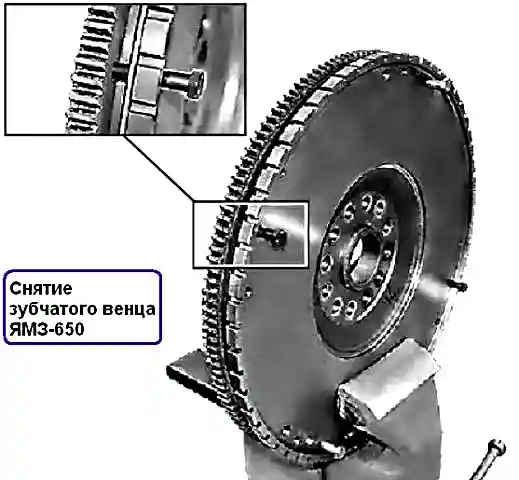
If it is necessary to remove the crown, unscrew the screws securing the ring gear and press it with M10 bolts (see Fig. 2)
Flywheel Assembly

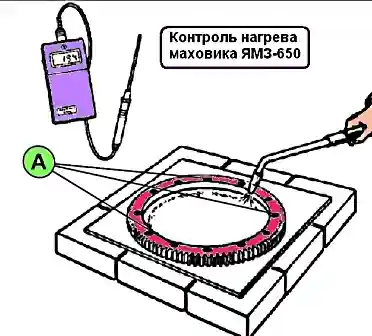
- 1. Heat the flywheel ring gear to 200˚ C.
- 2. If using a soldering torch, preheat the steel plate so that the heat is evenly distributed.
- 3. Check the temperature at 3 points (A) (see Fig. 3).
- 4. Install the crown, respecting the direction.
- 5. Let cool.
Installing the flywheel

Install the guide pin into the crankshaft with notches into the body.
Install flywheel.
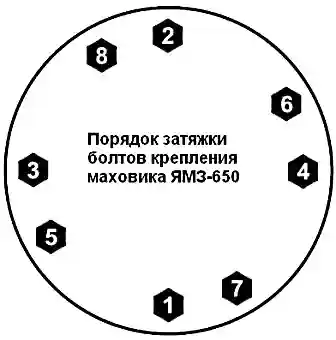
Fit the bolts and tighten to the recommended torque in the order shown in Fig. 4:
- - ensure the first tightening by 60 ± 6 Nm;
- - stretch to an angle of 120˚ ± 6.
Press the bearing into place.
Install retaining ring.
Reuse bolts.
These bolts can only be reused once. Make a mark on the bolt with each reuse with a center punch. If the bolt already has a punched mark, it must be changed.
When reusing these bolts, Loctite 542 sealant must be applied to the threads. New bolts do not require lubrication as they are already lubricated


