Removal and installation of the GAZ-3110 pendulum arm
Place the vehicle on the parking brake.
Install stands for the rear wheels.
Loosen the front left wheel bolts.
Raise the front of the car and place it on supports.
Unscrew the bolts and remove the wheel
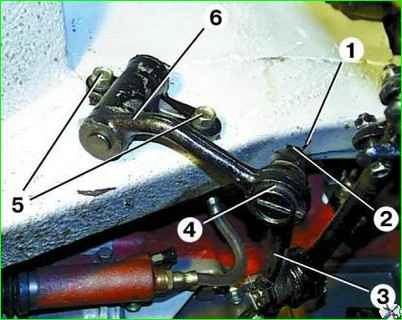
Remove the cotter pin 1, unscrew the nut 2 and press the bipod rod 3 from the ball joint pin of the pendulum arm 4.
Unscrew two fastening bolts 5 and remove bracket 6 with the pendulum arm from the car.
Disassembling the pendulum arm
Clamp the pendulum arm by the lugs of the bracket in a vice.
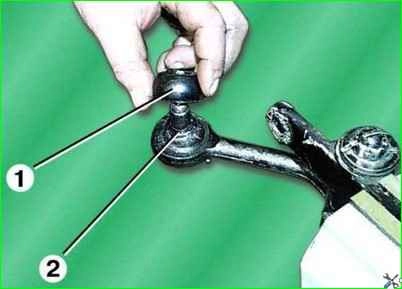
Remove seal 1 and bushing 2 of the ball joint pins.
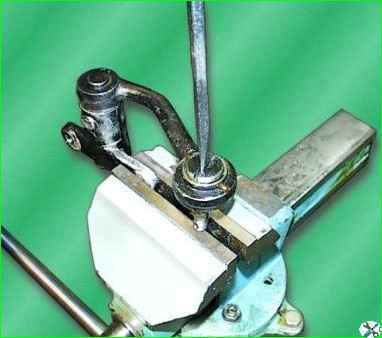
Turn over the pendulum arm and unscrew the plug.
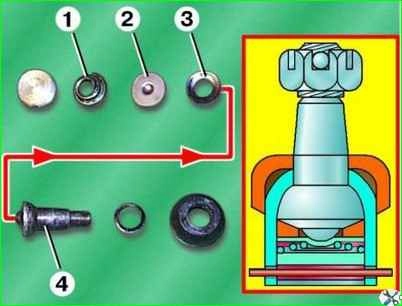
Remove spring 1, support heel 2, polyethylene block 3 and ball joint pin 4.
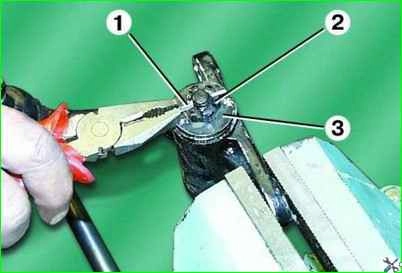
Remove cotter pin 1, unscrew nut 2 securing the pendulum arm pin in the bracket and remove support washer 3
Remove pin 2 with pendulum lever 1 and metal-ceramic 5 and protective rubber bushings 4 on both sides of the bracket from bracket 3.
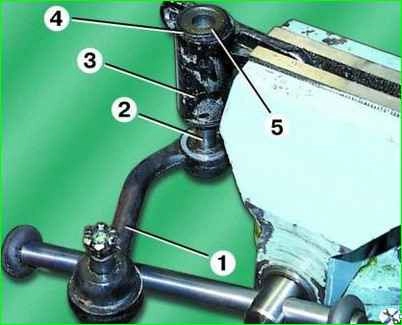
Lever assembly
Assembly of the pendulum arm is carried out in the reverse order of removal.
Tighten the nut securing the pendulum arm pin to a torque of 40–50 Nm (4.0–5.0 kgf m).
Installing the lever
Install the pendulum arm in the reverse order of removal. In this case, the bolts securing the lever to the spar are tightened to a torque of 50–62 Nm (5.0–6.2 kgf m).
The ball pin nut is tightened to a torque of 40–50 Nm (4.0–5.0 kgf m).
To align the nut slot with the hole for the cotter pin, the nut only needs to be tightened, and no more than one slot.


