Replacement of handles and locks GAZ-3110
Inner door lock handle
Remove door trim
Unscrew the two fastening screws and remove the top plate 1
Then remove the bottom plate by unscrewing the fastening screws.
Carefully, without tearing, remove the protective film glued to the inner door panel.
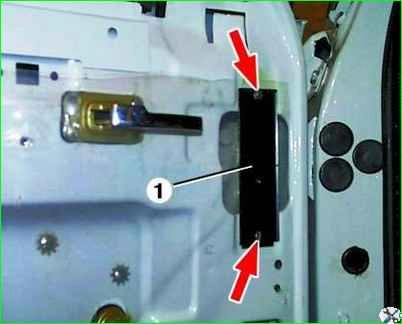
Then remove the three small protective films covering the openings of the inner door panel.
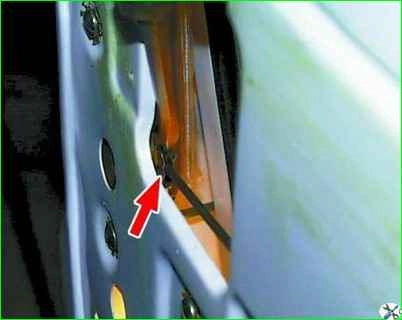
Remove the spring holder from the rod of the inner door lock handle by pressing it with a screwdriver from above.
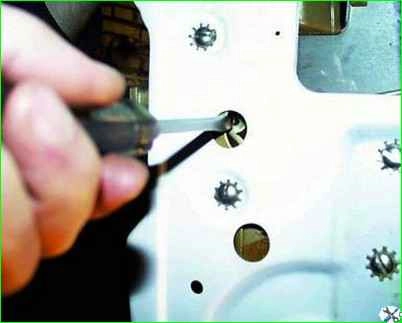
Push the rod out of the lock lever using a screwdriver through the mounting hole.
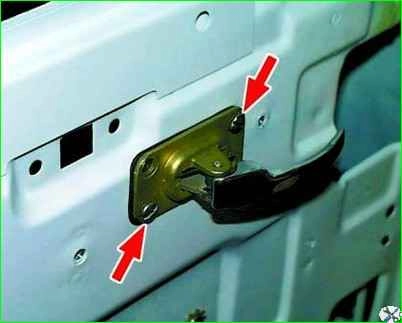
Unscrew the screws securing the inner door lock handle.
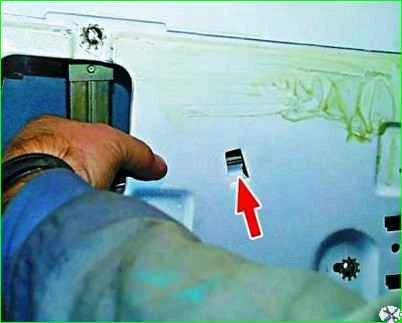
Remove the rod from the holder of the inner door panel.
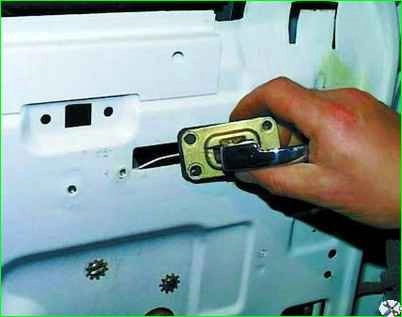
Holding the rod with your hand so that it does not fall inside the door, remove the handle from the hole in the inner panel of the door and pull it out together with the rod.
Remove the rod from the handle. To do this, remove the rubber gasket from the end of the rod and remove the rod from the handle lever.
Install the inner door lock handle in the reverse order of removal.
In this case, it is necessary to fix the film on the inner panel of the door with any available material that eliminates the possibility of tearing the film during the next dismantling (for example, sealant, plasticine, tape, etc.)
Removing the door lock
The door lock is non-removable and cannot be repaired.
If the lock breaks, it must be replaced. The design of the lock allows you to replace only the release spring.
Remove the door trim.
Remove the inside door handle.
Remove the spring holder from the locking rod by pressing it with a screwdriver.
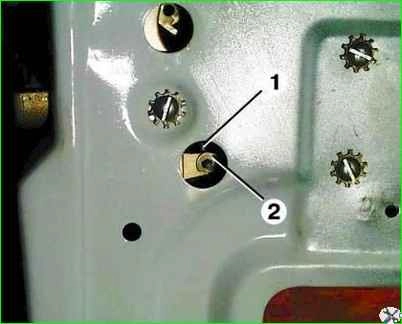
Remove spring holder 2 from blocking rod 1 by pressing on it with a screwdriver.
Push lock rod 1 out of the lock lever, holding its upper end with your hand so that it does not fall inside the door.
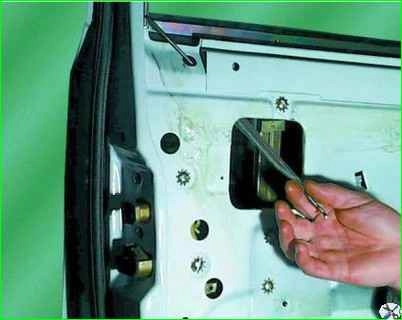
Pull the lock lock rod out of the door down through the mounting hole.
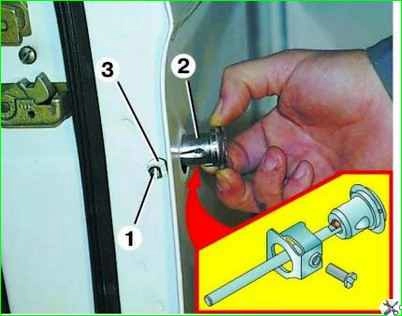
Unscrew screw 1 securing the door lock switch.
Pull the door lock switch 2 out, while holding the lock switch holder 3 inside the door.
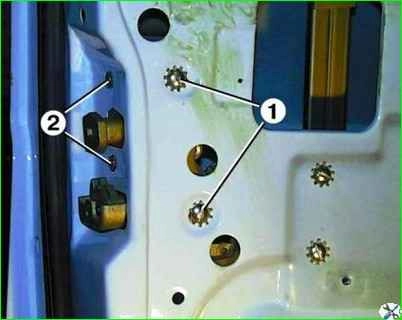
Unscrew two screws 1 of the side fastening of the door lock and two screws 2 of fastening the lock from the end of the door
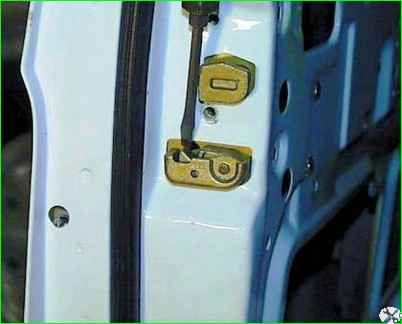
Press the lock cam with a screwdriver so that the lock can come out of the door hole, and push the lock inside the door.
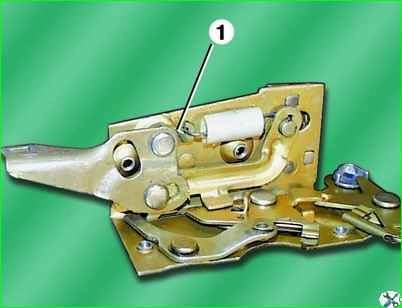
Lower the rod of the outer door handle down, remove the lock from it and remove it from the door.
If necessary, replace On the spring, unhook the upper end of 1 spring from the lever, and then disengage the lower end
Install the door lock in the reverse order of removal.
Before installation, rinse the lock in gasoline and apply CIATIM-201 or VTV-1 lubricant.
Removing the outside door handle
Remove door trim
Peel off the protective film enough to provide access to the handle mounting bolts.
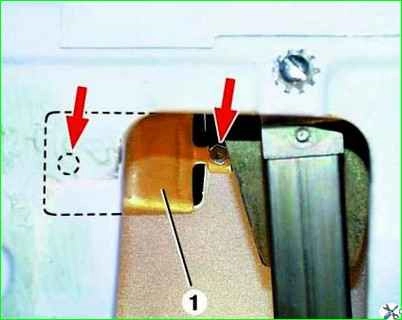
Unscrew the two bolts securing the handle and remove the mounting bracket 1
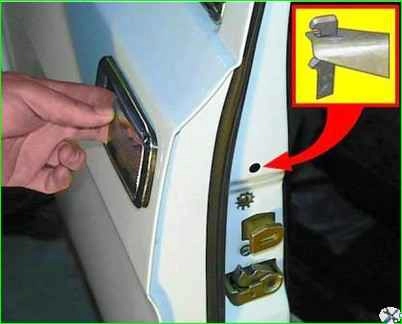
Pull out the outer door handle (while the plastic rosette remains on the door), through the hole in the inner door panel, unhook the handle rod from the lock lever and remove the handle.
Remove the rosette of the outer door handle.
Disassembling the outer door handle
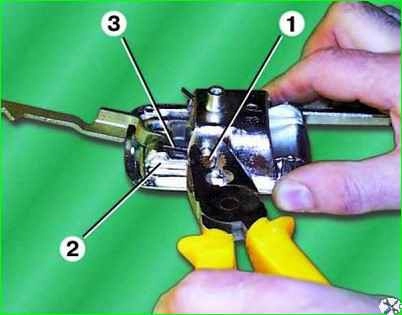
Remove axle 1, having first removed the cotter pin, remove handle 2 and spring 3
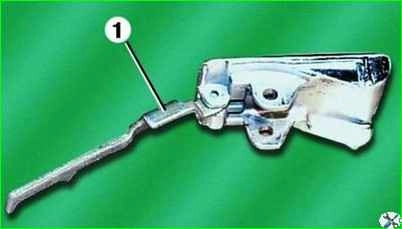
To attach the traction axis of 1 handle, the hole for the axis is drilled in three places.
If you need to replace the rod, you need to carefully remove the fasteners in the hole by drilling.
After replacing the rod, insert the axle and open the hole in two or three places.
Assembling the door handle
Wash the parts and apply grease to them before assembly.
Install the handle into the body and insert the axle so that it fits into one loop of the handle.
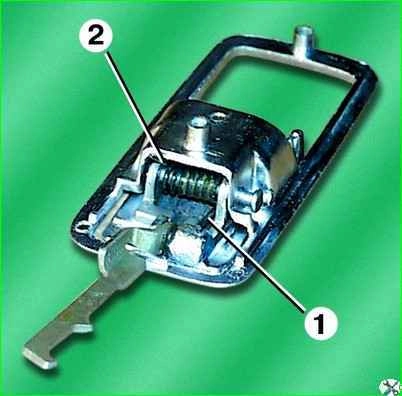
Insert the spring into the handle. In this case, end 1 of the spring should fit into the groove of the handle.
Then push the axle two or three turns into the spring.
Using a screwdriver, insert the other end of 2 springs over the edge of the housing’s supporting surface.
The spring should press the handle to the body.
Insert the axle all the way and secure it with a cotter pin.
Install the outer door handle in the reverse order of removal.


