Checking the wear of the king pin and bushings
We carry out the check with the front wheel hub bearings adjusted.
Raise the front wheel with a jack. Rock the wheel in a vertical plane.

If play is felt (the upper outer edge of the brake caliper moves more than 0.5 mm - this distance can be measured, for example, using an indicator), then the kingpin and bushings are worn out and need to be replaced.

Install the car on the wheels and use a feeler gauge to measure the gap between the upper ear of the steering knuckle and the boss of the front suspension beam.
The maximum permissible gap is 0.15 mm.
Eliminate the gap from 0.15 to 1 mm by selecting an appropriate set of adjusting washers installed between the upper ear of the steering knuckle and the boss of the front suspension beam.
If the gap is more than 1 mm, replace the thrust bearing.
Disassembly and repair of the pivot joint
Jack up the front of the car.
Remove the front wheels and install stops under the beam.

Using a 10mm wrench, unscrew the two bolts securing the top cap of the pivot bearing

Remove the cover of the upper bearing of the kingpin with a grease fitting.

Use a 19mm socket to unscrew the two bolts securing the brake caliper.

Remove the caliper and tie it with wire so that it does not interfere.
For convenience, remove the shock absorber (see How to replace the shock absorbers of a Gazelle car suspension).

Using pliers, unscrew the nut securing the transverse link to the lever

Use a 24mm wrench to unscrew the nut securing the transverse link to the lever.
The nut should be left on the thread of the pin

Using the rotary lever as a support, we “strain” the finger, resting the mounting blade on the transverse rod

Hit the lever with a hammer and press out the finger.
After unscrewing the nut, remove the pin from the hole in the transverse link
Using a 10mm wrench, unscrew the two fastening bolts and remove the bottom cover of the king pin bearing.

Use a wrench or a 17mm socket to unscrew the king pin stopper nut.

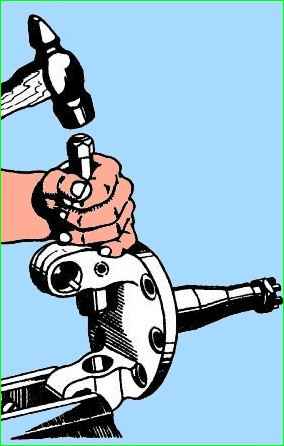
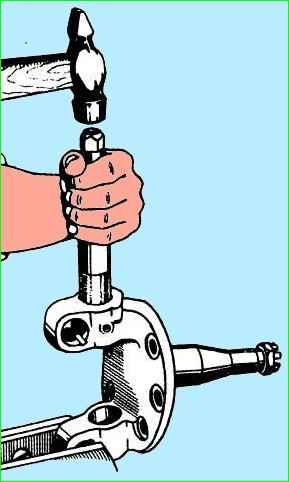
Use a soft metal hammer to knock out the stopper.

Use a soft metal mandrel to knock out the kingpin from top to bottom.

Remove the steering knuckle

Remove the support bearing.

Remove the protective cap from the support bearing.

Remove the rubber sealing ring from the upper eye of the steering knuckle.
We clamp the steering knuckle in a vice and knock out the bushings from its eyes through the mandrel
Clean the steering knuckle eyes and press new bushings into them using a mandrel.
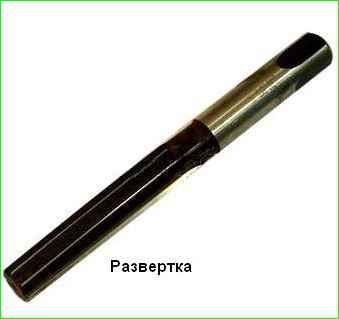
We unfold both bushings using a reamer to a diameter of 25+0.053+0.020 mm in one pass to ensure the alignment of the bushings
We wash all parts in kerosene. Lubricate the pin and its stopper with Litol-24 grease.
Assemble the pivot joint in the following sequence:
1. insert the king pin into the lower eye of the knuckle, with the lubricating groove of the king pin located at the bottom, and the flat under the stopper facing the longitudinal axis of the car.

- 2. We put the support bearing on the king pin.
- 3. We install the steering knuckle on the beam, controlling the alignment of the holes through the upper eye of the knuckle.
- 4. Move the kingpin upward until the flat coincides with the hole for the stopper.
- 5. After installing the covers, we syringe the connection with Litol-24 lubricant.
- 6. We finally assemble all the parts in the reverse order and adjust the wheel toe.
Lubricating the pin joint
Lubricate the pivot joint after 10 thousand km.
It is more convenient to work on an inspection ditch.
Carefully wipe the upper and lower grease fittings of the king pin with a rag.

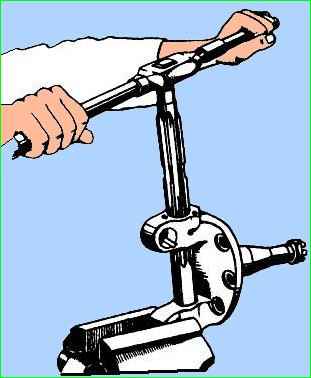
Use an oil syringe to pump Litol-24 or FIOL lubricant into the upper oiler

Use an oil syringe to pump lubricant into the lower oiler until it appears from the joint gaps
If the lubricant does not come out of at least one gap, you should “pump” the joint with a mixture of engine oil and kerosene in a 1:1 ratio and then lubricate it.
")

")
")
")
")
")
")
")