Prepare the vehicle to perform the work. Install the vehicle on a lift
Disconnect the negative terminal of the battery.
Raise the vehicle to a height convenient for performing the work.
Remove the front wheel.
Remove the front bumper (information on removing bumpers).
Remove the front headlight (information on removing the headlight).
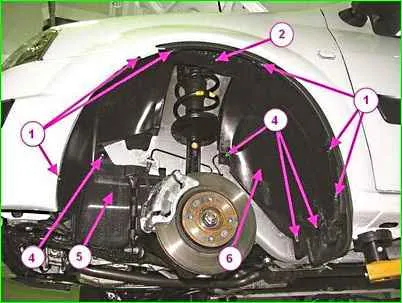
Remove the front wheel arch protective cover:

- - unscrew six self-tapping screws 1, figure 1;
- - unscrew nut 4, remove side mudguard 5;
- - remove clamps 2 and 3, remove protective cover 6 of the front wheel arch (Torx T20 screwdriver, device 7711238605).

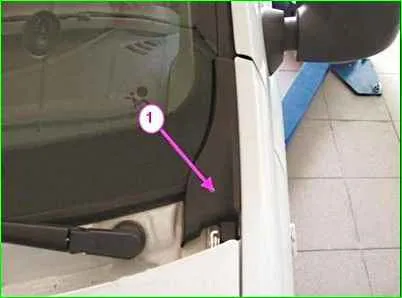
Remove the side turn signal.
Overcoming the resistance of the plastic holders, move the upper edge of the front fender trim toward the center of the car, then the lower edge of the trim up, remove trim 1, Figure 3.

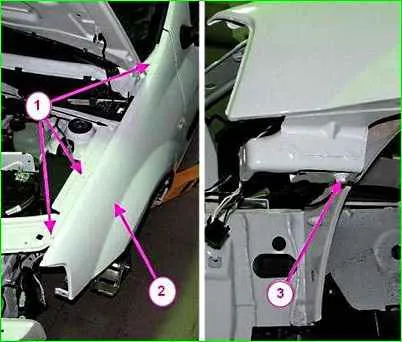
Remove bolts 1, 3

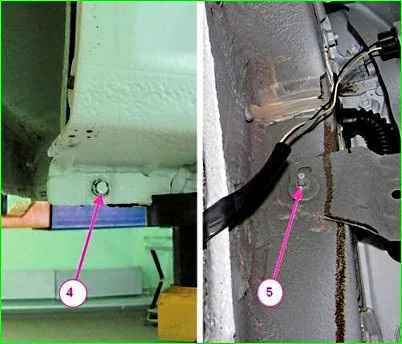
Unscrew bolts 4, figure 4, and nut 5 for fastening the front wing to the body, remove wing 2 (spanner 10; replaceable head 10, extension, ratchet).
Installation
Remove flange and spring nuts, clean the body surfaces mating with the wing, remove the remains of insulating gaskets and corrosion at the junction of the wing and body.
Degrease the areas of the body stripped to the metal.
Apply primer type GF-073 to the areas of the body surface stripped to the metal.
Install spring and flange nuts on the body, install insulating gaskets made of material 51G-36 or apply to the mating surface of the body and wing bitumen anti-noise mastic type BPM-2 in a layer 2-3 mm thick, 20 mm wide and leave for 15...20 minutes to dry the mastic.
The sizes of the insulating gaskets are similar to the sizes of the removed gaskets.
Install and pre-tighten the wing mounting screws (replaceable head 8, hinge, extension, ratchet, flat screwdriver).
Adjust the gaps between the front wing, hood and front door.
Final tighten the wing mounting screws, ensuring the requirements for mating the wing with the body panels (replaceable head 8, hinge, extension, ratchet).
Then install the units and parts in the reverse order of removal.


