Removal and installation of brake pressure regulator GAZ-3110
The pressure regulator is attached with two bolts to a bracket in the rear of the body
It prevents the rear wheels from locking earlier than the front wheels, which increases the vehicle's directional stability when braking.
Reacting through a load spring to the load on the rear axle, it limits the fluid pressure in the rear brake circuit.
The regulator is not repaired; if it fails, it is replaced.
After replacing the adjuster or rear suspension components, it is necessary to readjust the position of the load spring relative to the rear axle.
With proper adjustment, when braking on a horizontal section of a paved road, the front wheels should lock slightly earlier than the front wheels.
If, after adjustment, the rear wheels lock earlier than the front ones, or the front wheels lock much earlier than the rear ones, then the pressure regulator is faulty and must be replaced.
Removing the brake pressure regulator
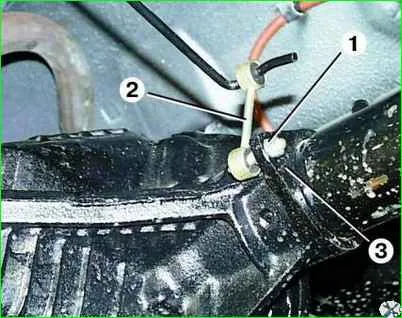
Unscrew the fastening nut 1 and disconnect the pressure regulator strut 2 from the rear axle bracket 3
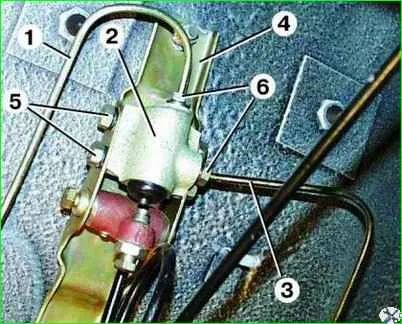
Unscrew the fastening nuts and disconnect pipelines 1 and 3 from the pressure regulator
Plug the pipeline holes.
Unscrew the two fastening nuts 5 and remove the pressure regulator 2 from the bracket 4.
Install the pressure regulator in the reverse order of removal.
After installation, bleed the rear circuit of the brake system and adjust the position of the pressure regulator load spring.
Adjusting the pressure regulator

Unscrew the fastening nut 1 and disconnect the pressure regulator strut 2 from the rear axle bracket 3.
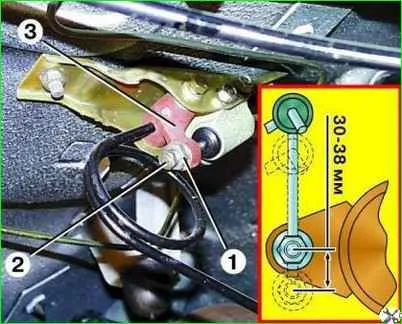
Loosen locknut 1 and, by rotating the adjusting bolt 2 on the pressure lever 3, set the size to 30–38 mm between the centers of the strut axle and the hole for the axle in the rear axle bracket.
Tighten locknut 1 while holding adjusting bolt 2.
Insert the rack axle into the hole in the bracket and tighten the fastening nut.
Let's take a closer look:
Removing the brake pressure regulator
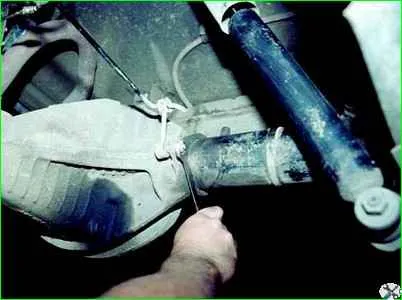
Use a 12 mm wrench to unscrew the nut securing the regulator strut to the rear axle bracket and remove the axle from the hole.
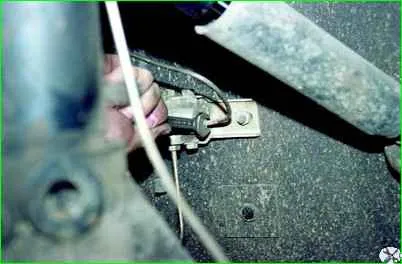
Using a 12mm wrench, unscrew the two brake pipe fittings from the regulator body.
To prevent brake fluid leakage, we place dirt-proof caps from the bleeder valves on the ends of the tubes.
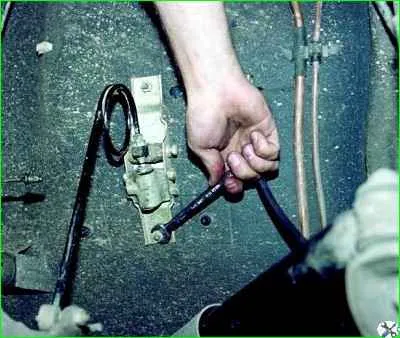
Using a 13mm wrench, unscrew the two nuts securing the bracket to the floor and remove the pressure regulator assembly
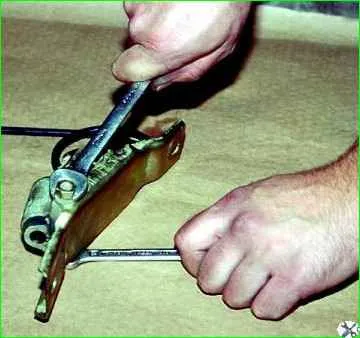
Using wrenches 12 and 13, unscrew the two bolts securing the regulator to the bracket
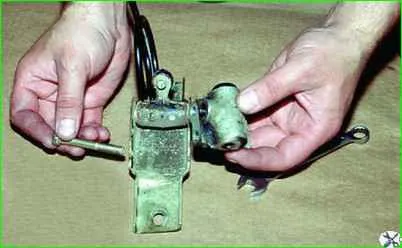
remove the regulator
Install the regulator in reverse order
After installing it on the car, it is necessary to bleed the rear circuit of the brake system and adjust This is the position of the load spring.
Adjusting the pressure regulator drive
We set up the pressure regulator by setting the car in running order, i.e. filled, with a set of tools and a spare tire in the inspection ditch.
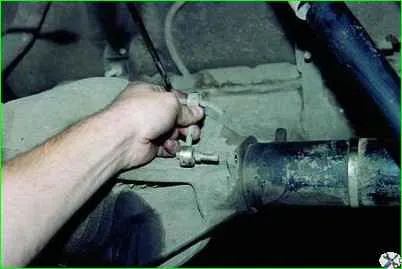
Disconnect the lower end of the regulator strut from the rear axle bracket.
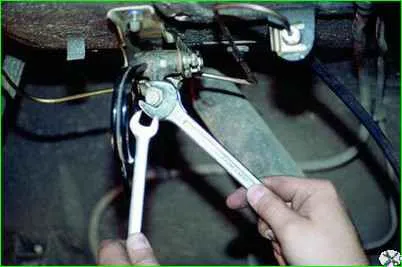
Using a 17mm wrench, unscrew the locknut a few turns, holding the adjusting bolt with a 12mm wrench.
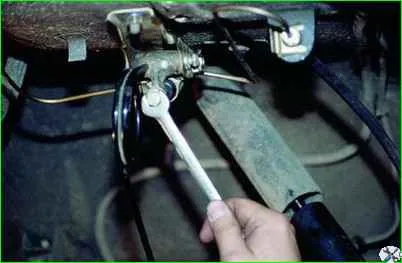
Turning the adjusting bolt with a 12mm wrench and pressing the lever against the regulator piston, set the distance of 30–38 mm between the axis of the regulator post and the bracket hole
Hold the adjusting bolt with a 12mm wrench and tighten the locknut with a 17mm wrench.
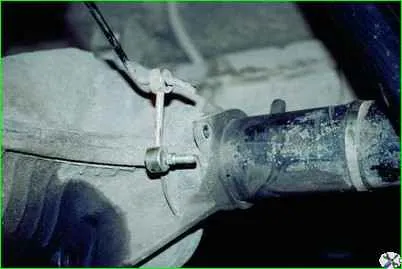
Attach the lower end of the regulator strut to the rear axle bracket.


