Disconnect the pusher from the clutch pedal in the passenger compartment by unscrewing nut 1 and removing the pusher axle 2 with two plastic bushings
Disconnect return spring 5 from the pedal.
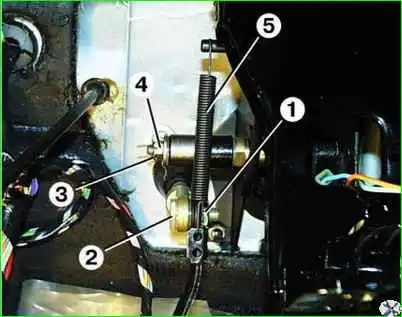
Remove cotter pin 3, unscrew nut 4 securing the pedal to the axle and remove the pedal assembly with two bushings.
If necessary, remove the pedal pad cover.
Inspection and troubleshooting of clutch pedal parts
- 1. The bushings must not have mechanical damage. One-sided wear of the bushings indicates that there is unacceptable play in the pedal assembly, which in turn affects the full travel of the pedal.
Replace defective parts.
- 2. If the return spring has lost its elasticity, i.e. When the clutch pedal is free, it does not reach the limiter, replace the spring.
- 3. In case of significant wear of the pattern of the clutch pedal pad, it is recommended to replace it.
Installation
Install the clutch pedal in the reverse order of removal. In this case, it is necessary to lubricate the friction surfaces of the bushings and axle with a thin layer of graphite grease.
Adjusting the clutch pedal
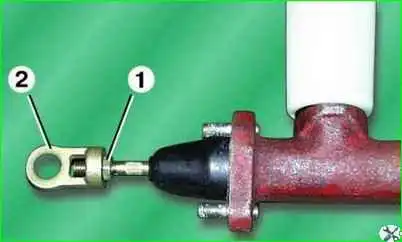
- 1. Adjust the pedal stroke by changing the length of the master cylinder pusher.
To do this, you need to disconnect the pusher from the pedal, loosen nut 1 of the pusher adjustment unit and, turning eye 2 in the desired direction, achieve the required result.
Then tighten the nut and connect the pusher to the pedal.
- 2. The full travel of the clutch pedal should be between 145–160 mm.
- 3. The free play of the pedal is not adjustable.
Bleeding the hydraulic clutch system
- 1. Fill the clutch master cylinder reservoir with fresh brake fluid to a level 15–20 mm below the top edge of the reservoir.
- 2. Remove the protective cap from the slave cylinder valve.
- 3. Place the bleeder hose onto the valve. Place the other end of the hose in a container with a small amount of brake fluid so that it is submerged in the fluid.
- 4. Press the clutch pedal several times and hold the clutch pedal depressed.
- 5. Open the bleeder valve to bleed air from the system. The presence of air in the system is determined by the appearance of bubbles in the container.
- 6. Close the bleeder valve.
- 7. Repeat the steps described in steps 4-6 until air bubbles stop appearing in the container.
- 8. Remove the hose from the bleeder valve and put on the cap.
- 9. Add brake fluid to the master cylinder reservoir to a level 20 mm below the top edge of the reservoir.
- 10. The lack of air in the system can be determined by the amount of movement of the outer end of the clutch release fork: when the clutch pedal is fully pressed, it should be at least 14 mm.
If you need to remove the entire pedal assembly:
Remove the instrument panel (GAZ-3110 instrument panel removal).
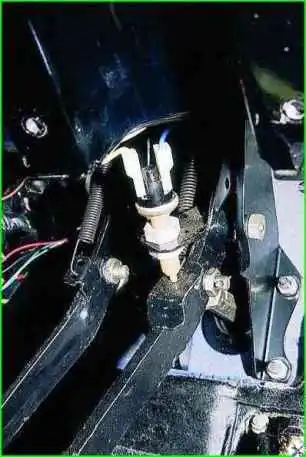
Disconnect the two wires of the brake light switch.
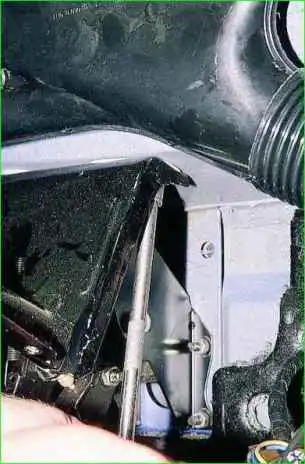
Using a 13mm socket with an extension, unscrew the two nuts located behind the steering column bracket (do not confuse them with the nuts securing the bracket itself).
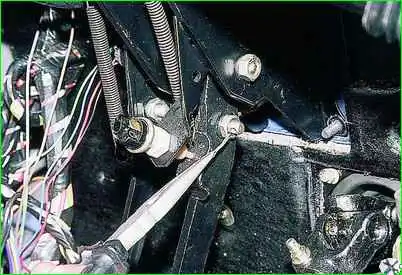
We take out the cotter pin of the brake pedal pusher axle and, holding the bolt with a 17mm wrench, unscrew the nut with a 19mm wrench. Remove the bolt.
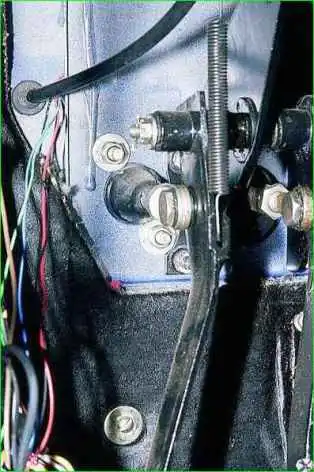
In the same way we remove the clutch pedal pusher axis (it does not have a cotter pin).
Plastic bushings are inserted into the holes of the clutch and brake pedal pushers. When assembling, lubricate and install them in place.
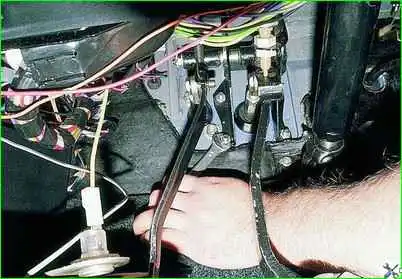
Using a 13mm wrench, unscrew the 4 nuts securing the bracket to the panel and remove the pedal assembly.
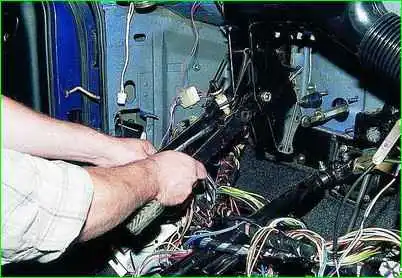
Install the pedal assembly in reverse order.


