Removal, inspection and installation of the ZMZ-406 flywheel
The flywheel is removed to replace the rear crankshaft oil seal, to replace it if the toothed rim used to start the engine with the starter is damaged, and to grind the surface under the clutch driven disc
You will need: the tools necessary to remove the gearbox and clutch, as well as a 17mm socket, a screwdriver.
Remove the gearbox (see Removing and installing the GAZ -3110 gearbox).
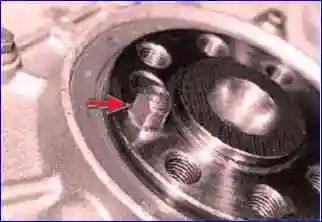
The flywheel can be installed on the crankshaft in only one position, and the special hole in the flywheel must coincide with the pin located on the crankshaft (Fig. 1).
However, to make installation of the flywheel easier, we recommend marking the relative positions of the parts.
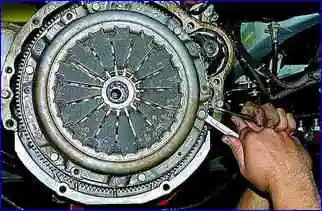
Using a 12mm wrench, unscrew the six bolts securing the clutch pressure plate, holding the flywheel from turning with a screwdriver inserted between its teeth.
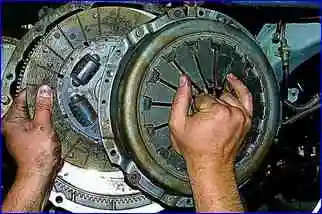
Remove the driven and pressure plates.
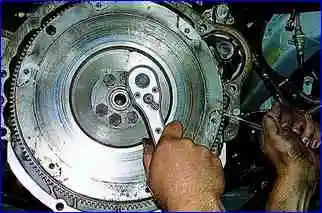
Using a “17” socket, unscrew the six bolts securing the flywheel, holding it from turning with a screwdriver inserted between the teeth
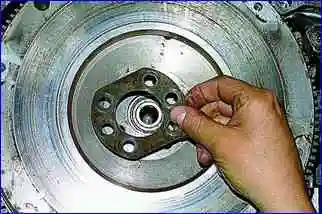
Remove the washer
Remove the flywheel
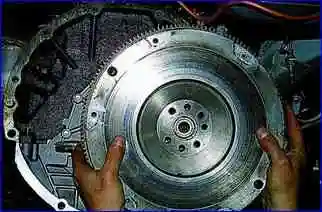
Check the condition of the flywheel rim teeth; if they are damaged, replace the flywheel.
If there are marks or burrs on the contact surfaces of the clutch driven disc or crankshaft flange, replace or repair the flywheel
You can check and repair the flywheel in a workshop that has special equipment.
Flywheel runout, measured along the toothed rim, should not exceed 0.5 mm.
To remove deep marks and burrs, the contact surface of the driven disk can be ground, but the layer of metal removed should not exceed 0.3 mm.
Install the flywheel in accordance with the marks and all removed components in the reverse order of removal.
Lubricate the threads of the flywheel mounting bolts with engine oil. Tighten the bolts evenly in a cross pattern to 65 Nm (6.5 kgcm).
Warning
Be sure to replace the flywheel mounting bolts with new ones. Reuse of bolts is not permitted


