The exhaust system consists of an exhaust manifold, a downpipe, a catalytic converter with an additional muffler, and a main muffler.
The downpipe flange is attached to the exhaust manifold flange with four studs.

The connection is sealed with a heat-resistant metal-reinforced gasket.
The fastening nuts are brass or copper-plated and are secured from unscrewing with locking plates (one for two nuts), the edges of which are bent at the edge of the nuts.
A threaded sleeve for the control oxygen concentration sensor (lambda probe) is welded into the inlet pipe.
The inlet pipe is additionally attached with a clamp to the gearbox bracket.
A bellows-type metal compensator is welded into the rear part of the inlet pipe, allowing the power unit to oscillate on the supports without transmitting them to the exhaust system.
The flange of the catalytic converter of exhaust gases is attached to the rear flange of the inlet pipe with three bolts and nuts. gases.
A sealing gasket is installed between the flanges.
The neutralizer serves to reduce emissions of carbon monoxide and nitrogen oxides into the atmosphere.
It consists of ceramic blocks with many pores, coated with so-called afterburning catalysts: rhodium, palladium, platinum.
Passing through the pores of the neutralizer, toxic carbon monoxide (CO) is converted into low-toxic dioxide (CO2), and nitrogen oxides are reduced to harmless nitrogen.
The degree of gas purification in a serviceable neutralizer reaches 90–95%.
For normal operation of the neutralizer, the composition of the exhaust gases (in particular, the oxygen content in them) must be within strictly specified limits.
This function is performed by the controller, changing the amount of fuel supplied depending on the readings of the control oxygen concentration sensor.
In the pipe connecting the neutralizer with the additional muffler has a sleeve welded in for the diagnostic oxygen concentration sensor.
The neutralizer and sensors are very sensitive to lead compounds - if poisoned by them, they stop working.
Therefore, it is strictly forbidden to operate the car (even for a short time) on leaded gasoline.
Another reason for the neutralizer failure is interruptions in the ignition system: unburned fuel burns out in the neutralizer, damaging its blocks.
This can lead to blockage of the exhaust system and engine stalling (or a strong loss of power).
The main muffler is located in the rear of the body.
The pipes of the additional and main mufflers are suspended from the body brackets on two rubber pads.
To protect the body floor from excessive heating Protective screens are installed above the neutralizer and additional muffler.
Maintenance of the exhaust system consists of inspecting the pipes and mufflers for corrosion, replacing failed parts, tightening the connections and periodically replacing the sensors.
Removing the inlet pipe
Place the car on a lift or inspection pit
Turn the steering wheel all the way to the left
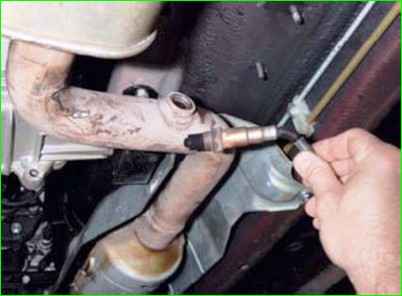
Removing the control oxygen concentration sensor
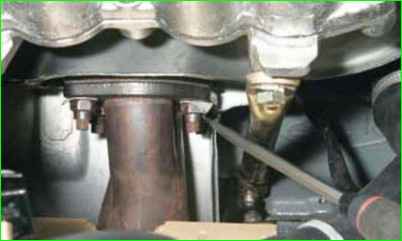
In the engine compartment, use a flat-head screwdriver to bend back the edges of the locking plates of the nuts securing the exhaust pipe to the exhaust manifold
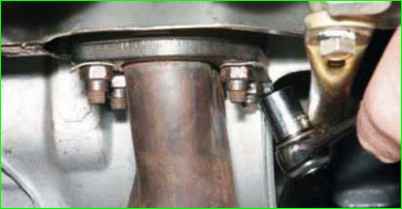
Using a 13 mm head, unscrew the four nuts securing the exhaust pipe to the exhaust manifold
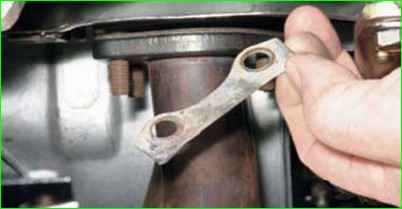
Removing the locking plates from the manifold studs
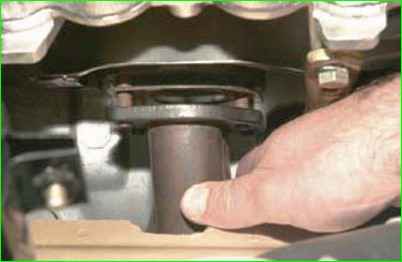
Move the intake pipe flange off the exhaust manifold studs
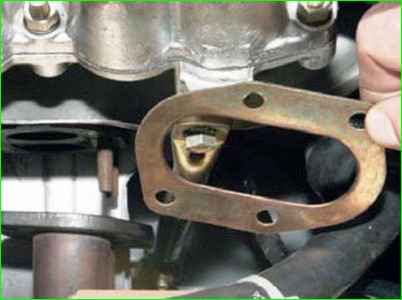
Removing the sealing gasket
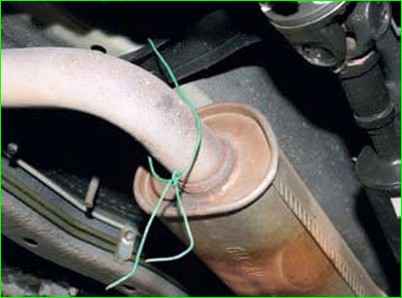
Tie the additional muffler pipe to the transfer case mounting bracket with wire
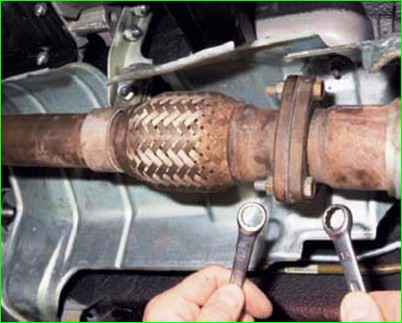
Using a 13 mm open-end wrench, unscrew the nuts of the three bolts securing the pipe flange to the neutralizer flange
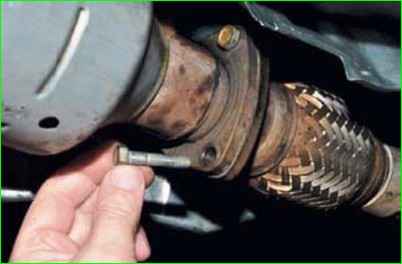
Removing the flange mounting bolts
Disconnecting the exhaust pipe and the neutralizer
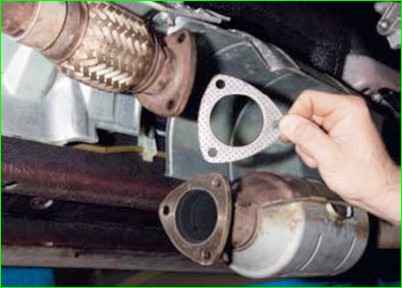
Removing the flange sealing gasket
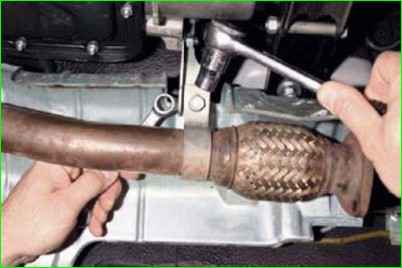
Using a 13 mm wrench, unscrew the nut of the bolt securing the intake pipe clamp to the gearbox bracket, holding the bolt from turning with a 13 mm socket or wrench
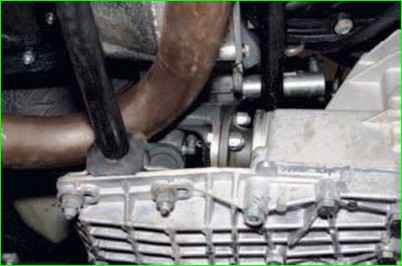
Turning the intake pipe, we remove it from the space between the anti-roll bar and the clutch housing
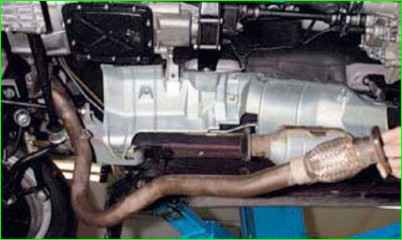
Removing the exhaust pipe
Installing the exhaust pipe in the reverse order
Removing the main muffler
If it is impossible to replace the defective unit with a new one, you can temporarily restore its functionality by applying a metal patch to the damaged area and securing it with clamps or wire.
It is recommended to put an asbestos sheet under the patch.
In addition, auto parts stores sell special kits for restoring exhaust system units, with which you can temporarily repair damage to the system in order to get to a car service center or garage.
Install the car on lift or inspection pit
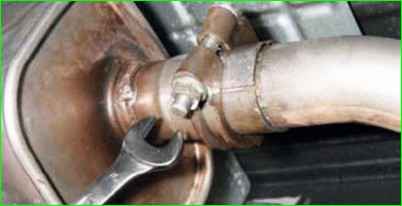
Using a 16 key, unscrew the nut of the clamp bolt of the main and additional muffler pipes
If the bolt turns, hold its head with a pipe wrench
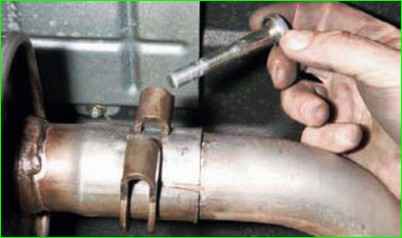
Remove the bolt from the clamp
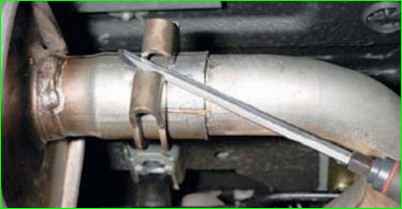
Use a flat-head screwdriver to loosen the clamp
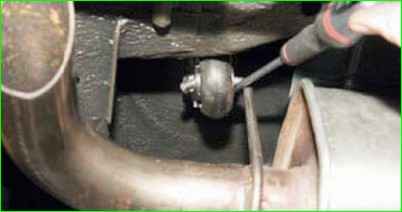
We remove the bracket of the main muffler pipe suspension from the hole of the cushion.
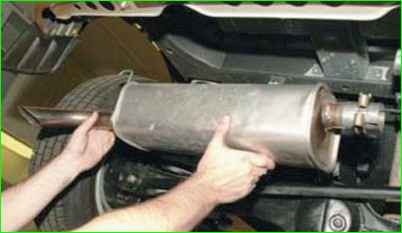
Turning the main muffler on the additional pipe, we pull the main muffler towards the left side of the car and remove the muffler
In case of a tight fit of the muffler pipes, we strike through a wooden spacer on the right end of the main muffler
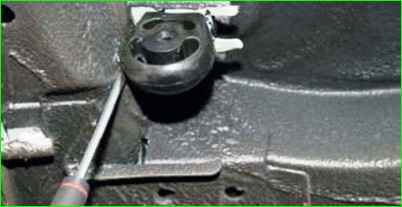
To replace the muffler suspension cushion, pry it up with a screwdriver and slide it along the body bracket guides
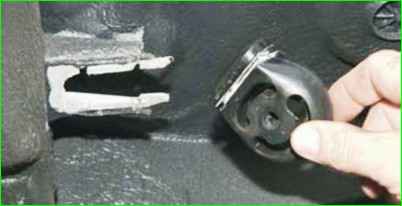
Remove the cushion.
Install the main muffler in the reverse order.
When installing, ensure that the exhaust system components do not touch the body during vibrations.
Removing the catalytic converter with additional muffler
The catalytic converter and additional muffler together form a non-detachable unit, which is replaced as a whole if any of its elements fails.
Irregularities in the ignition system may cause the catalytic converter to fail.
A catalytic converter malfunction may be one of the reasons for a sharp increase in CO content in the exhaust gases.
Before replacement, contact a specialized workshop for a more accurate check of the catalytic converter's performance.
The catalytic converter heats up to a very high temperature during operation (over 600 °C), so it will cool down more slowly than other components of the exhaust system.
Try not to leave the car on areas with dry grass and leaves.
The temperature of a very hot catalytic converter may be enough to set them on fire.
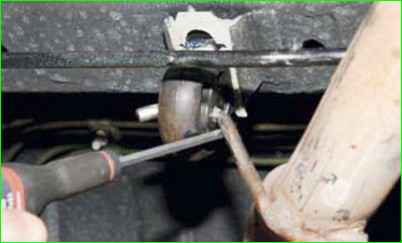
Removing the diagnostic oxygen concentration sensor
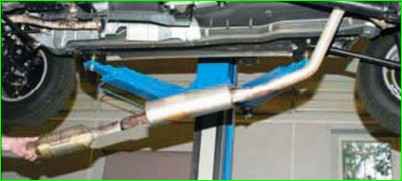
Remove the main muffler as described above
Remove the bracket for the additional muffler pipe suspension from the cushion hole and lower the additional muffler pipe onto the rear axle beam
Disconnect the inlet pipe from the catalytic converter and remove the converter with the additional muffler, removing its pipe from the space above the rear axle
If necessary, replace the additional muffler suspension cushion
Install the converter with the additional muffler in the reverse order
Replacing the heat shields
The exhaust system heats up to a high temperature during engine operation.
Therefore, if there is mechanical damage or severe corrosion of the heat shields installed between the system elements and the body base, be sure to replace them.
In addition to reducing the level of comfort in the cabin, a malfunction of the heat shields can lead to to ignition of the heat and noise insulation of the body floor, since the exhaust gas neutralizer heats up to a temperature of over 600 °C.
To remove the front heat shield, remove the neutralizer and additional muffler as described above
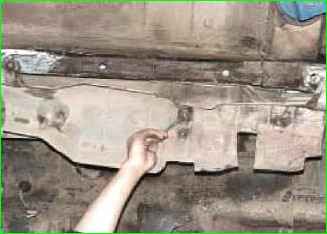
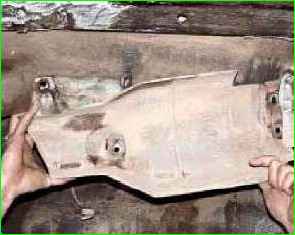
Turn off three bolts, unscrew three nuts securing the heat shield and remove its rear and front parts.
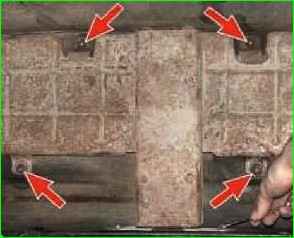
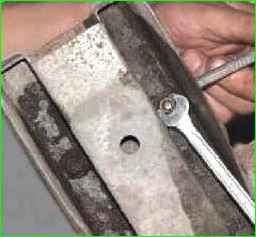
Install the front heat shield in the reverse order removal.
To remove the rear heat shield, remove the main muffler.
Unscrew the four nuts securing the shield to the body base, two bolts securing the shield reinforcement to the body crossmember, and remove the shield.
If necessary, disassemble the rear heat shield by unscrewing the nuts securing the four bolts securing the reinforcement, and remove the reinforcement.
Assemble and install the rear heat shield in the reverse order.


