The rear axle of the car is made in the form of a hollow beam, to the ends of which flanges with seats for axle shaft bearings and holes for mounting brake shields are welded.
In the middle, the main gear reducer with a differential is bolted to the beam, and two axle shafts are inserted into the beam from the flange side, transmitting torque from the reducer to the rear wheels.
The main gear is hypoid, its gears are selected for noise and contact, so they can only be replaced as an assembly (pair marking - 2106).
The driving gear of the main gear is made integral with the shaft (tailpiece) and is installed in the gearbox neck on two tapered bearings.
The outer rings of the bearings are pressed into the seats of the neck, and the inner ones are placed on the shank.
A spacer sleeve is installed between the inner rings; when tightening the tailpiece nut, the bushing is deformed, providing constant preload of the bearings.
The preload of the bearings is controlled by the torque of the drive gear (other parts are not installed).
For new bearings, the torque should be within 157-197 Nm, for bearings after a run of 30 km or more - 39.2-59.0 Nm.
In this case, the tailpiece nut is tightened with a torque of 118-255 Nm, periodically checking the rotation of the drive gear.
If the specified torque has already been reached, and the tightening force of the nut is less than 118 Nm, it is necessary to replace the spacer sleeve with a new one, since the old one is deformed too much.
Replacing the sleeve is also necessary if the torque is higher than the permissible value (due to carelessness when tightening).
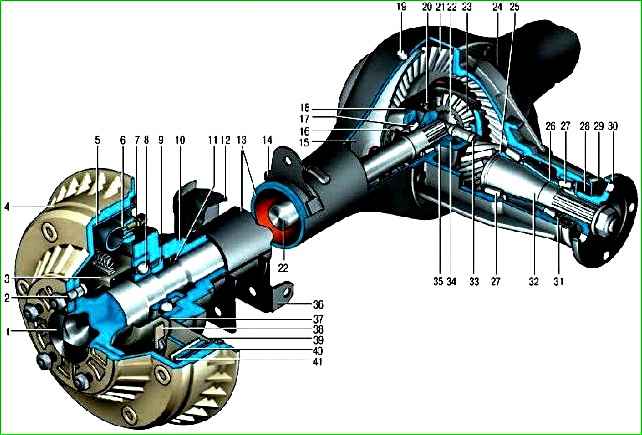
The gearbox housing 24, which contains the main gear and differential, is attached to the beam 13 (Fig. 1) of the rear axle.
The leading 32 and driven 21 gears of the main gear are matched in pairs based on contact patch and noise, so if one of them is damaged, both are replaced.
A spacer sleeve 26 is located between the inner rings of the bearings 27 of the leading gear, which, deforming when the nut of the leading gear is tightened, provides a preliminary tension in its bearings.
An adjusting ring 25 is installed between the end face of the leading gear and the inner bearing, determining the correct position of the leading gear relative to the driven one.
The driven gear of the main gear is attached to the flange of the box 35 differential, which rotates on two bearings 17.
The preload in these bearings, as well as the gap between the teeth of the driving and driven gears, are adjusted with nuts screwed into the detachable bearing beds.
The half-shaft gears 23 are installed in cylindrical sockets of the differential box and rest on the box through support washers 34.
By selecting washers by thickness, a lateral clearance of 0–0.1 mm is set between the teeth of the satellites and the half-shaft gears.
The inner end of the half-shaft 22 enters the splined hole of the half-shaft gear, and the outer end rests on the ball bearing 8, which is secured to the half-shaft with a locking ring 9.
The half-shaft bearing is sealed in the beam socket on the inside by a self-tightening oil seal 11, and on the outside by a rubber ring clamped between brake shield 39 and rear axle beam flange.
The bearing is secured in the beam socket by plate 37, which, together with oil deflector 3 and shield, is bolted to the beam flange.
If the main pair or pinion bearings are replaced, it is necessary to re-o select the thickness of the adjusting ring.
It is installed on the shaft between the drive gear and the inner ring of the large bearing.
The driven gear of the main transmission is attached to the flange of the differential box with special bolts without washers.
These bolts cannot be replaced with any others. The differential box rotates in two tapered bearings.
Their preload, as well as the gap between the teeth of the main gear gears, is adjusted with nuts screwed into the detachable bearing beds.
The half-axle gears are installed in cylindrical sockets of the differential box and rest on it through support washers.
These washers are selected by thickness so that the gap between the teeth of the satellites and the half-axle gears is within 0 - 0.1 mm.
The satellites are mounted on the axle with constant engagement with the half-axle gears.
The axle has spiral grooves for supplying lubricant to the rubbing surfaces.
One end of the half-axle rests on a single-row ball bearing installed in the socket of the rear axle beam, and the other (splined) end enters the axle gear.
The inner bearing ring is fixed to the axle with a locking ring installed with tension (shrink fit).
The outer bearing ring is fixed with a plate, which, together with the oil deflector and brake shield, is attached to the rear axle beam with four bolts and nuts.
1.3 liters of transmission oil are poured into the rear axle housing (almost to the lower edge of the filler hole). The axle shafts exit the beam with seals.
If the seals are leaky, the oil is diverted through the oil deflector to the outside of the brake shield - this way it does not get on the brake pads.
The oil seal installed in the gearbox neck works on the flange surface.
An oil deflector is installed between the bearing and the flange.
Oil leakage from under the self-locking nut of the flange (the same nut adjusts the preload of the bearings) indicates that it is loose.
Operating the car with a loose gearbox nut can lead to its failure.
A breather located on the rear axle beam above the gearbox serves to equalize the pressure outside and inside the rear axle housing.
During each maintenance, check that the cap is not jammed breather.
Checking the tightness of the rear axle seals
Check the tightness of the seals by external inspection.
It is more convenient to check from underneath the car, installed on a lift or inspection pit. Below are the places where oil leaks are possible.
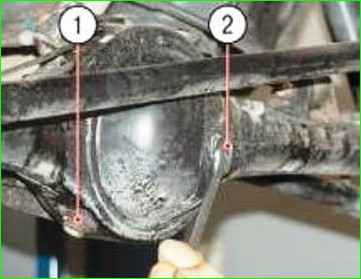
Drain plugs 1 and filler plugs 2.
If oil leaks from under the plugs, tighten them.
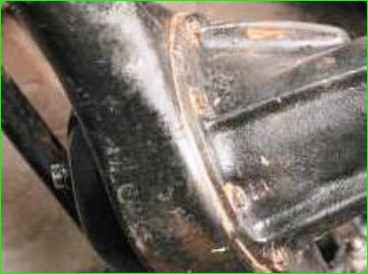
Connector on the gearbox flange.
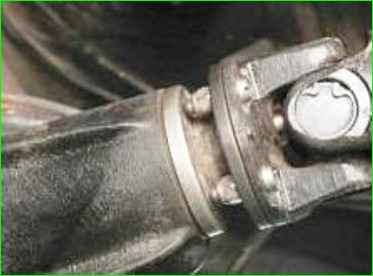
Pinion pinion seal
If the axle shaft seal is out of order, it will leak here.
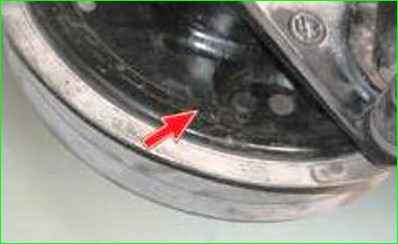
Oil leaking from the seals can be caused by a clogged breather
If traces of oil leakage are detected, clean the breather from dirt, check the freedom of movement of the breather cap in all directions, carefully wipe the leaking areas and inspect them again after a run of 20-30 km.
If traces of leakage are detected again, the breather may be clogged and the pressure in the rear axle housing increases when it heats up during operation, squeezing oil out of the seals.
Turn out the breather and clean it.
If oil leakage from the seals is still observed after cleaning, replace the breather, as it may be faulty (the valve is stuck).
If oil still leaks from the seals, replace the seals.
Checking the rear axle for serviceability
Check the tightness of all threaded connections and, if necessary, tighten them.
The breather cap must be cleaned of dirt and rotate freely.
Using our hands, apply a force of about 10 kgf along the axis of the suspended wheel and determine the presence of play in the axle shaft.
It is allowed to be no more than 0.7 mm.
Parking the brake must be released during this check.
A minor oil leak (sweating) from under the front bearing seal of the main gear is allowed, but if the gearbox and the bottom of the car above the main gear are heavily oiled, the seal should be replaced.
The noise in the rear axle and, accordingly, the need for repairs can be determined based on the results of the following tests.
Test 1
Smoothly accelerate the car on a level road from a speed of 20 to 90 km/h.
At the same time, listen to the noise and note the speed at which it appears and disappears.
Release the gas pedal and listen to the car in engine braking mode.
Usually the noise appears and disappears at the same speeds, both during acceleration and deceleration.
Test 2
We accelerate the car to a speed of 100 km/h, move the gearshift lever to neutral, turn off the ignition and roll freely to a stop.
At the same time, we monitor the nature of the noise at various deceleration speeds.
In the first version, we tested the gearbox in acceleration and braking mode under the load created by the engine.
In the second - without it. If the noise is present only during the first test, it may be caused by the gearbox gears, pinion gear bearings, or differential.
If the noise is present in both cases, its source should be sought elsewhere.
Test 3
Set the gearbox lever to neutral, start the engine, and gradually increase the crankshaft speed.
Compare the resulting noises with those noticed earlier.
If they are similar to the noises that occurred during the first test, this indicates that they are not coming from the gearbox.
Test 4
Noises detected during the first test and absent during subsequent tests are caused by the gearbox.
To confirm, lift the rear wheels, start the engine, and engage fourth gear.
Make sure that the noises actually come from the gearbox, and not from other units or parts.


