The condition of the belt tension rollers should always be checked when removing or replacing the drive belt
When rocking and rotating the rollers by hand, there should be no play, jamming, or noise in the roller bearings.
In many cases, noise from wear of the roller bearing is observed with the engine running.
We perform the work in an inspection pit or on a lift.
We remove the auxiliary drive belt. To do this:
Remove the engine compartment mudguards.

Using a 13 mm socket, loosen the two bolts securing the tension roller bracket.

Using a 13 mm head, turn the adjusting bolt counterclockwise and loosen the belt.

Remove the belt

When installing the belt, keep in mind that when installing on the compressor pulley, the belt should be located closer to the inner edge of the pulley

Use a flat screwdriver to pry off the protective cover of the tension roller bearing

Remove the protective cover

Using a 17 mm socket, unscrew the tension roller mounting nut

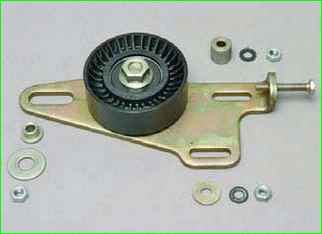
Removing the roller from the bracket

To remove the bracket itself, remove the spacer sleeve roller

Removing the disc washer

Using a 13 mm socket, unscrew the three nuts securing the bracket to the timing cover.

Remove the bracket from the studs.

Remove the roller axis from the hole in the bracket
To remove the support roller:

Pry off the roller protective cover with a screwdriver

Remove it

Using a 17 mm socket, loosen the roller mounting bolt

Remove the roller

Removing the disc washer

Removing the bolt

Removing the spacer sleeve
Installing the roller in the reverse order
")

")
")
")
")
")
")
")