Removing the engine screen
Relieving pressure in the power system
We check the serviceability of the injector windings with the ignition off
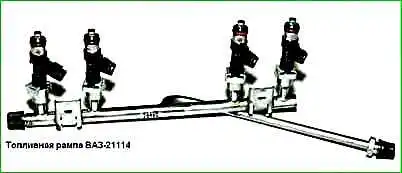
We show the operation of checking the resistance of the windings on a removed fuel rail.

Squeezing the spring clamp of the wire block, disconnect it from the injector.

By connecting the tester probes to the injector terminals, we check the winding resistance.
A working injector should have a winding resistance in the range of 11 - 16 Ohms.
We also check other injectors.

To check the quality of the spray and the tightness of the injectors, remove the air supply hose to the throttle assembly.
Using a 10mm socket, unscrew the nut securing the clamping plate of the fuel supply tube holder and the canister purge solenoid valve tube (the holder is located under the battery mounting platform).

Remove the clamping bar.

Pressing the spring clamp of the tip of the fuel supply hose to the ramp, remove the fuel supply tube from the hose

Use a 5mm hexagon to unscrew the two screws securing the fuel rail to the intake pipe

We move the fuel rail (along the axes of the injectors) so that all the injectors come out of their slots in the intake pipe.

Remove the fuel rail with injectors. Insert the fuel tube into the tip of the fuel supply hose to the ramp until the latch engages.
Turning on the ignition, check the tightness of the connection between the ramp, hose and tube.
We check each injector one by one, placing a container under it to collect fuel.
With the ignition on, we directly supply 12 V to the injector from the battery using two wires.

The nozzle sprayer should produce jets with a characteristic spray cone.
Having disconnected the wires from the injector, check whether fuel is leaking through the nozzle hole.
Fuel leakage should not exceed one drop per minute.
We check other injectors in the same way.
If the electrical resistance of the injector is not normal, the amount of fuel sprayed and the spray pattern are very different from other injectors, or the injector is leaking, it must be replaced.

Before removing the fuel rail, relieve the pressure in the power system.
Then, pressing the latch, disconnect the engine management system wiring harness block from the injector wiring harness block.

Holding the tip of the fuel supply hose to the ramp with a 17mm wrench, use a wrench of the same size to unscrew the fitting of the ramp tube.

A rubber O-ring is installed on the tip of the ramp tube.
Remove the fuel rail with injectors from the engine compartment

Move the injector lock

Remove the lock

Remove the injector from the fuel rail

Remove the sealing ring from the nozzle and nozzle body
The injector O-rings are the same. We also remove the other injectors. We replace the sealing rings with new ones.
We assemble and install the fuel rail with injectors in the reverse order.
Before installation, apply a thin layer of engine oil to the injector sealing rings.
A loose or damaged O-ring of the ramp tube tip must be replaced.
")

")
")
")
")
")
")
")