The brake mechanism of the rear wheels is drum, with a two-piston wheel cylinder and automatic adjustment of the gap between the shoes and the drum
The automatic clearance adjustment device is located in the wheel cylinder.
The main element of the device is a steel split thrust ring installed on the piston with an axial clearance of 1.25-1.65 mm.
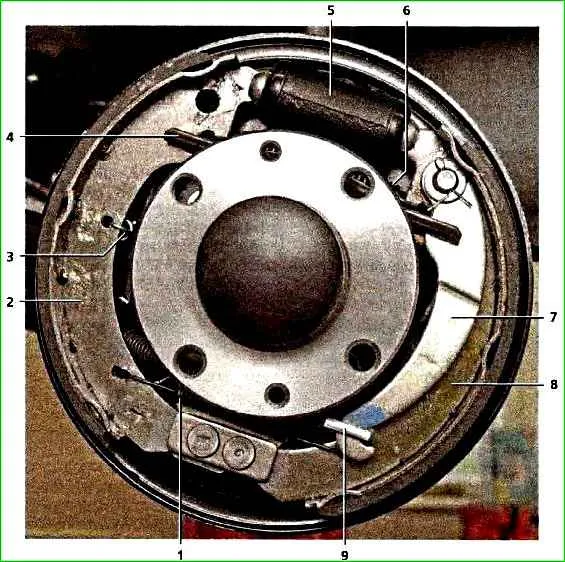
The thrust rings (two per cylinder) are inserted into the cylinder with tension, providing a shear force along the cylinder surface of at least 350 N, which exceeds the force of the brake pad tension springs.
When the brake linings wear, the thrust rings shift under the action of the pistons by the amount of wear.
If the cylinder mirror is damaged due to mechanical impurities in the brake fluid, or due to corrosion (presence of water in the brake fluid), the rings may “sour” in the cylinder and one or even both pistons will lose mobility.
The cylinders in this case must be replaced.
Replacing rear brake pads
The brake pads of the rear wheels must be replaced only as a set - all four pads.
Replacing the pads of only one brake mechanism can lead to the car pulling to the side when braking.
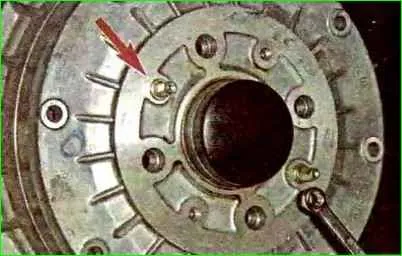
Using a 7mm spanner (preferably a high hex head) unscrew the two wheel guide pins.
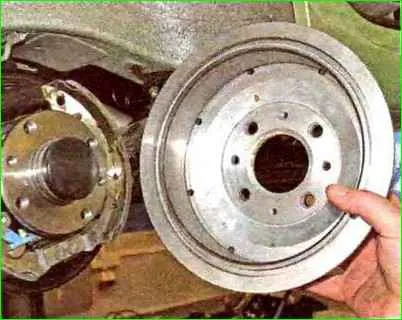
Remove the brake drum.
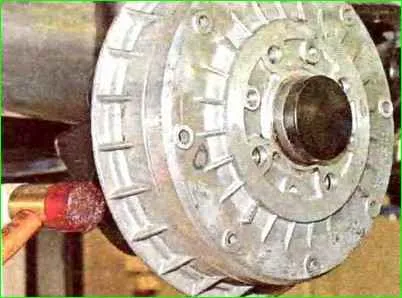
If the drum cannot be removed, then, turning it evenly, use a hammer with a plastic tip (or an ordinary hammer through a wooden block) to strike the end of the drum.
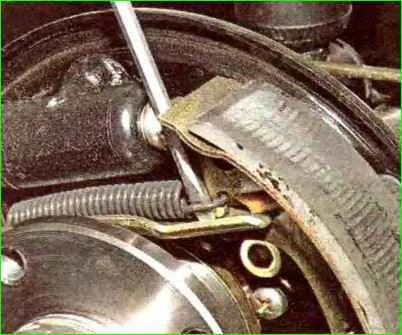
Use a screwdriver to remove the hook of the upper tension spring from engagement with the block.
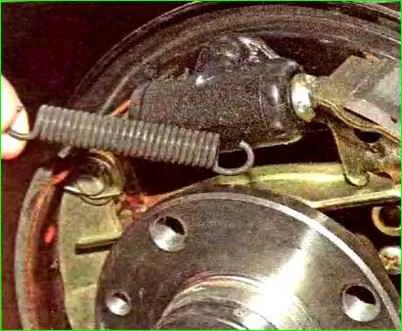
Remove the spring
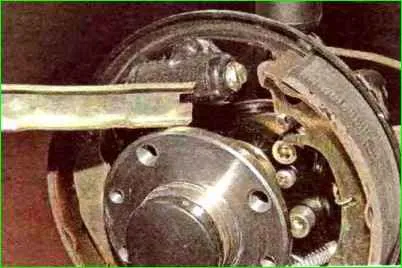
We remove the upper stops of the pads from the slots of the cylinder pistons and remove the spacer bar
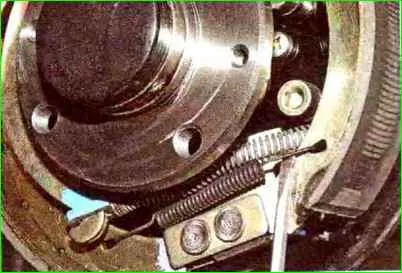
Use a screwdriver to remove the hook of the lower tension spring from engagement with the block.
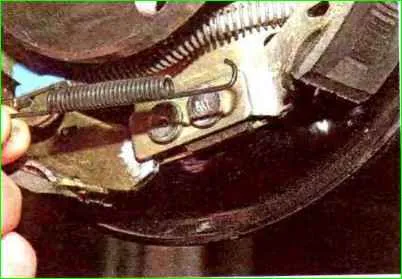
Remove the tension spring
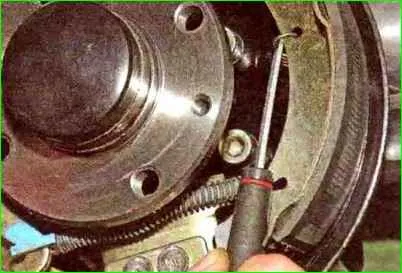
Use a screwdriver to remove the guide spring from engagement with the block.
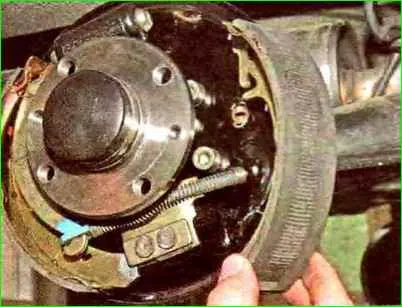
Remove the front block.
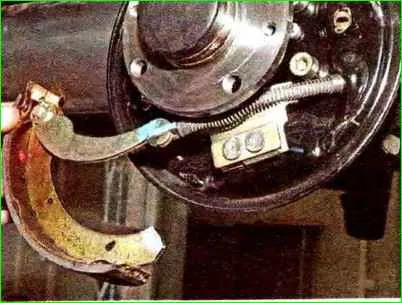
Having disconnected the guide from the rear block lower the spring pad
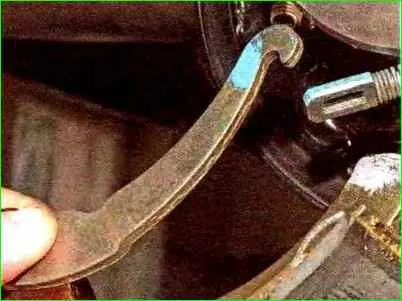
We remove the manual brake pad drive lever from the hole in the parking brake cable tip
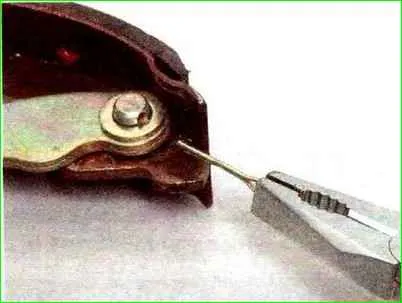
Straighten the cotter pin and remove it from the hole in the finger of the parking brake manual drive lever.
Remove the washer from the finger.
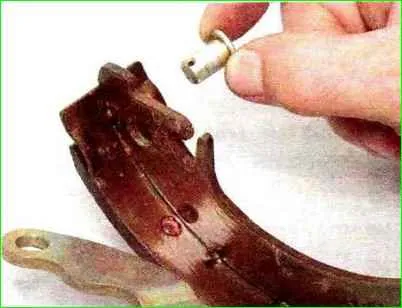
Remove the lever and take out the finger.
Install the manual shoe drive lever onto the new block in the reverse order.
Install new pads in reverse order.
For the convenience of assembling the spring guide with the block, hook a wire or cord approximately 0.5 m long to the hook of the spring.
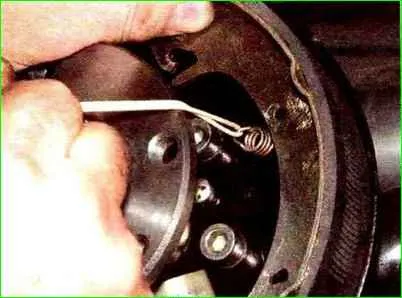
Tensing the spring, insert its hook into the hole in the block.
Then we pull out the wire.
Before installing the drum, it is necessary to recess the pistons inside the working cylinder.
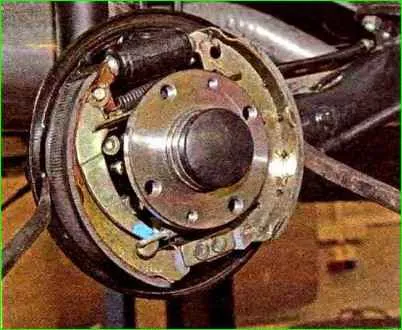
To do this, press on the pads with two mounting blades, leaning against the shoulder of the brake shield
After installing the drum, press the brake pedal several times to set the pistons to the working position.
Adjusting the parking brake.
Replacing the rear wheel brake cylinder
It is more convenient to carry out the work on an inspection ditch or overpass.
Remove the brake drum and the upper tension spring.
We remove the upper stops of the brake pads from the slots of the cylinder pistons.
For ease of unscrewing the brake pipe fitting, you can unscrew the bleeder fitting from the cylinder.
If the tube does not come off and there is no spare tube, you can first unscrew the two cylinder mounting bolts.
Pull out the cylinder together with the tube so that you can hold it with a key.
Then, by rotating the cylinder and holding the tube with a wrench, you can remove the cylinder without damaging the tube.
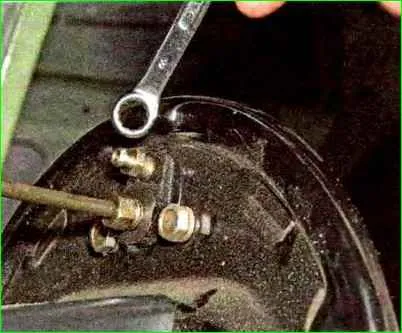
Use an 8mm spanner to unscrew the bleeder fitting (the bleeder fitting can also be a 10mm spanner).
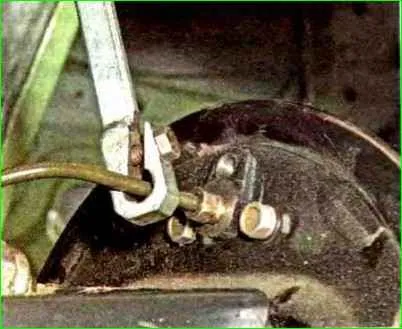
Use a special 10mm wrench to unscrew the brake pipe fitting.
We remove the tip of the tube from the cylinder hole
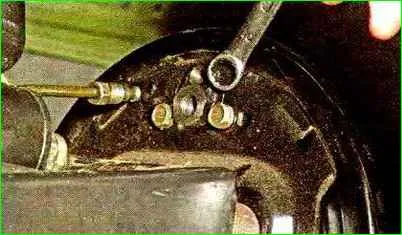
Using a spanner wrench or a 10mm socket, unscrew the two bolts securing the cylinder to the brake shield
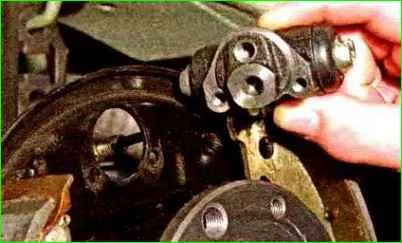
Remove the cylinder
Install the new cylinder in reverse order.
After assembling the brake mechanism (including installing the drum), we bleed the hydraulic brake drive.
Replacing the rear wheel brake hose
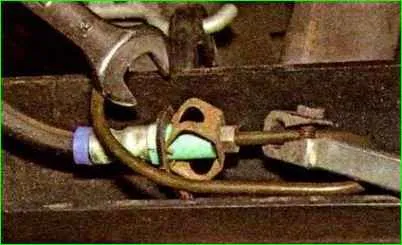
Use a special 10mm wrench to unscrew the brake pipe fitting, holding the lower tip of the hose by the hexagon with a 15mm wrench.
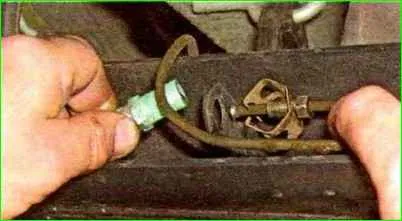
We remove the lower tip of the hose from the hole in the rear suspension beam bracket.
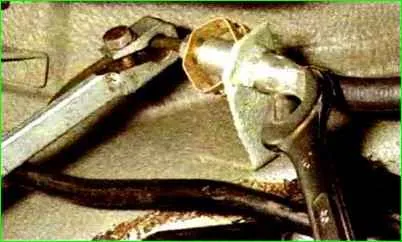
Use a special 10mm wrench to unscrew the brake pipe fitting, holding the upper tip of the hose by the hexagon with a 15mm wrench
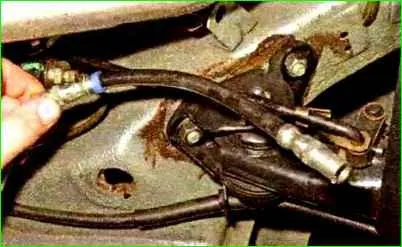
We remove the upper tip of the hose from the hole in the body bracket and remove the hose
Install the hose in reverse order. We bleed the brake system.


