The canister purge valve is installed on the air filter housing.
The need for inspection and replacement can be determined by the fault code
To complete the work you will need a multimeter and pieces of wire.
Removal and inspection
We prepare the car for work.

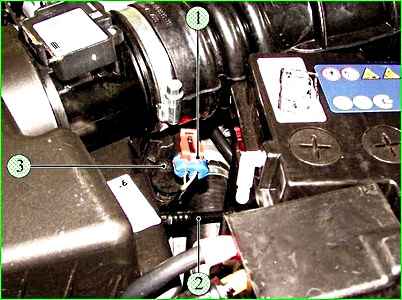
Having released the lock, disconnect the wiring harness block from the canister purge valve (the photo shows it with the air filter cover removed for clarity).

Using a screwdriver, we release the lock, moving the valve up, and remove it from the bracket.

Squeezing the clamp, remove the tip of the fuel vapor supply tube from the valve pipe.

Squeezing the clamps of the tip of the canister purge valve tube, disconnect the tip from the receiver fitting

And remove the adsorber purge valve

We apply 12 V voltage from the battery to the valve terminals (“+” to terminal 2, “-” to terminal 1).
To avoid a short circuit during the following operation, one of the probes should be insulated with a PVC tube.
When voltage is applied to the terminals, the valve should open with a characteristic click.
The faulty valve must be replaced.
Installation
Install the valve in the reverse order of removal.
")

")
")
")
")
")
")
")