Usually, the manufacturer installs on the car wheels for tubeless tires 53x13H2 ET 35, 5Jx14H2 ET 35 or 5½ Jx14H2 ET35, where: 5 (51/2) is the rim width in inches;
J - symbol of the rim profile;
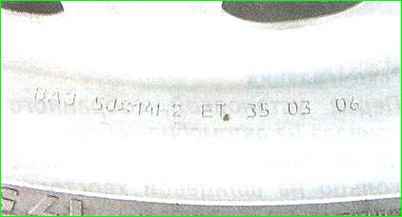
- 13 (14) - rim mounting diameter for the tire in inches;
- H2 - symbol for the shape of the rim flanges;
- ET - symbol for rim offset;
Rim offset (ET) is the distance between the plane bisecting the wheel rim (the plane equidistant from the rim flanges) and the mounting (mounting) plane of the wheel.
35 — rim offset in millimeters.
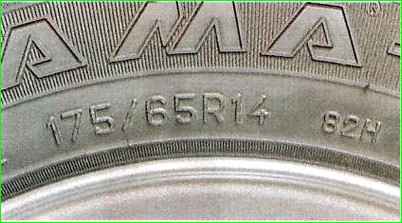
The car is equipped with tubeless tires 175/70R13 82T (or H) or 175/65R14 82H, where:
- 175 (185) - profile width in millimeters
- 70 (65) - the ratio of the profile height to its width in percent;
- R - radial tire designation;
- 13 (14) - tire diameter in inches;
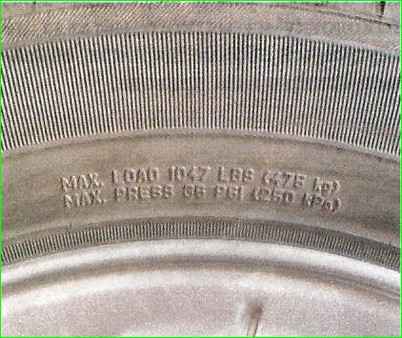
- 82 - load index (maximum permissible load on the tire 475 kgf);
- T (H) - speed index (maximum permissible speed 190 and 210 km/h, respectively).
The maximum tire load (MAX LOAD) is duplicated in decrypted form along with an indication of the maximum permissible air pressure (MAX AT) of the air in the tire.
It is also allowed to install tires with a 14-inch mounting diameter and a T speed index on the car.
When giving recommendations on the choice of particular tires, the manufacturer proceeds from the conditions for ensuring maximum stability, controllability, cross-country ability and safety of the vehicle.
So, wheels with a large offset can touch the parts of the brake mechanisms, and with a smaller offset they increase the load on the hub bearings and can lead to unpredictable behavior of the car during emergency braking or in the event of failure of one of the brake system circuits.
High-profile tires can touch body parts at maximum suspension travel, and wide tires can rub against the car's side members or its wings at large turning angles.
A tire with a lower load index can burst under a fully loaded vehicle, and an underestimated speed index can lead to the tire breaking when driving at high speed.
Tires that can be installed on a car are divided into three types: summer, winter and all-season.
If the car is used all year round and the winter is snowy, then it is better to have two sets of wheels: with winter and summer tires.
Winter tires are made of softer rubber, which allows them not to “turn to stone” at low temperatures, and the tread has narrow wavy slots - lamellas.
This allows the tire to better hold the car on slippery surfaces.
The sidewalls of winter tires have a snowflake on them and may have the inscription M+S or M.S. (from the English mud - “dirt” and snow - “snow”), which indicates the type of tread pattern and indicates improved cross-country ability of the tire.
The possibility of using studded tires in winter depends on the specific operating conditions of the vehicle.
Keep in mind that studs are designed to improve tire traction only on slippery hard surfaces such as ice or packed snow.
In other cases, tires are useless, and on asphalt they can even slightly degrade the tire’s grip on the road.
Using a winter tire in summer leads to intensive wear.
All-season tires can be used all year round. They are distinguished from other tires by the inscription ALLSEASON or TOUSTERRAIN on the sidewall.
According to their performance, they behave satisfactorily in various weather conditions, but at the same time, in summer they are inferior in technical indicators to summer tires, and in winter to winter tires.
The tread pattern can be universal or directional, and is not regulated by the manufacturer's requirements.
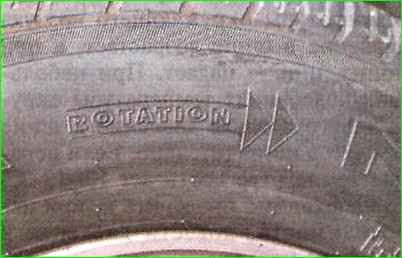
With a directional tread pattern, the inscription ROTATION and an arrow are printed on the sidewall of the tire, indicating the direction of rotation of the wheel when the vehicle moves forward.
A special case of a directional pattern is asymmetrical. In this case, the inscription O is printed on the sidewall UTSIDE, which must be on the outside during installation.
Checking the condition of the wheels
1. Before each trip, we carefully inspect the car’s wheels and their fastening elements. Each wheel is attached to the hub with four bolts.
Press vigorously on the side of the wheel with your foot, swinging it in the transverse direction.
If the wheel bolts are not tightened, the wheel will start to hang loose on the hub.
At the slightest suspicion that the wheel fastening is loose, check the tightness of the bolts.
Wheel rims must be free of cracks and signs of deformation. Tires are not allowed to have cuts, peeling, ruptures, swellings (“hernias”), or protruding cords.
2. If there is no mechanical damage to the tire, its suitability for use is determined by the height of the tread pattern.
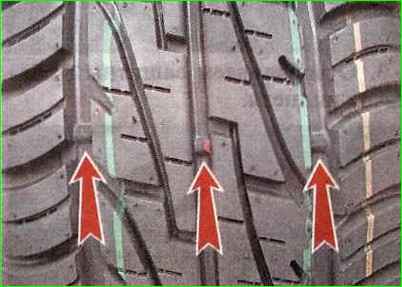
Visually determine the tread height using the indicator ridges in the grooves of the pattern.
The protrusions are 1.6 mm high. Once the tread height is equal to the knob height, the tire must be replaced.
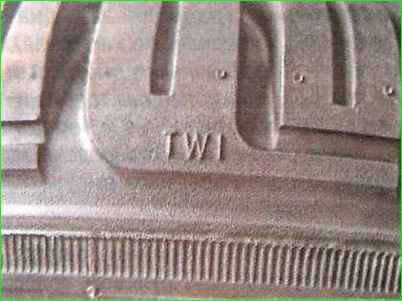
Indicators are located along the entire circumference of the tire at some distance from each other. We find them by symbols in the form of the letters “TWI” or arrows “▲” on the sidewall of the tire.
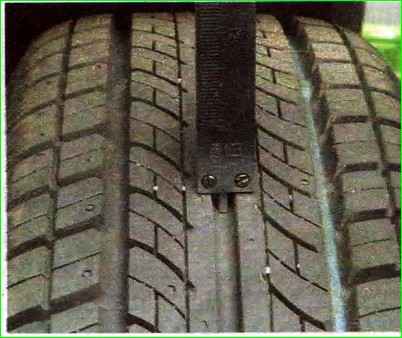
3. We determine the exact tread height using a caliper depth gauge and compare the degree of tire wear at the edges and in the middle
Accelerated wear in the middle part of the tread indicates operation of the tire with increased pressure, at the edges of the tire - with reduced pressure, and rapid wear of the inner or outer part of the tread indicates the need to adjust the wheel alignment angles.
Intensive wear of one of the wheels may be caused by deformation of the suspension elements or power elements of the car body.
4. The appearance of vibration felt on the body or steering wheel when the car is moving at a constant speed above 80 km/h may be a consequence of an imbalance of one of the wheels.
To identify the cause, we check the wheel balancing at a tire shop.
If vibration is caused by disk deformation, tire damage, or uneven wear, replace the tire or wheel.
5. We hang each wheel of the car one by one and swing it in a vertical plane.
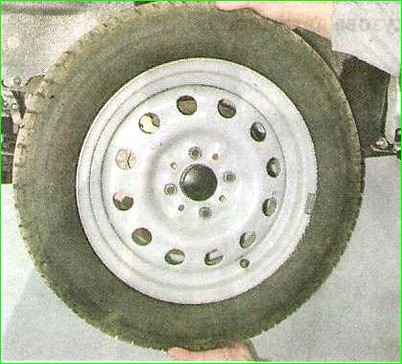
In hubs with worn bearings, play will be felt. To make sure that the play is not caused by faulty suspension parts, repeat the test with the brake pedal depressed. If the knocking noise disappears, it means the wheel bearing is faulty.
We replace faulty bearings. If a knock is heard, check the condition of the front suspension.
Checking tire pressure
The air pressure in a car tire is not constant. When the ambient temperature rises, the tire pressure increases, and when it decreases, it drops.
With small fluctuations in ambient temperature, the tire pressure changes slightly.
If the temperature difference reaches 10-15 ˚С, then it is necessary to check and, if necessary, adjust the tire pressure to normal.
The pressure in the tire also increases when the car is moving at high speed and frequent maneuvers.
In winter it is almost unnoticeable. Cold air and low road surface temperatures prevent the tire from heating up.
In the summer, the incoming flow of warm air does not cool the tire well, and its temperature begins to rise.
Additional heating of the tire occurs from the road surface heated by the sun's rays. All this can increase the tire pressure by 0.2-0.3 bar.
The tire pressure is measured only when its temperature is equal to the ambient temperature.
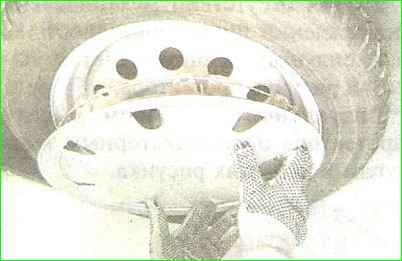
Remove the decorative wheel cap
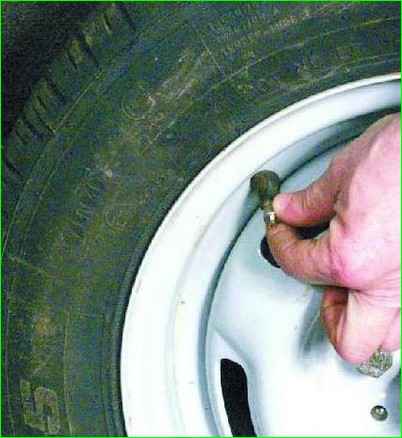
Unscrew the protective cap of the nipple.
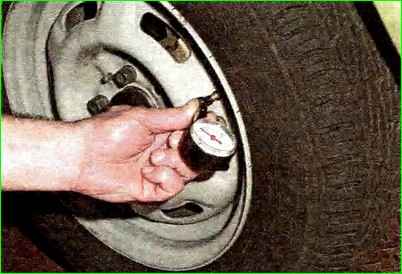
Press the leg of the pressure gauge tightly to the end of the nipple, and hold it in this position for 1-2 seconds, after which we disconnect the pressure gauge from the nipple.
Return the pressure gauge needle to zero and repeat the test.
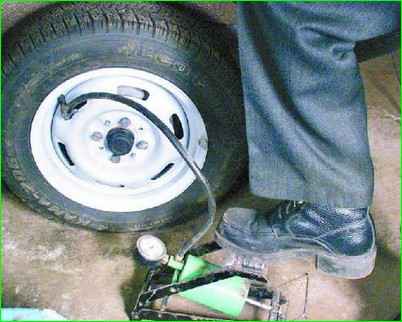
If the tire pressure is below 1.9 bar (0.19 MPa), then inflate it using a pump or compressor.
If the pressure in the wheel tire is higher than normal, then bleed the air by recessing the nipple axis with a special spike on the pressure gauge body or with a screwdriver blade.
We release air from the tire in small portions with an intermediate pressure check.
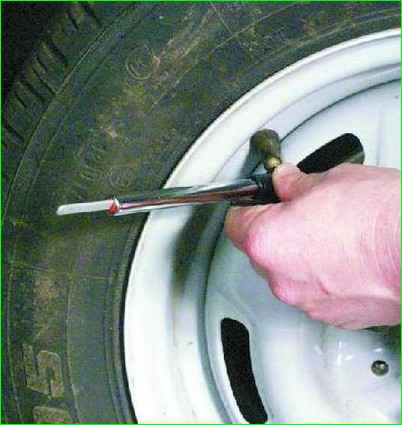
Screw the protective cap onto the nipple.
We similarly check the pressure in the remaining wheels of the car.
Replacing a wheel
We install the car, if possible, on a flat horizontal platform. If there are passengers in the car, they should be disembarked.
Remove the spare wheel and the necessary tools from the luggage compartment.
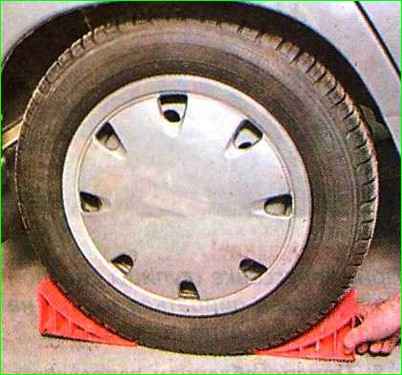
Secure the car with the parking brake and install wheel chocks on both sides under the wheel located diagonally from the one being replaced.
Remove the decorative wheel rim cap.
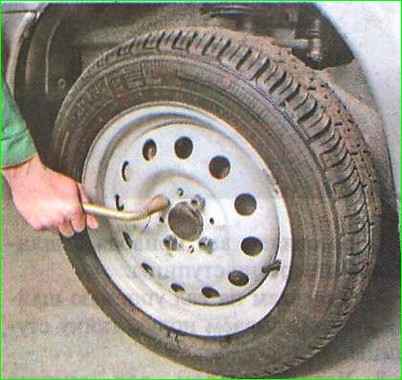
Using a 17 mm wheelbrace or socket wrench, loosen all wheel bolts by approximately half a turn
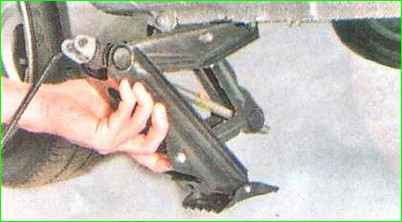
Installing a jack under the threshold of the car
The upper platform of the jack must be installed under a special bracket, welded to the body sill.
In this case, the lower support platform of the jack must be strictly under the upper stop.
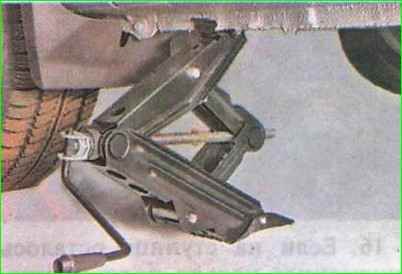
Smoothly lift the car, while simultaneously checking that it does not move forward or backward.
We lift until the car wheel to be replaced is at a distance of 2-3 cm from the supporting surface.
Finally unscrew the mounting bolts and remove the wheel.
Install the spare wheel on the hub. Holding the wheel, we first tighten its mounting bolts.
Holding the wheel from rotating, tighten the bolts of its fastening crosswise.
Smoothly lower the car until the wheel firmly touches the supporting surface. then lower the car completely onto the wheels and fold down the jack.
Finally tighten the wheel bolts according to the same pattern to a torque of 65.2-92.6 Nm.
Place the removed wheel in the luggage compartment and fasten it securely.
Remove the wheel chocks.
Check the tire pressure and, if necessary, adjust it to normal.


