The master cylinder must be repaired or replaced when the pressure in the clutch release drive is not maintained (when pressed smoothly, the pedal reaches the stop, but the clutch does not disengage)
When obvious traces of fluid leakage from the master cylinder are visible.
Let's see how this is done:
Removing the clutch master cylinder
Remove the clutch master cylinder reservoir cap and remove the screen.
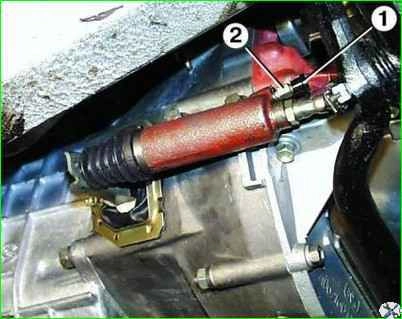
Remove cap 1, open valve 2 on the clutch slave cylinder and drain the fluid from the system into a container.
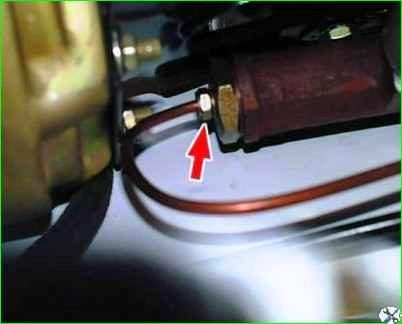
Unscrew the fastening nut and disconnect the tube from the master cylinder.
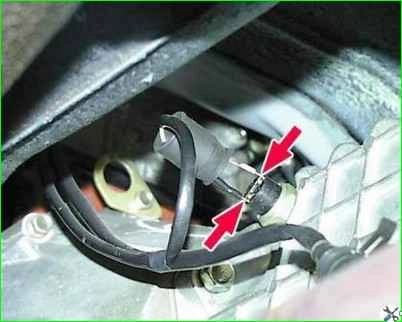
Disconnect the pusher from the clutch pedal in the passenger compartment by unscrewing nut 1 and removing the pusher axle 2 with two plastic bushings.
Unscrew the two nuts 3 securing the cylinder to the front panel and remove the master cylinder.
Disassembling the clutch master cylinder
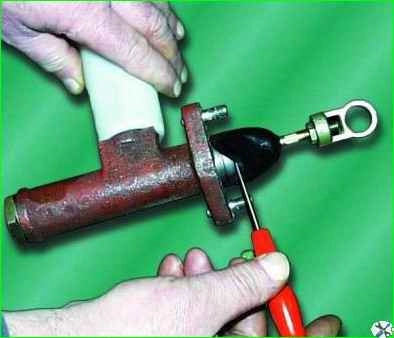
Use a screwdriver to pry off the protective cap, slide it off the cylinder body and turn it inside out
Clamp the cylinder in a vice.
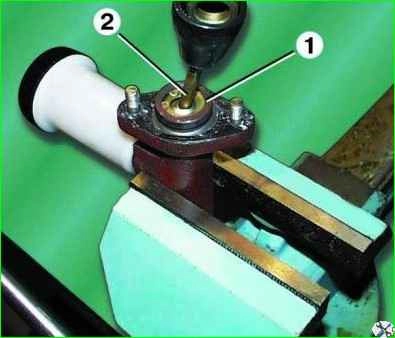
Remove lock ring 1, holding pusher 2, and carefully remove the pusher from the cylinder
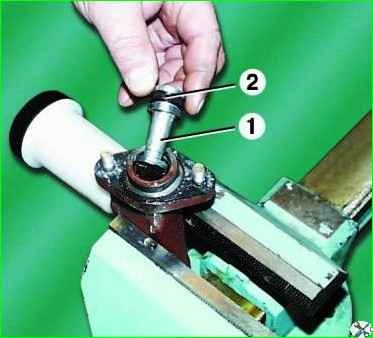
Remove piston 1 with cuff 2
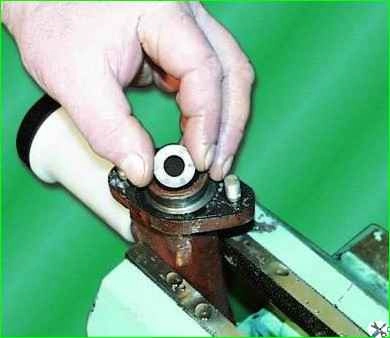
Remove the piston valve
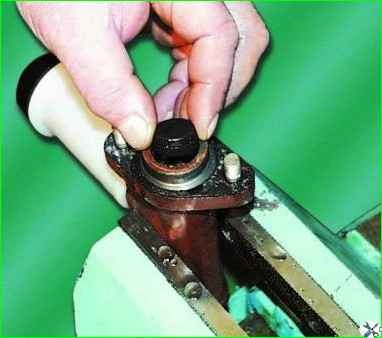
Take out the inner cuff.
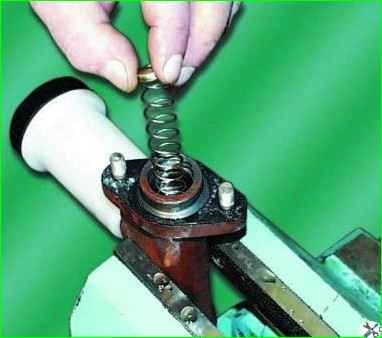
Remove the spring.
When repairing the master cylinder, it is not recommended to unscrew the fitting if there are no signs of fluid leakage.
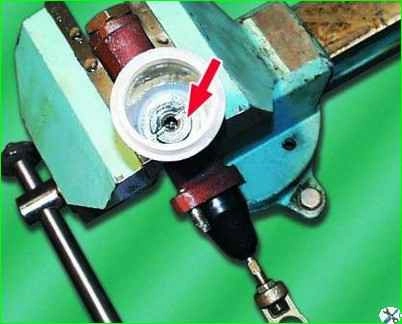
If it is necessary to remove the tank, unscrew the tank fitting together with the gasket and remove the tank together with the gasket
Inspection and defect detection of clutch master cylinder parts
Wash the master cylinder parts with clean brake fluid and dry.
The master cylinder mirror should not have marks, holes or areas of corrosion.
If these defects are present, replace the cylinder.
There should be no mechanical damage on the threaded parts of the cylinder.
The master cylinder cuffs must be firm and elastic.
Torn, swollen and hardened cuffs, as well as those with marks on the working surfaces, must be replaced.
The end of the pusher and the mating surface of the piston should not have obvious signs of one-sided wear.
The piston surfaces in contact with the cylinder bore should also not show signs of one-sided wear. Otherwise, it is recommended to replace the pusher and piston.
The piston valve should not have visible signs of deformation and should fit tightly to the end of the piston.
The protective cap of the master cylinder must not have cracks or through holes.
It should be installed on the pusher and the master cylinder body with a slight interference fit. Otherwise, replace the cap.
A broken spring or one that has lost its elastic properties must be replaced.
The threads of the tips of the tube and hose should not have mechanical damage, the fitting of the tips should not have cracks or traces of visible deformation.
The master cylinder is assembled in the reverse order of disassembly.
Before assembly, it is necessary to lubricate the master cylinder parts with fresh brake fluid. The cuff is installed on the piston with the working edge inside the cylinder.
Install the master cylinder in the reverse order of removal. After installation, it is necessary to bleed the clutch release drive system.


