First of all, note at what speed the vibration of the transfer case occurs, then proceed to determine the causes of the vibration
Test 1
Set the transfer case and gearbox levers to neutral and start the engine.
Set the engine crankshaft speed equal to the vehicle speed at which the vibration occurred.
If the vibration persists when the vehicle is parked, then you should check the fastening and condition of the engine mounts, since they are the cause of the vibration.
Test 2
Raise the vehicle on a lift
If no vibration is detected during test No. 1, set the transfer case levers to neutral, start the engine, engage direct gear in the gearbox and set the engine crankshaft speed to the speed of the vehicle at which the transfer case vibration occurred.
If vibration is observed with the vehicle stationary and at this crankshaft speed, it is caused by a malfunction of the intermediate driveshaft (imbalance, bending of the mounting bolts or flange of the elastic coupling, jamming in the cardan joint).
Test 3
If vibration is not detected during tests 1 and 2, detected, proceed to test 3.
Accelerate the vehicle to the speed at which vibration occurs, and set the transfer case and gearbox levers to neutral.
If vibration persists, it is caused by a faulty front or rear propeller shaft, imbalance, jammed cardan joints, or imbalance of the center differential.
Before centering the transfer case, check the condition of the powertrain mounts and ensure that they are installed correctly (the centering washers of the engine mounts must fit into the corresponding holes in the side brackets).
Install the transfer case on the vehicle without fully tightening the mounting nuts of its suspension brackets.
Moving the transfer case in the longitudinal, transverse, and vertical directions (tightening or loosening its mounting nuts), achieve a minimum and uniform gap between the flanges of the intermediate shaft and the drive shaft transfer case (the flanges must be at the same level and parallel to each other).
Fill the gap between the body floor and the supports with adjusting shims and align the centering belts of the flanges, slightly moving the transfer case forward (by the amount of the gap between the flanges).
Finally tighten the nuts securing the transfer case supports.
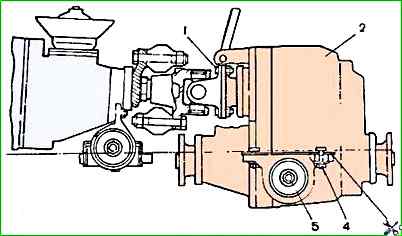
When replacing the transfer case or changing a four-speed gearbox to a five-speed and vice versa, as well as when the rear engine suspension "settles", causing vibration of the transfer case, it is necessary to select and install a new thickness of shims 3 (Fig. 1).
")

")
")
")
")
")
")
")