Depending on the vehicle configuration, different schemes and options for auxiliary unit drives may be used.
Belts may vary in size, since auxiliary units such as the power steering pump, generator, and air conditioning compressor may be from different manufacturers.
Therefore, before checking and replacing belts, you need to decide which option is right for you.
The size of the belts is indicated on the outside. It is necessary to buy belts according to their size.
When replacing belts, it is imperative to check the condition of the tension and auxiliary rollers.
It is imperative to carry spare belts with you, especially on long trips.
Let's consider some variants and technology for replacing belts.
Insufficient belt tension worsens the circulation of fluid in the cooling system, which leads to engine overheating.
In addition, recharging the battery is worsened and the belt itself wears out faster.
If the tension is too strong, the bearings of the water pump and generator may fail.
Check the tension of the water pump and generator drive belt from above in the engine compartment.
Tension is characterized by the amount of belt deflection between the pulleys of the pump and the crankshaft (deflection "B") (Fig. 1) or the generator and pump pulleys (deflection A) when applying a force of 98.1 N (10 kgf) in the middle of the distance between the pulleys.
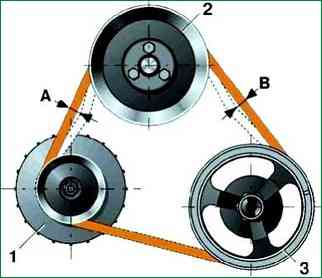
Sag "A" should be 10-15 mm, sag "B" - 12-17 mm.
It is more convenient to check sag "A".
To check the tension, you can use a spring scale-steelyard, hooking it to the belt branch and pulling it up.
Adjust the belt tension on a car installed on a lift or inspection pit.
Adjustment is carried out by moving the generator relative to the engine.
You will need: a key "for 13", a mounting blade.
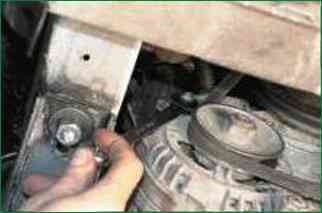
Remove the oil pan guard and engine splash guard.
Loosen the alternator mounting nut to the tension bar by about one turn
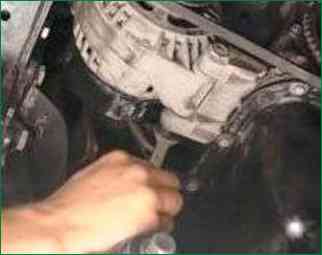
Loosen the lower mounting nut generator.
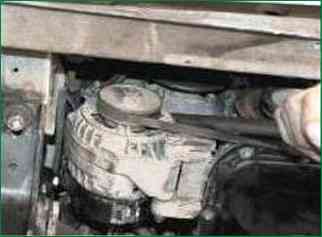
To increase the belt tension, move the generator away from the engine.
When moving the generator to increase the belt tension, apply force only to the generator housing. placing a mounting blade between the housing and the engine.
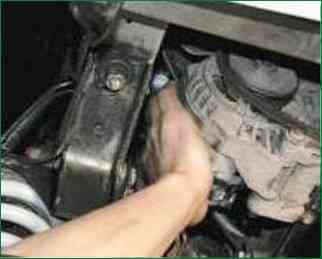
To reduce the belt tension, move the alternator toward the engine by hand.
Without changing the position of the alternator, tighten the alternator mounting nut to the tension bar and the lower alternator mounting nut.
Tightening torques:
- - alternator mounting nuts to the tension bar 28.08-45.3 Nm (2.9-4.6 kgcm);
- - alternator lower mount nuts 57.3-72 Nm (5.95-7.35 kgcm).
Install the oil pan guard and engine splash guard in the reverse order of removal.
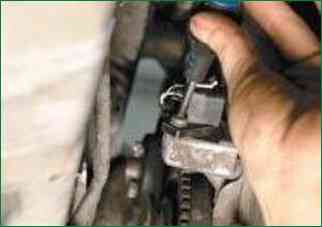
To replace the belt, unscrew the crankshaft position sensor screw and remove the sensor from the bracket socket without disconnecting the wires.
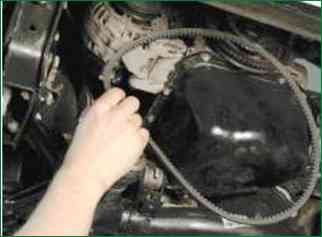
Remove the power steering pump drive belt.
Perform operations 2 and 3, prev tension adjustment, and move the alternator toward the engine until it stops.
First remove the belt from the pump pulley, then from the alternator and crankshaft pulleys.
Put the new belt first on the crankshaft pulley, then on the alternator pulley, and then on the pump pulley.
If the new belt is tightly put on the pump pulley, and the alternator is moved toward the engine until it stops, carefully turn the pump pulley by hand or slowly turn the crankshaft until the belt is completely put on the pulley. Ask an assistant to turn the crankshaft.
Perform steps 2-6 for adjusting the belt tension.
Reinstall the crankshaft position sensor.
Alternatively, the vehicle may be equipped with one poly V-belt that drives all auxiliary units (water pump, generator, and power steering pump).
In this case, the generator is installed to the left of the engine at the top.
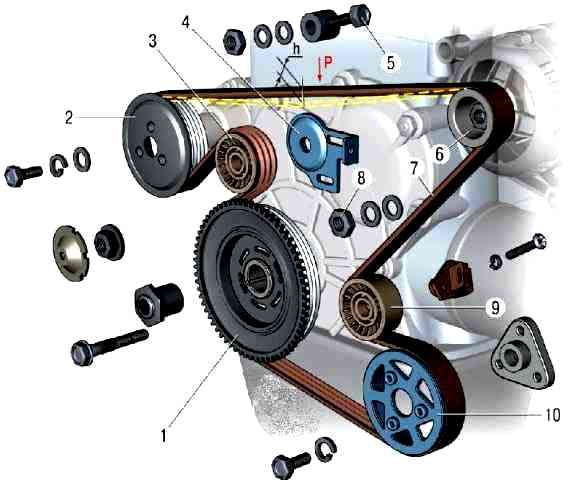
In this case, the belt tension is checked by its deflection between the generator and water pump pulleys.
With normal belt tension, the deflection "h" under the action of a concentrated load "P" of 75 N (7.6 kgf) should be equal to (12 ± 1) mm.
Adjust the belt tension by moving the tension roller 3, rotating the tensioner bolt 5 with the tensioner bracket 4 fastening nuts 8 loosened.
After adjustment, turn the engine crankshaft two revolutions and check the belt tension again.
Alternatively, the car can be equipped with one poly V-belt, which serves as a drive for all auxiliary units (water pump, generator and power steering pump).
In this case, the generator is installed to the left of engine at the top.
In this case, the belt tension is checked by its deflection between the generator and water pump pulleys.
With normal belt tension, the deflection "h" (Fig. 11) under the action of a concentrated load "P" of 75 N (7.6 kgf) should be equal to (12 ± 1) mm.
Adjust the belt tension by moving the tension roller 3, rotating the tensioner bolt 5 with the loosened nuts 8 for fastening the tensioner bracket 4.
After adjustment, turn the engine crankshaft two revolutions and check the belt tension again.
Option with two belts with a coolant pump drive belt, generator, power steering and a compressor drive belt
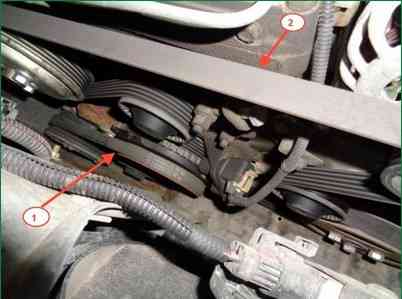
Work should be performed in an inspection pit or on a lift.
Preparing the car. Open the hood.
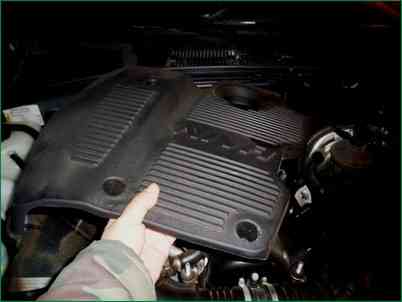
Remove the plastic engine protection (screen)
When the belts are loose or the auxiliary rollers are worn out, a characteristic "whistle" or noise appears when the engine is running in this area.
To check the tension of the auxiliary belt, press your finger on the belt in the middle between the alternator pulley and the coolant pump.
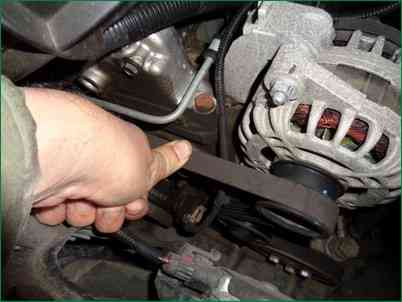
With a pressing force of about eight kilograms, the belt deflection should be 12 ± 1 mm.
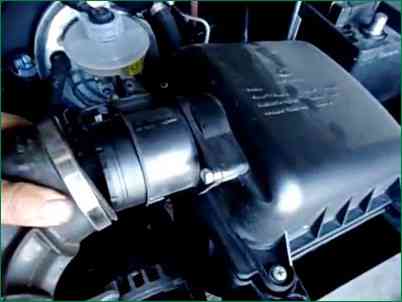
To adjust the belt tension, remove the rubber air supply pipe to the throttle assembly.
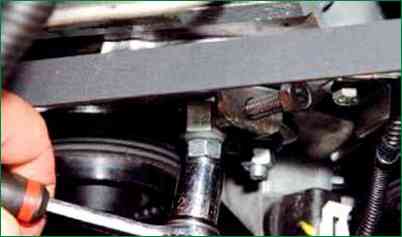
Using a 13 mm socket, loosen the three nuts securing the tension roller bracket.
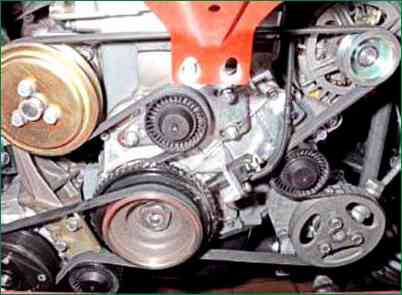
Photo 6 shows the location of the belts and nuts of the tension roller bracket.
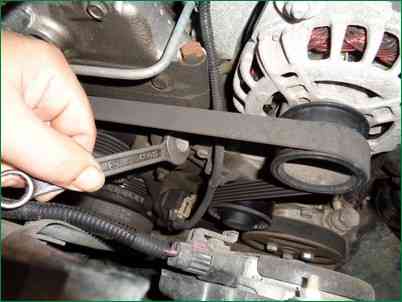
Using a 13 mm wrench or head, turn the adjusting bolt clockwise, tightening the belt.
Tighten the tension roller mounting nuts. Start the engine, stop it after five minutes and check the belt tension.
Belts should not be overtightened, as the bearings of the units they rotate may fail due to excessive load.
We replace the auxiliary unit belts if cracks, tears, or peeling rubber are detected.
First, remove the air conditioning compressor drive belt (see below).
After removing the air conditioning compressor drive belt, loosen the tension roller bracket fastening and rotate the adjusting bolt counterclockwise, loosening the belt tension.
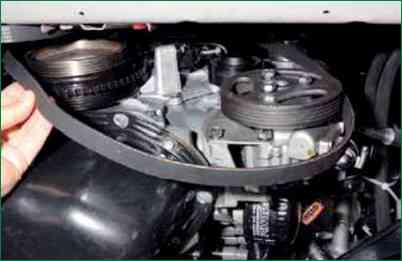
Remove the belt from the tension roller and other pulleys.
Install the new belt in the reverse order.
First, put the belt on the crankshaft pulley, and lastly on the tension roller.
After installation, adjust the belt tension.
Checking and removing the air conditioning compressor drive belt
To do this, remove the lower engine compartment protection and engine compartment mudguards.
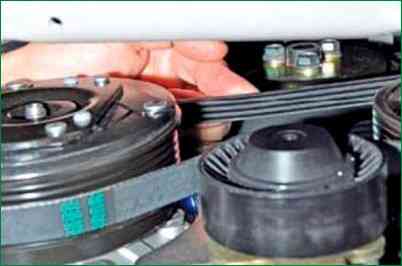
To simply check the tension of the air conditioning drive belt, press the belt with your finger (Fig. 1) in the middle between the compressor and crankshaft pulleys.
When pressing force is about 10 kilograms, the belt deflection should be about 8 mm.
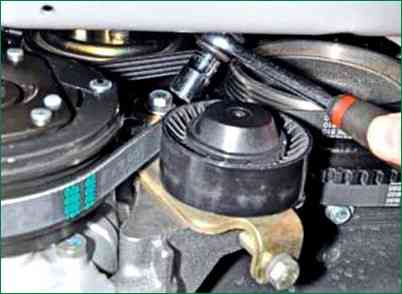
To adjust the belt tension, use a 13 head to loosen the two bolts securing the tension roller bracket.
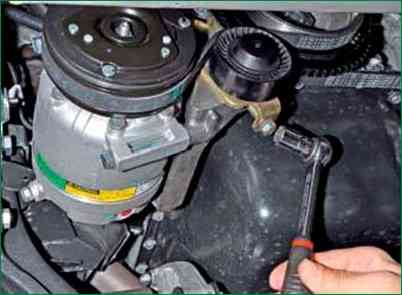
Using a 13 mm head, turn the adjusting bolt clockwise, tightening the belt.
After tensioning the belt, tighten the tension roller bracket mounting bolts.
To remove the belt, loosen the tension roller bracket mounting bolts and loosen the belt tension by turning the adjusting bolt counterclockwise.
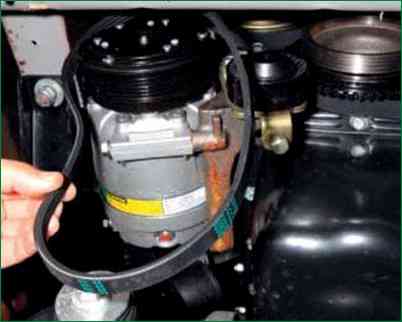
Remove the belt from the tension roller and the crankshaft and compressor pulleys.
Install the new belt in the reverse order.
Install the new belt in the reverse order.
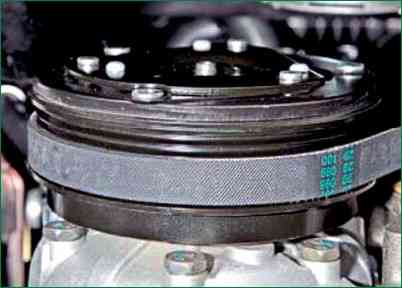
Put the belt on the compressor pulley so that it is located closer to the inner edge of the pulley. And adjust the belt tension, as stated above.
After a short run of the car, it is necessary to check the belt tension. New belts stretch a little, so it is better to check and tighten.
PS. And finally, after removing the belts, it is necessary to determine why the belt broke or was defective.
Increased belt wear occurs due to oil getting from under seals or other mating surfaces of the engine.
Premature wear also occurs due to loose belt tension. In this case, the pulleys slip and excessive heating and wear of both the belt itself and the unit pulley occur.
You should also pay attention to the pulleys themselves and the units that are driven by these belts.
The units that rotate with these belts should not jam due to bearing failure.
The pulleys should not have nicks or sharp edges. Check the play of the generator rotors, coolant pump, air conditioning compressor and power steering pump by scrolling and shaking them by hand.
When buying belts, you should buy only from trusted and reliable manufacturers. Inspect the belt, bend it and look at the quality of the product, the year of its manufacture.


