Work with an assistant on an inspection ditch or overpass
Drain the oil from the gearbox.
Disconnect the wire terminal from the negative terminal of the battery.
Remove the air filter.
Remove the starter.
Remove the clutch cable leash from the groove of the clutch release fork lever.
Remove the left mudguard of the power unit.
Disconnect the wire blocks from the reverse gear lock solenoid
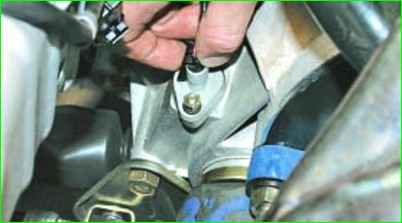
Bend back the plastic retainer and disconnect the wiring harness connector from the speed sensor
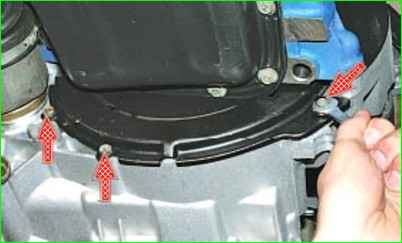
Using a 10 mm wrench, unscrew the three bolts securing the front cover of the clutch housing
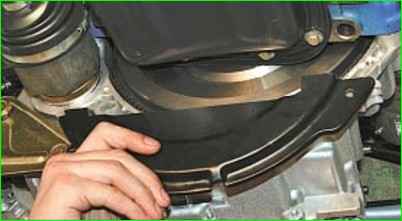
Remove the cover
Install a reliable support under the engine or hang it up.
Remove the rear support of the power unit (article on removing the supports - Replacing the supports of the power unit Lada Priora)
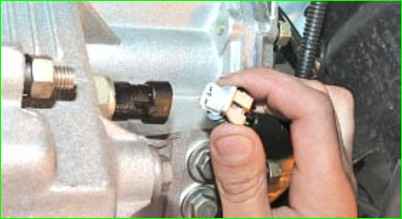
Press out the plastic retainer and disconnect the wiring block from the reverse switch
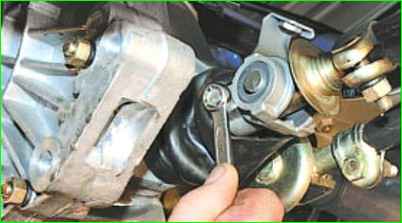
Using a 10 key, unscrew the bolt securing the gearshift drive hinge housing to the gear selection rod
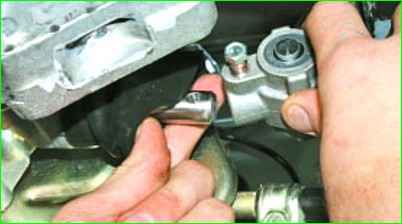
Disconnect the gear selection rod with the hinge from the rod
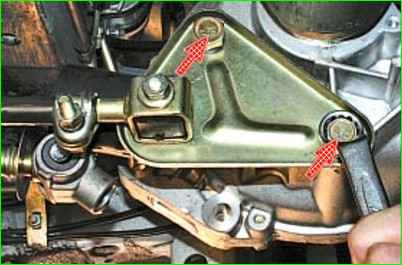
Using a 17 key, unscrew the two bolts securing the torque rod bracket
Removing the front wheel drives (article - Front wheel drives Lada Priora)
The right drive does not need to be removed completely. It is easy to disconnect it from the gearbox and move it aside and hang it on the body.
You cannot remove both drives at the same time, since in this case the gears of the axle shafts in the differential may shift, and it will be impossible to install the drives without disassembling the gearbox.
If you need to remove both drives, then after disconnecting one of them, you need to insert a technological plug or the old housing of the inner hinge. After that, you can remove the second drive.
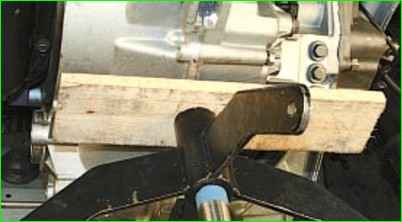
Install a reliable support for the gearbox
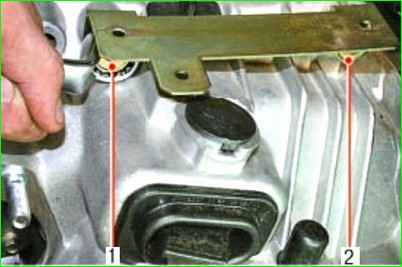
Using a 19 key, unscrew the two bolts of the upper gearbox mount to engine.
Bolt 1, the front one is shorter than bolt 2.
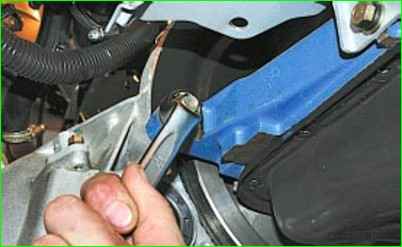
Using a 19 key, unscrew the nut of the right lower mount of the gearbox to the engine
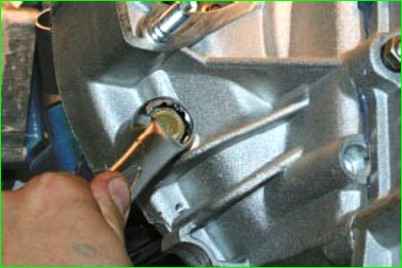
Using a 19 mm wrench, unscrew the bolt of the lower left gearbox mount to the engine
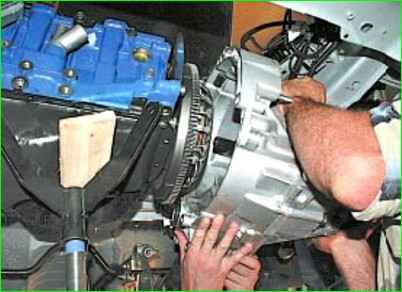
Move the gearbox as far back as possible, the primary shaft should disengage.
Holding the gearbox, remove the support and take the gearbox out from under the car.
Install the gearbox in the reverse order.
Before installation, lubricate the splines of the primary shaft of the gearbox.
Using a mandrel, check the centering of the driven disk of the clutch.
When removing and installing the gearbox, do not rest the primary shaft of the gearbox on the petals of the diaphragm spring of the clutch, so as not to damage them.
Before installing the gearbox, apply a thin layer of SHRUS-4 grease to the splined end of the primary shaft.
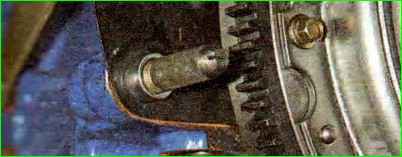
To facilitate the operation of installing the gearbox, screw in two M12x1.25 mm guide studs (with sawn slots for a screwdriver) into the front lower threaded hole of the cylinder block and into the rear upper hole.
Insert the input shaft of the gearbox into the splines of the driven disk of the clutch and, having oriented the gearbox so that the two guide studs enter the corresponding holes of the clutch housing, and the standard stud of the clutch housing - into the hole of the cylinder block, sending the gearbox until it stops in the engine cylinder block.
Use a screwdriver to unscrew the guide studs from the holes of the cylinder block.
Further We carry out assembly operations in the reverse order.
Pour oil into the gearbox.


