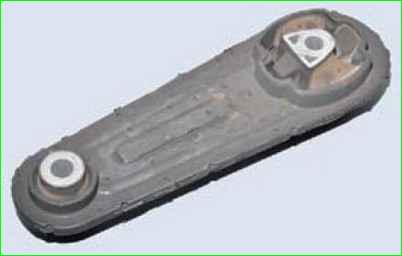
We remove and replace the supports if they are defective or when repairing the power unit
If any of the supports is damaged, the power unit sags on the side where the support is bad (incorrect tilt of the power unit relative to the body)
If the rubber inside the support is damaged, a knock occurs when the car starts moving or when driving over uneven surfaces.
Removing the rear support of the power unit
We install the car on an inspection ditch or on a lift.
We disconnect the negative terminal of the battery.
We remove the engine crankcase protection.
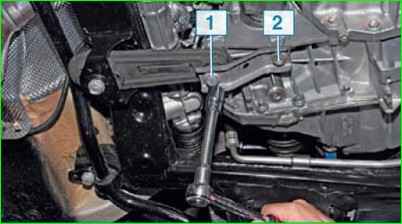
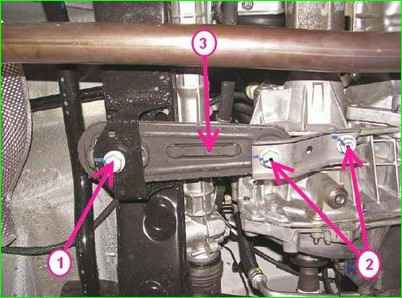
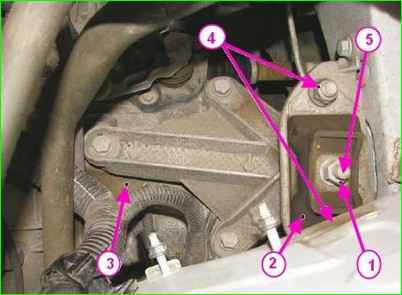
Using an 18 mm head, unscrew bolt 1 (Fig. 1) and loosen bolt 2 securing the support and support bracket to the gearbox housing
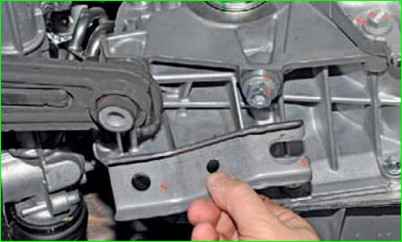
Remove the support bracket (Fig. 2).
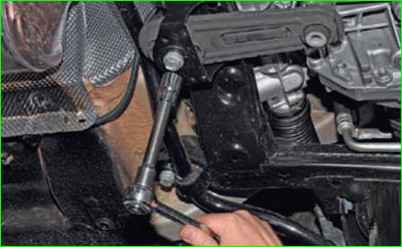
Using an 18 mm socket, unscrew the bolt securing the support to the subframe (Fig. 3).
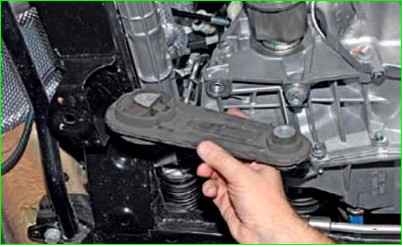
Removing the support (Fig. 4).
Install the rear mount in the reverse order. Tighten to the required torque:
- - bolt 1 (Fig. 6) for fastening the rear engine mount to the front suspension subframe 105 Nm (10.5 kgf.m);
- - bolts 2 for fastening the rear engine mount to the gearbox 105 Nm (10.5 kgf.m) (18 replaceable head, extension, torque wrench).
After all operations, install the crankcase guard.
Replacing the right powertrain mount
Place the car on an inspection pit or lift.
Disconnect the negative battery terminal
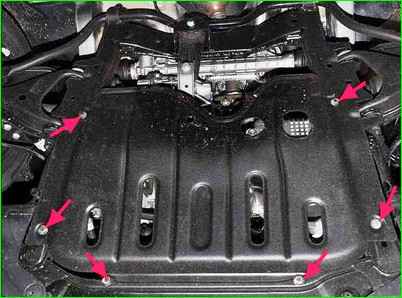
Unscrew the powertrain protection bolts (Fig. 7).
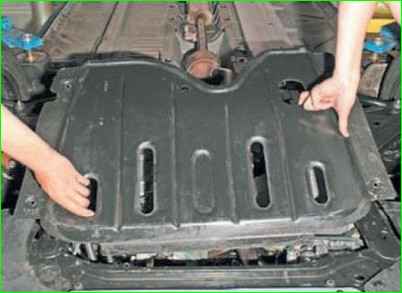
Remove the protection (Fig. 8).
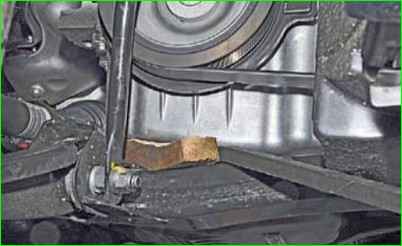
We slightly hang the right side by the eye or using a jack.
To support the engine, you can use a crossbar, which is installed on the gutters of the engine compartment.
You can use a wooden block (Fig. 9), which we install between the oil pan.
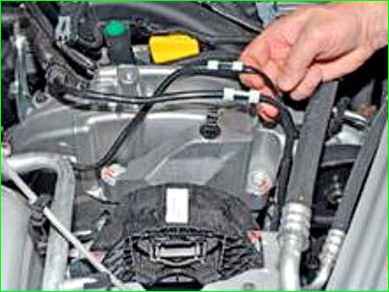
Remove the tubes from the holders on the support (Fig. 10).
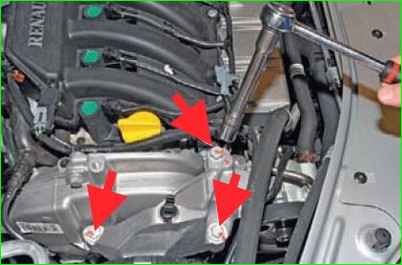
Using a 16 mm head, unscrew the three bolts securing the support bracket to the upper timing belt cover (Fig. 11).
Mark the position of the right engine mount support on the body with a marker.
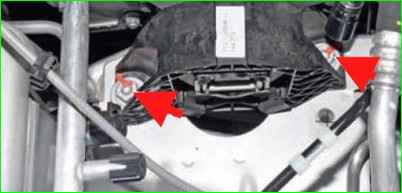
Unscrew the two bolts securing the mount to the body (Fig. 12).
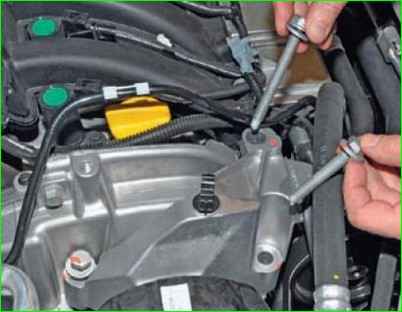
Remove the bolts securing the mount. It should be noted that the bolt for the left mount of the mount bracket is longer than the bolts for the right mount (Fig. 13).
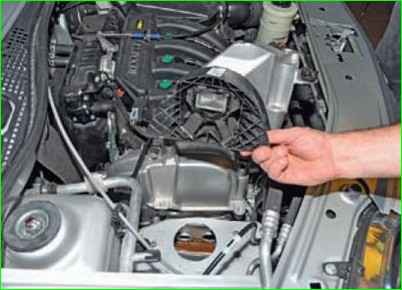
Removing the right support of the power unit assembled with the bracket (Fig. 14).
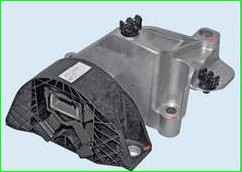
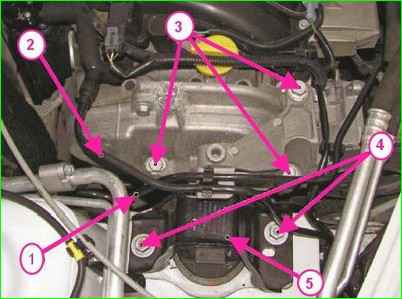
Tighten to the specified torque:
- - bolts securing the right engine mount bracket to the engine 62 Nm (6.2 kgf.m);
- - bolts securing the right engine mount to the body 62 Nm (6.2 kgf.m) (16 mm socket, extension, torque wrench)
Removing and installing the left powertrain mount
Place the vehicle on a lift or inspection pit.
Remove the battery
Remove the battery pan
Remove the ECM
Remove the crankcase guard (as shown above)
Hang out the left side of the engine (you can use a crossbar or a wooden block placed under the engine crankcase).
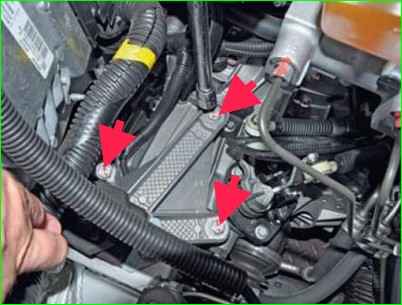
Using a 16 mm head, unscrew the three bolts (Fig. 17) fastening the support bracket to the gearbox
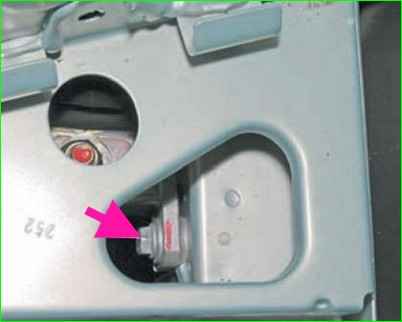
Using a 13 mm head with an extension, unscrew the front bolt of the upper support bracket mount to the side member under the battery platform (Fig. 18).
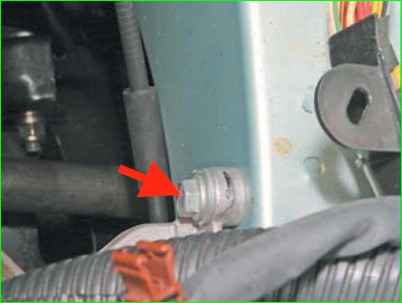
Using a 13 mm wrench, loosen the rear bolt of the upper mount bracket to the side member, located behind the battery platform (Fig. 19).
Under the platform, using a 13 mm head, loosen the two bolts of the lower mount bracket to the side member by 2-3 turns
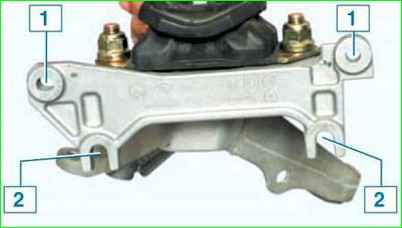
Figure 20 shows the location of the bracket mounting holes
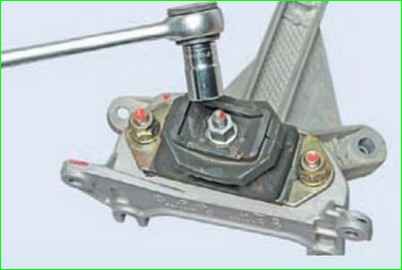
Removing the left mount
If necessary, use a 16 key to unscrew the nut securing the mount to the bracket (Fig. 22).
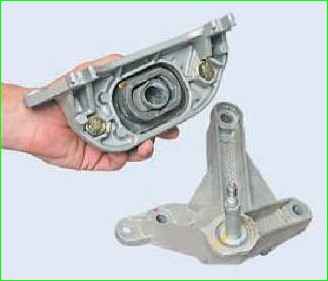
Removing the mount from the bracket (Fig. 23).
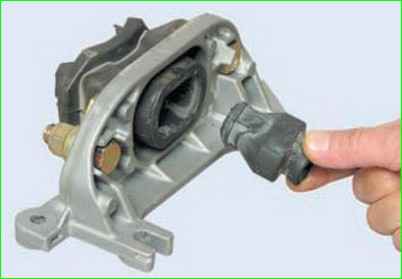
Removing the rubber insert from the mount (Fig. 24).
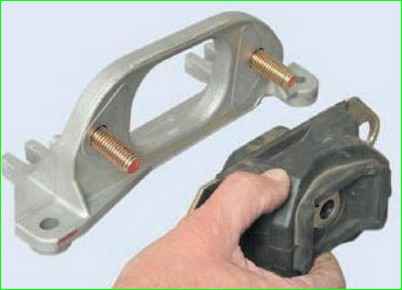
Remove the mount cushion (Fig. 25).
Install the mount in the reverse order.
Tightening torques for left support fasteners:
Tightening torque for left engine mount stud nuts 105 Nm (10.5 kgf.m) (18 replaceable socket, extension, ratchet, torque wrench)
Install nut 1 of gearbox mounting stud to cushion 2 of left engine mount.
Tightening torque for left support stud nut 62 Nm (6.2 kgf.m) (16 replaceable socket, extension, ratchet, torque wrench).
Install and tighten the power steering line fastening bolt (if the vehicle is equipped with one) to the left engine mount.
Tightening torque for power steering line fastening bolt 21 Nm (2.1 kgf.m) (replaceable head 13, extension, ratchet, torque wrench).


