All vehicle instrumentation: speedometer, odometer, tachometer, fuel level indicator, as well as the trip computer display are installed on the instrument panel
Indicator lamps are also located there.
Indicator lamps inform the driver that various vehicle systems are turned on or that there is a malfunction.
They are made of LEDs and soldered to the electrical board of the instrument panel.

The brake fluid level sensor is installed in the cap of the master brake cylinder reservoir.
When the liquid level drops below the permissible level, the sensor float drops and closes the contacts, causing the warning lamp to light up.
The emergency oil pressure sensor is installed in the cylinder head.
The contacts of a working sensor should close when the pressure in the engine lubrication system drops below 0.06 MPa (0.6 kgf/cm 2).
The tachometer and speedometer are electromechanical, and the odometer is completely electronic.
Information about driving speed and distance traveled is read from the vehicle speed sensor.
Odometer readings (total and daily mileage), fuel level indicator are displayed on the liquid crystal display of the trip computer.
The trip computer control buttons are located on the lever of the right steering column switch.
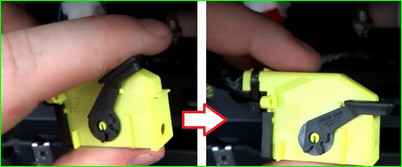
The fuel level indicator (and fuel reserve) sensor is installed in the fuel module.
The car can also be equipped with wear sensors for the front brake pads. The signal from the sensor is displayed on the instrument panel.
Removing and installing the instrument panel
We prepare the car for work and disconnect the wire terminal from the negative terminal of the battery.
Having released the steering column position adjustment lever, move the steering wheel as far down as possible.
Remove the instrument panel trim (see article - “Replacing fuses and relays of the Lada Granta”).

Use a short Phillips screwdriver to unscrew the two screws of the upper fastening of the instrument panel trim.

We also unscrew one screw of the lower fastening

Overcoming the resistance of two spring clips (they touch the lower protrusions of the cladding), we remove the cladding from the opening of the instrument panel

Remove the four screws securing the instrument panel


Tilt the instrument cluster, release the connector block lock and disconnect the wiring harness block
The figure shows the disconnection of the wire block

Remove the shield from the instrument panel
Install the instrument panel in reverse order
Checking and replacing the low brake fluid level sensor
We prepare the car for work.
Turn on the ignition.

Pressing from above, recess the sensor float rod.
In this case, the warning lamp for insufficient brake fluid level should light up on the instrument panel
If the control lamp does not light up, the terminals in the connecting block may have oxidized or the sensor may be faulty.
To verify that the sensor is faulty, just short-circuit the terminals of the connecting block.
If the warning light comes on, the sensor is faulty and must be replaced.
Turn off the ignition.

Disconnect the wiring harness block from the sensor

Unscrew the cap of the master brake cylinder reservoir.
Remove the sensor float from the tank and remove the sensor.
The faulty sensor is replaced as an assembly.
Replacing the emergency oil pressure sensor
We prepare the car for work.

Squeeze the protrusions of the wire connecting block on both sides and remove the block from the emergency oil pressure sensor.

Use a 21 mm spanner to unscrew the sensor and remove it

You can check the sensor only on a special stand, or by replacing it with a known good one.

Install the sensor in reverse order.
Start the engine and make sure there are no oil leaks from under the sensor.
If necessary, replace the sensor O-ring or the sensor assembly.
")

")
")
")
")
")
")
")