Preparing and washing engine parts
The engine block must be washed (Fig. 1)

Preparing engine parts for assembly.

Pressing the front crankshaft oil seal into the front cover (Fig. 2).

Outside on There is an engine speed limiter on the front cover (Fig. 3).
We remove all the insides from the speed limiter and install a solid gasket and tighten it with the housing.
We screw the studs for fastening the fuel pump into the front cover
At the factory, the fuel pump is fastened with bolts. We install studs (Fig. 4), which will eliminate unnecessary problems in subsequent operation.

It happens that when a bolt is lost, a larger bolt is installed and this bolt rests against the camshaft gear, which leads to wear of the camshaft gear (Fig. 5)

Preparing the crankshaft. If the shaft was bored, then blow out the channels after boring with compressed air
Tighten the technological plugs of the oil channels (Fig. 6).

We countersink the holes on the shaft using a ball from a bearing (so that there are no sharp edges on the working part of the shaft bearing (Figure 7)).

On the rear part of the crankshaft, you can apply an oil drain thread, in the place where the shaft is pressed by the packing (Fig. 8). This increases the tightness of this joint.

We inspect and grind, if necessary, the camshaft (Figure 9)

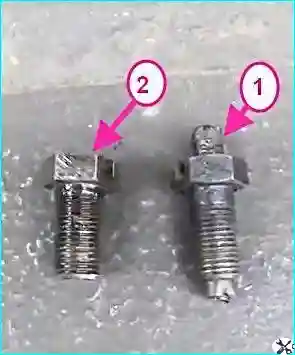
If we remove the insides of the rev limiter, then we modify the bolt that secures the camshaft drive gear
Using a grinder, we cut off the crimping of the flag and remove the flag and spring. You will get bolt 2, as in the figure (figure 10)
This is done so that the bolt flag does not rest against the solid gasket under the rev limiter housing.
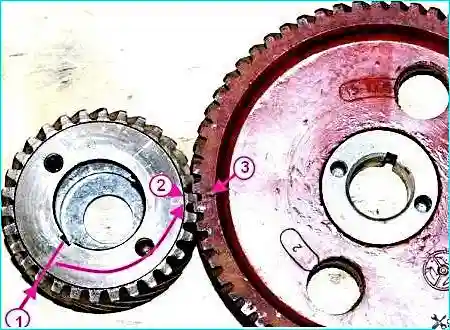
To avoid mistakes when assembling and installing gears, it is necessary to take into account that the mark on the crankshaft gear is located on the 12th tooth, counting from the tooth opposite the slot for the key counterclockwise (Figure 11).
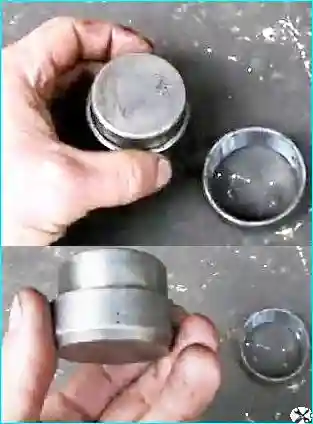
Pressing in the babbitt bushings of the camshaft (of course, you can use steel-aluminum bushings) (Figure 12)

To press in the bushings, use the device (Figure 13)