Checking the wheel alignment angles is mandatory if suspension parts that may change the wheel alignment have been replaced or repaired
Check and adjust the wheel alignment angles on the vehicle under a static load of 2250 N (225 kgf).
The load is distributed across the vehicle interior: 75 kg on the front seats and 75 kg in the center of the rear seat.
The wheel alignment angles should have the following values:
- - camber -0°30´ ± 30´
- - longitudinal angle of inclination of the steering axis 3° 40´ ± 30´
- - toe-in 0 ± 1 mm.
Before adjusting the wheel alignment angles check:
- - air pressure in the tires;
- - axial clearance in the front wheel hub bearings;
- - serviceability of the shock absorbers (no jamming of the rods);
- - radial and axial runout of the tires;
- - clearance in the suspension ball joints;
- - free play of the steering wheel.
Eliminate any detected faults and make the necessary adjustments.
After installing the car on the stand, immediately before checking the angles, it is necessary to “squeeze” the car suspension, applying 2-3 times a force of 392-490 N (40-50 kgf) (directed from top to bottom), first on the rear bumper, and then on the front.
The order of checking and adjusting the wheels should be as follows:
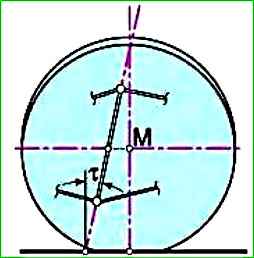
1. Longitudinal tilt angle of the steering axis
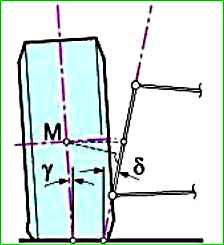
2. Camber angle
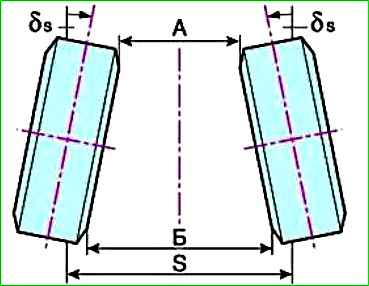
3. Toe-in
Pivot Angle
If the angle does not match the data given above during the check, it is necessary to change the number of adjusting washers installed between the upper arm axle and the crossmember bracket.
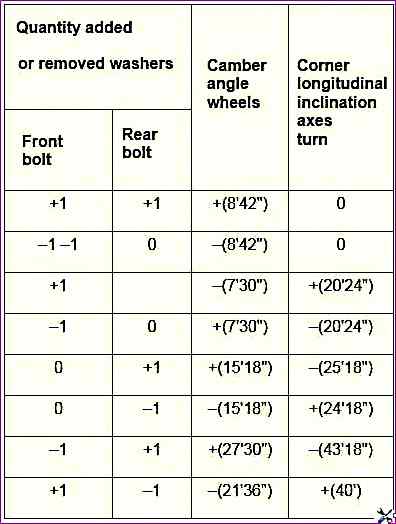
Changing the camber and viscoelastic angles of the steering axis when changing the number of 0.75 mm thick washers on the upper arm axle mounting bolts
The data are given for 0.75 mm thick washers. Plus - adding a washer, minus - removing a washer.
To adjust the longitudinal tilt angle of the steering axis:
- unscrew the nuts securing the axle of the upper arm of the front suspension and move the washers from one bolt to the other until the normal angle value is obtained.
The longitudinal tilt angle of the steering axis increases when moving the washers from the rear bolt to the front and decreases when moving them back;
- tighten the nuts with a torque wrench and check the correctness of the longitudinal tilt angle of the steering axis.
Front camber angle
If the camber angle differs from the norm, then it is necessary to adjust it by changing the number of washers installed between the axle of the upper arm and the crossmember bracket.
To decrease the camber angle, remove the same number of washers from both bolts, and to increase it, add.
Front toe-in wheels
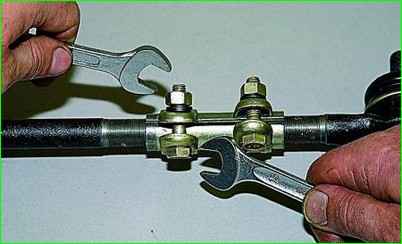
If the alignment differs from the norm, it is necessary to loosen the side rod clamps and use key 67.7813.9504 to turn both couplings by the same amount in opposite directions; thus, the couplings are screwed on or unscrewed and change the length of the lateral rods.
After completing the adjustment, install the clamping clamps with the slot facing backwards, with an acceptable downward deviation of 60° to the horizontal plane of the car.
When the nuts are tightened, the edges of the slots of the clamping clamps should not touch.
After adjusting the wheel alignment, check that the wheels and steering gear parts do not touch the adjacent suspension and body parts.
To do this, turn the wheels in both directions until the pitman arm stops against the steering gear housing mounting bolts.
