Change the tension roller if extraneous noise appears when it rotates
You can detect play in the tension roller bearing when replacing the accessory drive belt.
Prepare the car for work. Install the car on a lift, remove the right wheel.
Remove the right front wheel shield.
Remove the belt in accordance with the article on belt replacement, - "How to Replace a Drive Belt"

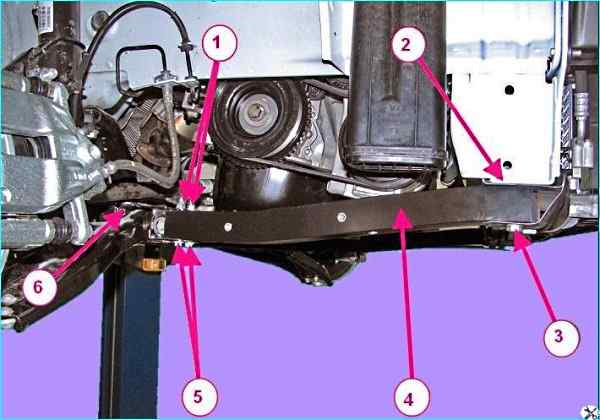
Unscrew the two nuts 1, figure 1, bolts 5 securing the side member to the subframe 6 and remove the bolts (you will need a 13 mm open-end wrench and a 10 mm head).
Unscrew the bolt 3 securing the side member to the radiator frame 2 and remove the right side member 4 of the subframe (use a 16 mm head).

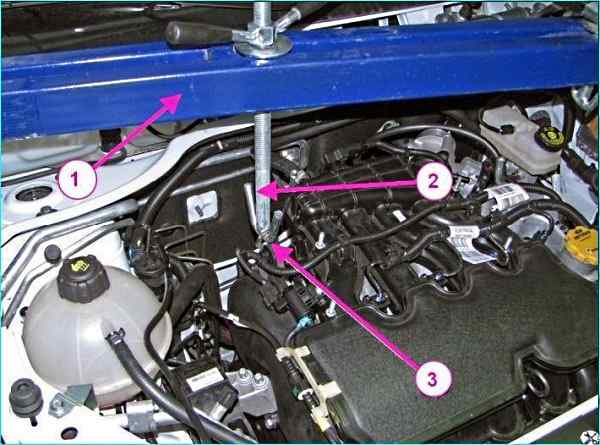
We install crossmember 1 on the car, figure 2 for hanging the power unit, insert hook 2 of the crossmember into eye 3 of the right eye and hang the engine on the right side.
You can lift the engine from below, then you need to remove the engine crankcase guard.

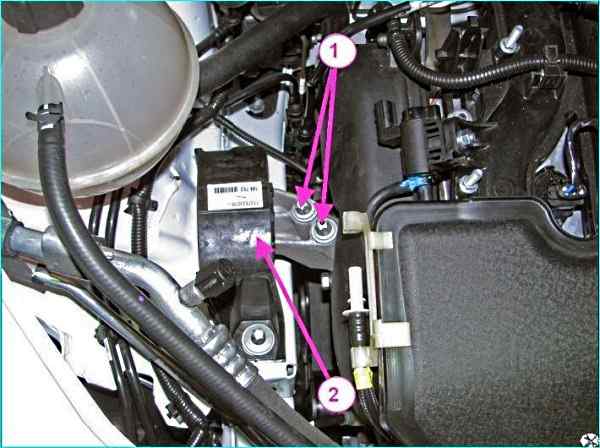
Unscrew and remove the two bolts 1, Fig. 3, fastening the engine to the right support 2 of the power unit suspension (use the Torx E12 head).
Lower the engine enough to remove the roller from the mounting stud.

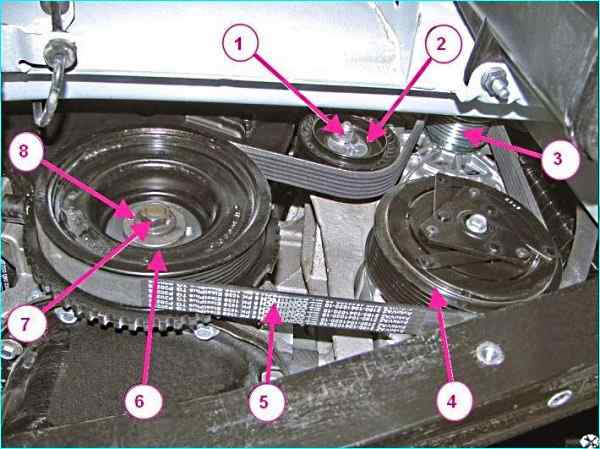
Using a 13 mm head, unscrew the nut 1, Figure 4, securing the tension roller and remove the tension roller.
Install the roller in the reverse order.
Tightening torques for fasteners:
- - nuts 1 bolts 5 securing side member 4 to subframe 6 of the front suspension (Figure 1) – 18 Nm (1.8 – 2.4 kgfm).
- - bolts 3 securing side member 4 to frame 2 of the radiator 18 – 24 Nm (1.8 – 2.4 kgfm).
Install the alternator drive belt.
The final tightening torque for the nut securing the tension roller after installing the belt is 30 – 36 Nm (3.0 – 3.6 kgf.m).


