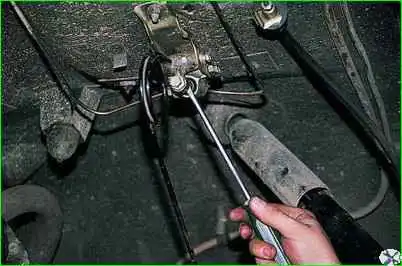
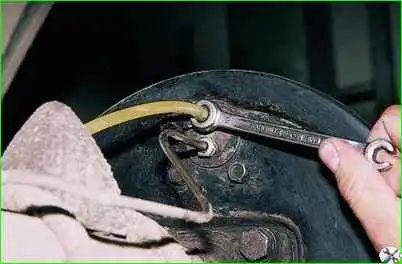
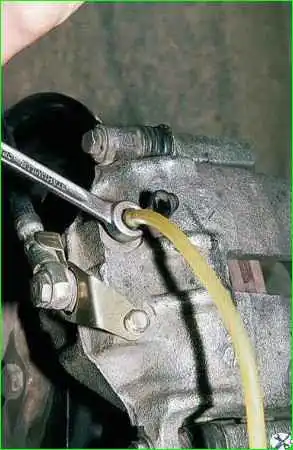
Clean the air release valve on the wheel from which air will be removed from dirt and dust
Check and, if necessary, add brake fluid to the reservoir to the maximum mark.
Remove the protective cap from the air release valve and place a rubber hose on the valve head to drain the fluid.
Immerse the end of the hose in a clean, transparent container partially filled with brake fluid.
Press the brake pedal sharply 4–5 times (with an interval of 1–2 s between presses), and then, leaving the pedal pressed, unscrew the air release valve ½–¾ of a turn. In this case, air bubbles will be visible in the liquid flowing from the hose.
After fluid flows out of the hose stops, tighten the air release valve tightly and release the brake pedal.
Repeat step 5 until the emission of bubbles from the escaping liquid completely stops.
In this case, it is necessary to monitor the level of brake fluid in the reservoir and add brake fluid to the reservoir, not allowing the level in it to drop below the “min” mark.
Remove the hose, wipe the end of the valve and put the cap on it.
Bleed the brakes of the remaining wheels, if necessary.
If work was carried out only on the brake of one wheel, it is enough to bleed only the cylinder of this wheel.
If bleeding of the brake system is not done thoroughly enough, then when you press the pedal at the end of its stroke, you will feel an increased “softness” of the pedal.
This operation is performed by two people in compliance with safety precautions, since brake fluid is toxic.
The order of priority when pumping the entire system:
- - rear right wheel;
- - rear left wheel;
- - front right wheel;
- - front left wheel.
To top up or replace, use only new brake fluid.
Do not reuse brake fluid that was drained when bleeding.

If the work is performed on a lift, then tighten the pressure regulator rod before bleeding the rear circuit.
Remove the protective cap from the rear right wheel cylinder bleeding valve and, putting on a transparent hose, immerse its free end in a container partially filled with brake fluid.
Press the brake pedal 4-5 times.

Without releasing it, use a 10 key to turn the air release valve 1/3–½ turn. Air bubbles will be visible in the liquid flowing from the hose.
After the pedal “goes” forward all the way, squeezing a portion of liquid from the system into the container, close the valve and only then release the pedal.
Repeat pumping until air bubbles completely stop coming out of the hose.
Having removed the hose, put on the protective cap.

In the same way we bleed the rear left, front right and front left brake mechanisms (in the specified order).
If there is air left in the system, then when you press the brake pedal you will feel its elasticity. In this case, repeat bleeding until the pedal becomes “hard.”
If bubbles continue to come out of the hose even after removing air for a long time, check the tightness of connections, pipelines, hoses, master and slave cylinders.
Tighten leaking connections, and replace faulty O-rings and seals.
After bleeding, add clean, recommended brake fluid into the reservoir to the MAX mark and install the reservoir cap with an emergency level drop sensor.
When changing brake fluid, bleeding should be done until fresh brake fluid (it is lighter) begins to come out of the bleeder fittings of all brake cylinders.


