Adjusting the valve clearances of the ZMZ-402 GAZ-3110 engine
The thermal gap between the valves and rocker arms is adjusted when repairing the cylinder head
Also when there is a knocking sound in the area of the valve cover
With an increased gap, a characteristic loud knock appears.
If the gap between the valves and rocker arms is small, the engine will be “squeezed”, or they say “stupid.”
This will reduce its power and throttle response, and increase wear on the valve mechanism.
Adjustment is carried out on a cold engine.
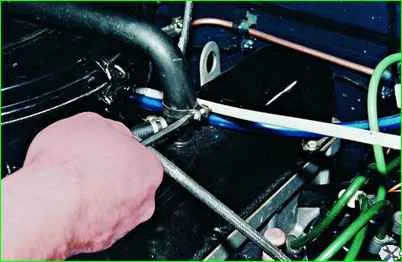
Remove the carburetor air filter housing to do this:
Use a screwdriver to loosen the clamp and remove the crankcase gas exhaust hose.
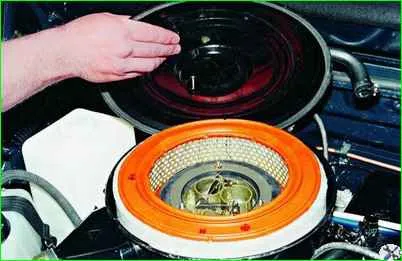
Snap off the five clips, remove the cover of the air filter housing, and take out the filter element.
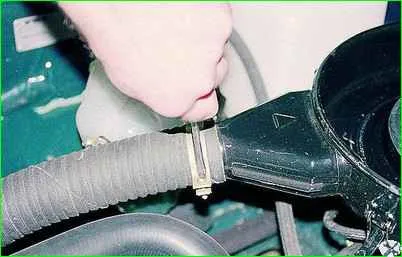
Use a screwdriver to loosen the clamp and remove the corrugated air intake hose.
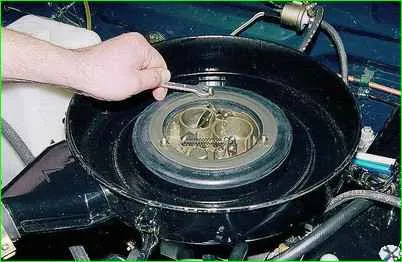
Use a screwdriver to bend the antennae of the lock washers, and use a 10mm wrench to unscrew the three nuts.
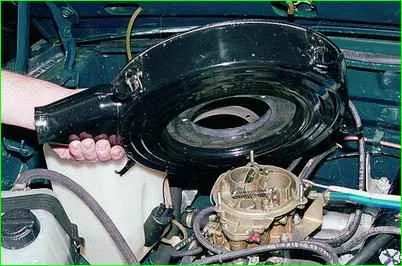
Remove the air filter housing.
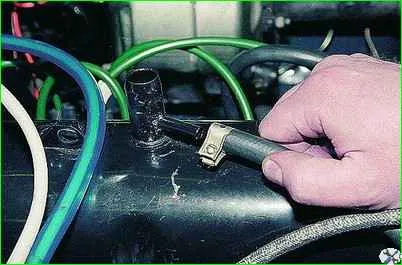
Disconnect the crankcase gas exhaust pipe.
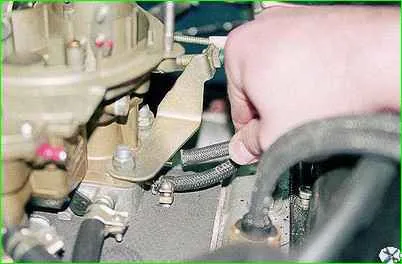
Disconnect the hose of the vacuum regulator of the ignition sensor-distributor
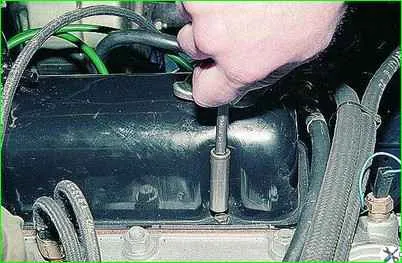
Use a 10mm socket wrench to remove the six bolts of the cylinder head cover
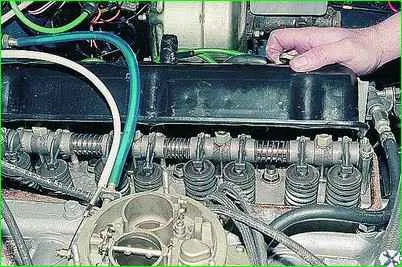
Remove the cover
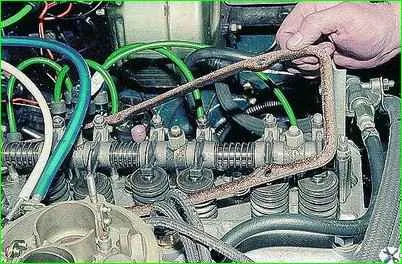
Remove the sealing gasket.
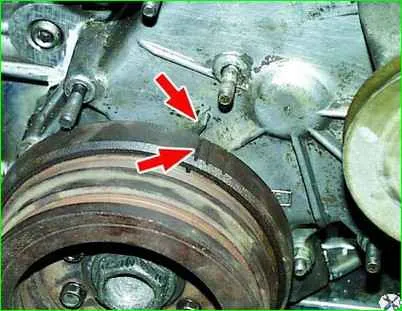
Install the piston of the first cylinder to TDC.
To do this, turn the crankshaft so that the third mark on the pulley aligns with the boss on the camshaft sprocket cover.
After this, remove the distributor cap and check that the slider is in the contact position of the 1st cylinder. Otherwise, turn the crankshaft one revolution.
Both valves of the first cylinder must be closed. The rocker arms swing freely.
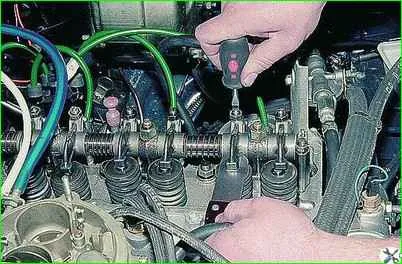
Using a 14mm wrench, loosen the locknut of the adjusting screw and unscrew the adjusting screw one or two turns.
Insert a feeler gauge between the valve stem and the rocker arm.
Turn in the adjusting screw until the dipstick is does not move in the gap with little effort.
Having set the gap, hold the adjusting screw and tighten the lock nut and check the gap again.
Adjust the clearances of both valves of the first cylinder.
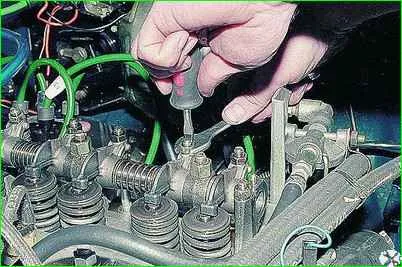
Then use a special key for the ratchet:
- Rotate the crankshaft half a turn (180°) and adjust the clearances in the valve drive of the 2nd cylinder.
- Rotate the crankshaft another half turn (180°) and adjust the clearances in the valve drive of the 4th cylinder.
- Rotate the crankshaft another half turn (180°) and adjust the clearances in the valve drive of the 3rd cylinder.
Amount of clearances in the valve drive:
First cylinder:
- intake valve - 0.40-0.45 mm;
- exhaust valve - 0.35-0.40 mm
Second cylinder:
- intake valve - 0.40-0.45 mm;
- exhaust valve - 0.40-0.45 mm
Third cylinder:
- intake valve - 0.40-0.45 mm;
- exhaust valve - 0.40-0.45 mm
Fourth cylinder:
- intake valve - 0.40-0.45 mm;
- exhaust valve - 0.35-0.40 mm
After adjusting the valves, you need to start the engine and after warming up, make a test drive.
Check engine operation in all modes. In case of unsatisfactory operation of the valve mechanism, repeat the clearance check.


