The article will consider replacing the pipelines of a car equipped with an anti-lock braking system
After performing work with depressurization of the brake system, you need to bleed the brakes, as indicated in the article - How to replace the ABS hydraulic unit Niva Chevrolet
Replacing the tube to the left front brake
We install the car on a lift or inspection ditch and install the parking brake
Disconnect the battery terminals and remove the battery from the car
Loosen the wheel mounting bolts and raise the car (if it is on a lift) to a height convenient for performing the work
Remove the front wheel
Disconnect the brake tube mounting nipple from the left front brake hose
Install in the hose hole plug.
Remove the brake hose mounting bracket from the brake pipe fitting
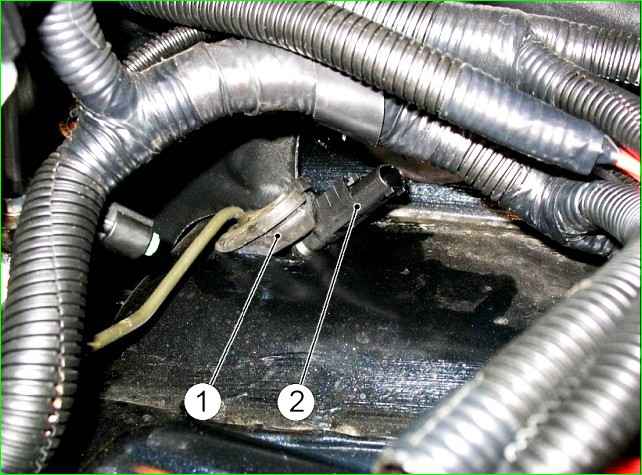
Remove split seal 1 from the hole in the mudguard
Disconnect the brake pipe mounting nipple from the hydraulic unit and install the plug in the hydraulic unit hole
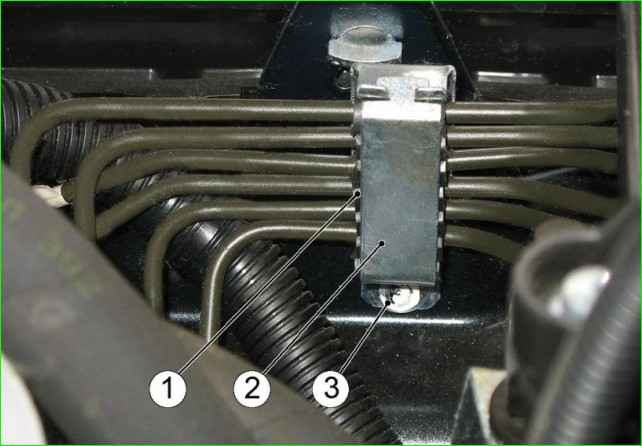
Unscrew nut 3 fastening soundproofing bushing 1
Remove guide bracket 2 and take out tube from slot in bushing
Remove tube from car
Install tube in reverse order
Part number according to spare parts catalog 21230-3506550-50-0
Bleed brake system as described in article - How to replace ABS hydraulic unit Niva Chevrolet
Replacing tube from adapter to right front brake
Install car on lift or inspection pit
Remove engine screen
Unscrew canister bracket mounting nuts and move the canister to the side
Loosen the wheel mounting bolts
Raise the car to a height convenient for work
Unscrew the right front wheel nuts and remove the wheel
Disconnect the brake pipe mounting nipple from the right front brake hose
Install a plug in the hose hole
Remove the brake hose mounting bracket from the brake pipe nipple
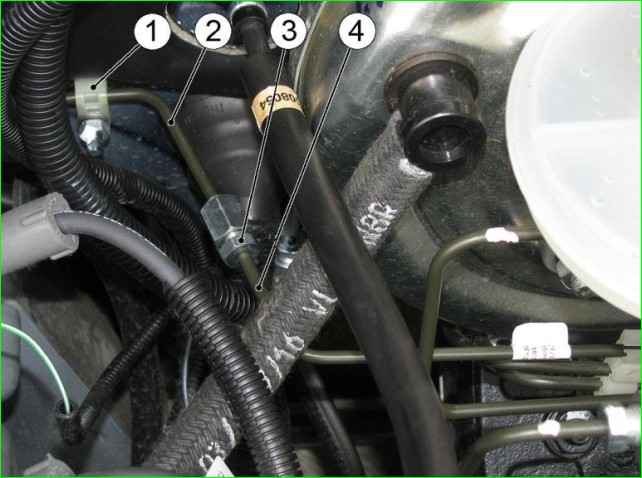
Disconnect the fitting 3 of the pipe to the right front brake 4 and install a plug in its hole
Unscrew the nuts and remove the two clamps 1 securing the pipe to the body
Remove the pipe from the car
Pipe catalog number 21230-3506540-55-0
Install the pipe in the reverse order and bleed the brake system, as described in the article - How to replace the ABS hydraulic unit Niva Chevrolet
Replacing the pipe to the right front brake
Place the car in the work place, brake with the parking brake and turn off the ignition
Remove the screen engine

Disconnect fitting 3 of pipe to the right front brake 4
Install a plug into the hole in the pipe from the adapter to the right front brake
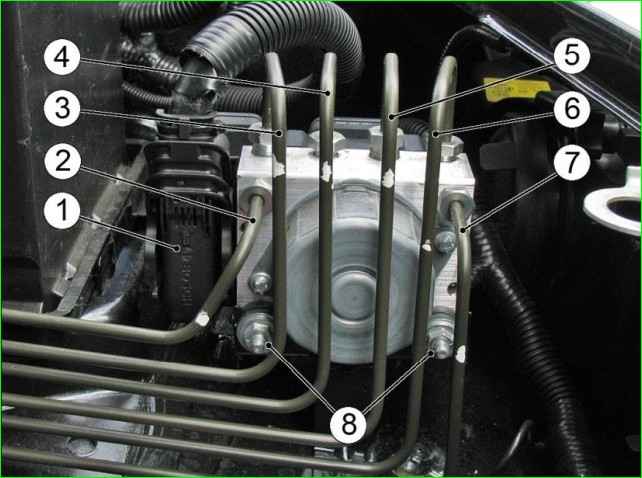
Disconnect the brake pipe fitting to the right front brake from the ABS hydraulic unit
Install the plug in the hydraulic unit hole

Unscrew nut 3 for fastening soundproofing bushing 1
Remove guide bracket 2 and take out tube from slot in bushing
Take out tube from plastic bracket and remove from car
Install tube to right front brake in reverse order
Bleed brake system as described in article - How to replace the ABS hydraulic unit Niva Chevrolet
Replacing tube to left rear brake hose
Place car on lift or inspection ditch and set on parking brake
Raise car to height convenient for work
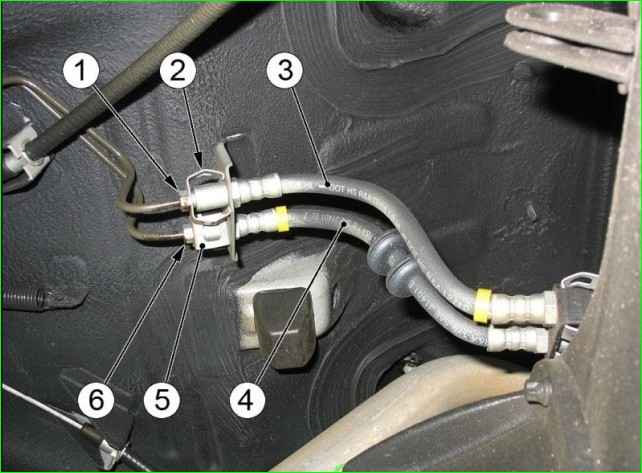
Disconnect fitting 1 of the brake pipe from hose 3 of the left rear brake
Install a plug in the hole of the left rear brake hose
Remove bracket 2 of the hose fastening from the brake pipe fitting
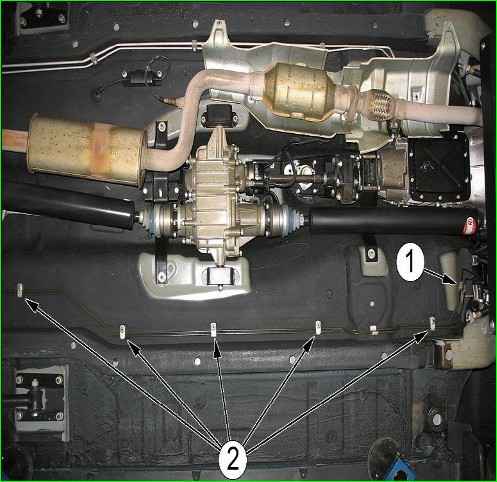
Unscrew the nipple 1 and disconnect the tube to the left rear brake hose from the tube to the left adapter
Install the plug in the tube hole
Unscrew the five nuts 2 of the brackets for fastening the tubes to the car body, disconnect the strips from them and remove the brake tube
The tube is installed in the reverse order, and the brake system is bled
Replacing the tubes to the adapter
Place the car on a lift or inspection ditch and set the parking brake
Raise the car to a height convenient for work
Remove the engine screen
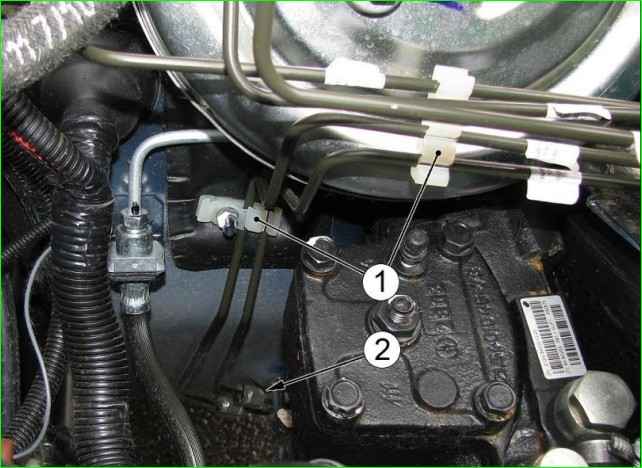
Disconnect nipple 2 of the brake pipe to the right or left adapter
Install a plug on the brake pipe to the rear brake hose
Lower the car if it was raised on a lift
Disconnect the nipple of the brake pipe to the right or left adapter from the ABS hydraulic unit
Install the plug in the hole of the hydraulic unit

Unscrew nut 3 fastening noise-insulating bushing 1
Remove guide bracket 2 and take the tube out of the slot in the bushing

We take the tube out of two plastic clamps 1 and remove it from the car
The number of tubes according to the spare parts catalog: right 21230-3506560-50-0; left 21230-3506570-50-0
We install in the reverse order and bleed the brake system


