Place the car on a lift or inspection pit, apply the parking brake and turn off the ignition
Disconnect the negative terminal from the battery
Remove the engine noise insulation screen.
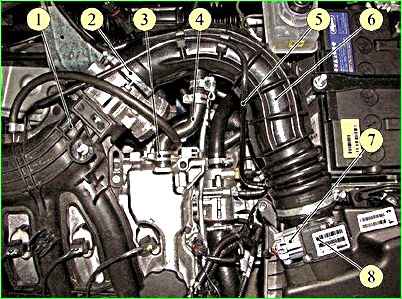
Loosen clamp 3, fasteners and disconnect the upper hose 4 of the crankcase ventilation from the pipe of the cylinder head cover.
Disconnect the connector of the tube 5 of the adsorber valve from the electronic module 1 intake.
Loosen clamp 2 fastening and disconnect hose 6 of intake pipe from electronic intake module.
Disconnect block 7 of ignition system wiring harness from sensor 8 of mass air flow.
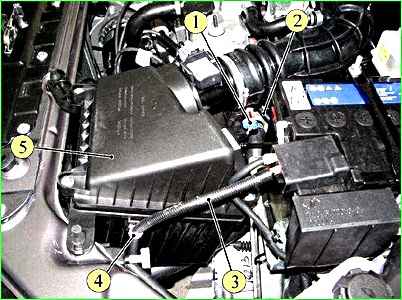
Disconnect block 1, wiring harness of ignition system from valve of adsorber.
Disconnect connector of steam outlet pipe 2 from valve of adsorber.
Disconnect bracket 4 of fastening together with harness 3 of front wires from housing of air filter 5.
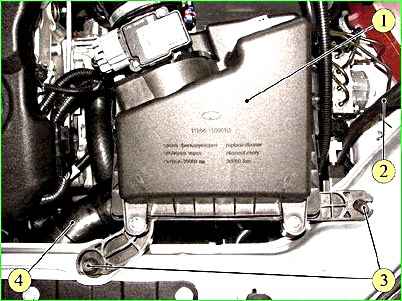
Disconnect the air filter 1, from the supports 3 of the air filter mount and the air intake pipe 4, turn over the air filter with the intake pipe hose as an assembly
Disconnect the mounting bracket with the steam outlet pipe 2 of the radiator from the air filter housing and remove the air filter with the intake pipe hose and the adsorber valve as an assembly.
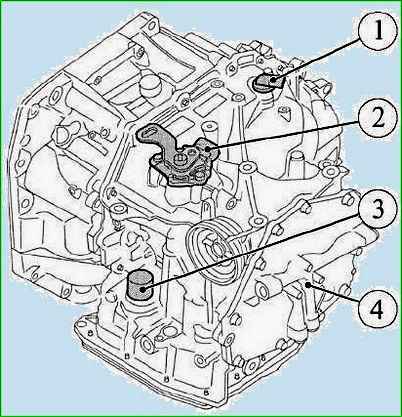
Disconnect the wiring harness connector from sensor 1, the number of revolutions of the output shaft.
Disconnect the wiring harness connector from the connector of the mechanism 2 for selecting driving modes.
Disconnect the wiring harness connector from the 22-pin connector 3 of the automatic transmission.
To disconnect the connector, turn the locking ring of the connector counterclockwise until it stops.
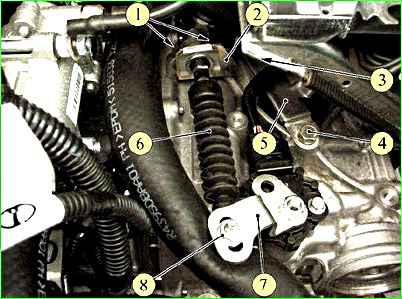
Unscrew nut 8, fastening the control cable to the lever 7 of the mechanism for selecting the gearbox driving modes.
Unscrew two bolts 1 fastening bracket 2 of the control cable to the torque converter housing.
Unscrew bolts 3 and 4 of bracket 5 fastening the wiring harness to the gearbox housing.
Remove the decorative caps of the front wheel hubs and loosen the nuts fastening the wheel drives.
Remove the front wheels. Remove the left front fender shield
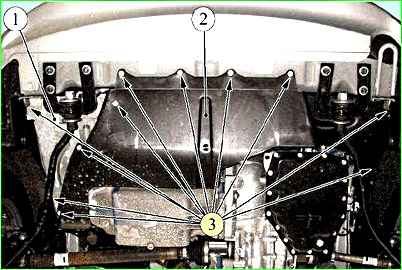
Unscrew eleven screws 3, and remove the middle and right engine mudguards.
Unscrew nut 2, fastenings and disconnect the terminal of the front wiring harness from the starter.
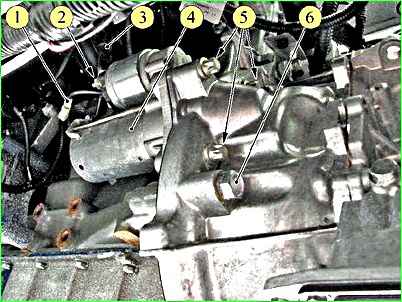
Disconnect the block of wire 1 of the starter traction relay from the front wiring harness. Unscrew the three bolts 5 of the fastening and remove the starter 4.
Unscrew the plug and overflow pipe and drain the oil from the automatic transmission.
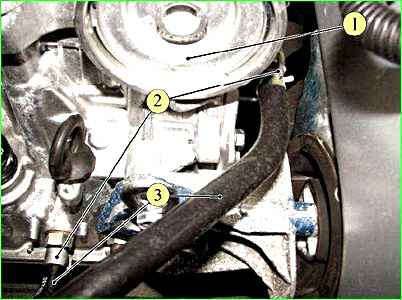
Loosen the clamps 2, disconnect the pipes 3 of the oil cooling system from the fittings of the automatic transmission and drain the oil from the cooling system. Install technological plugs on the fittings and tubes.
Remove the heat shield of the right wheel drive joint, disconnect the ball pins from the steering knuckles and remove the front wheel drives
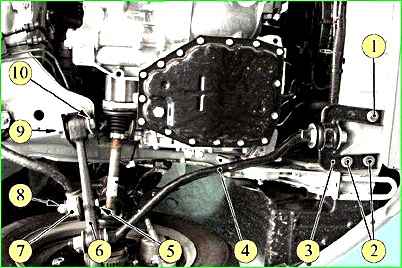
Unscrew one bolt 1, and two bolts 2 fastening bracket 3 of the stretcher, remove the spring washers and disconnect the left stretcher 4 of the lower arm with the bracket assembly from the body.
Unscrew nut 8 bolt 10 fastening strut 7 stabilizer and transverse stability to the lower arm 6 of the front suspension, remove the spring washer and remove the bolt.
Unscrew the nut 9 of the bolt 10 securing the left lower arm 6 of the suspension to the body bracket, remove the spring washer, remove the bolt and remove the arm assembly with the tie rod.
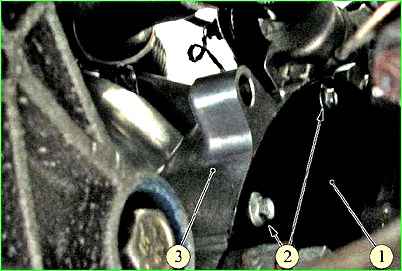
Unscrew the bolts 2, securing the plug of the torque converter housing cover and remove the plug 1.
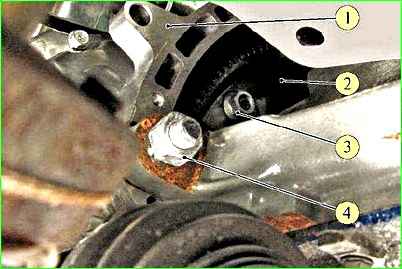
Unscrew the four nuts 3, fastening the torque converter to the flywheel, alternately turning the crankshaft clockwise by the head of the bolt fastening the crankshaft damper.
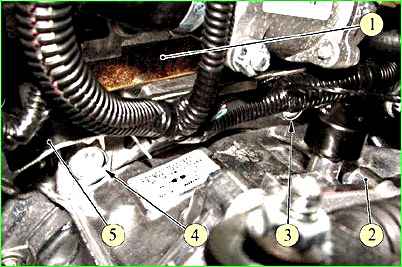
Unscrew the two upper bolts 3 and 4, fastening Automatic transmission to the cylinder block.
Install the stops under the engine and gearbox
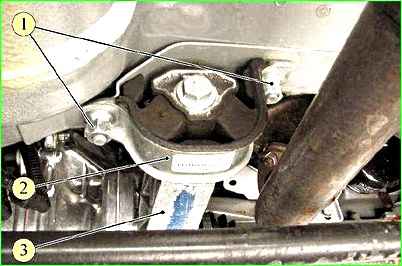
Unscrew the two nuts 1, fastening the rear support 2 of the engine mount to the car body.
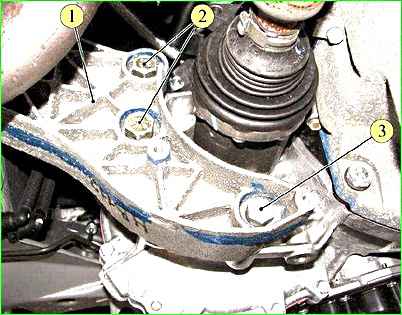
Unscrew two bolts 2, and one bolt 3 securing bracket 1 of the rear support to the automatic transmission and remove the bracket assembly with the support.
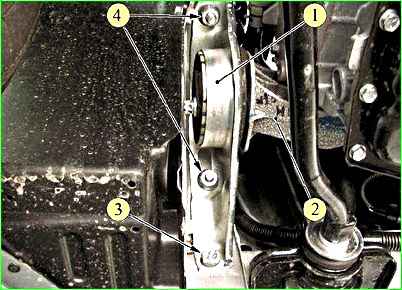
Unscrew two nuts 4, and bolt 3 securing the left support 1 of the engine mount to the car body
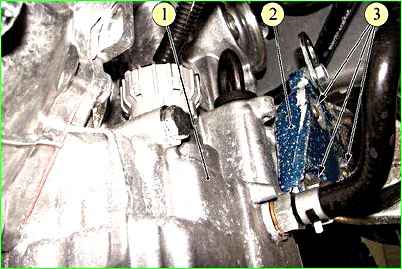
Unscrew three nuts 3, fastening bracket 2 of the left engine mount to the automatic transmission and remove the bracket assembly with the support
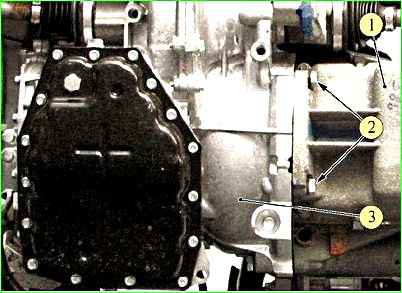
Unscrew two bolts 2, fastening automatic transmission 3 to crankcase 1 of the engine

Unscrew nut 4, studs fastening automatic transmission to the cylinder block
Unscrew the last bolt 6, fastening automatic transmission to the cylinder block
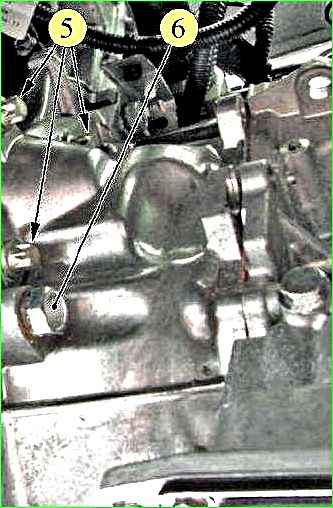
Carefully remove the automatic transmission from the engine with a slight downward tilt. Perform the operation with an assistant.
Remove the torque converter housing cover from the engine.
Install the automatic transmission on a workbench.
Unscrew the three studs from the automatic transmission housing that secure the left engine mount bracket.
Unscrew the stud from the torque converter housing that secures the automatic transmission to the engine.
Unscrew the two oil cooling system fittings from the automatic transmission housing and install service plugs in their place.
Secure the torque converter from axial movement by installing a service bracket on the torque converter axle and securing it to the housing with a bolt and nut.


