We replace the timing belt every 75,000 km or if it shows signs of wear and undercutting of teeth, cracks, delamination of rubber and fabric base
It is also necessary to replace the belt if oil gets on it, having previously eliminated the cause of oiling.
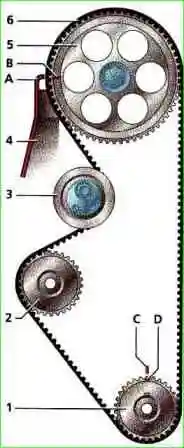
Excessive tension on the belt reduces the life of the belt, as well as the life of the coolant pump bearings and idler.
Insufficient belt tension also leads to premature failure of the belt and can cause a violation of the valve timing.
Checking the timing belt
We check the condition and adjust the tension of the timing belt drive on a cold engine (15-35 ° C).
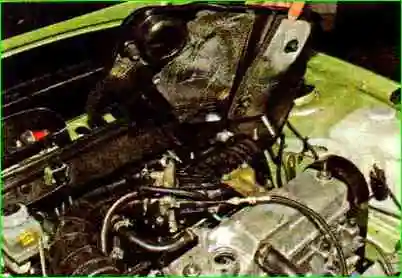
Having removed the oil filler cap, remove the engine screen.
Reinstalling the oil filler cap
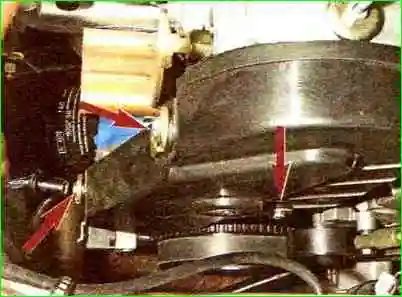
With a head of 10, we unscrew the three bolts securing the front timing cover.
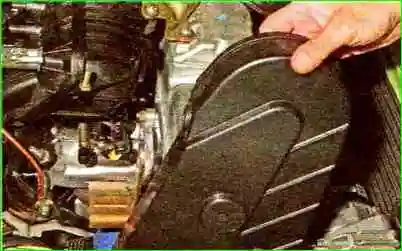
Remove the timing cover.
Remove the right mudguard of the power unit.
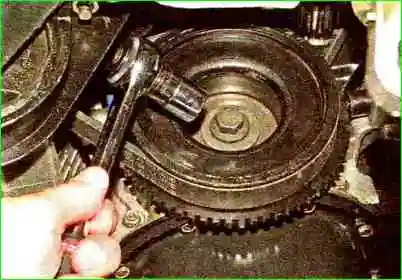
To check the tension of the belt with a head of 17, turn the crankshaft 1-2 turns clockwise for the bolt securing the alternator drive pulley.
Then turn the crankshaft counterclockwise so that the camshaft pulley turns about two teeth.
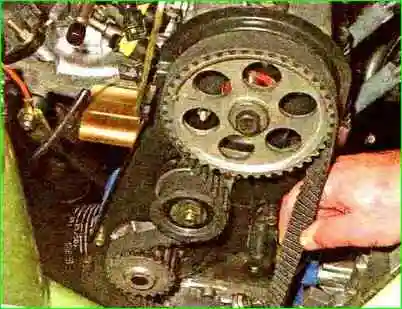
Checking the belt tension.
With normal belt tension, its front branch should be twisted 90˚ with the thumb and forefinger of the hand with a force of 15-20 N (1.5-2.0 kgf).
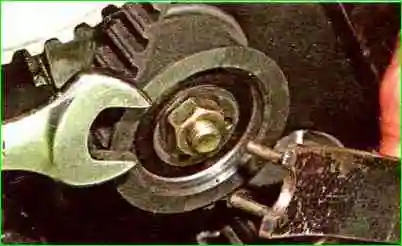
To tension the belt with a 17 wrench, loosen the tightening nut of the tension roller and turn the roller counterclockwise with a special key.
To loosen the belt, turn the roller clockwise
In the absence of a special key, two pins (screws) with a diameter of 4 mm can be inserted into the holes of the tension roller.
Inserting the screwdriver shaft between the pins, turn the roller.
After adjusting the belt tension, we tighten the tension roller fastening nut.
Turning the crankshaft clockwise by 1-2 turns, check the belt tension again and repeat the adjustment if necessary.
Changing the timing belt
Remove the alternator drive belt (see "Checking the condition and replacing the alternator drive belt").
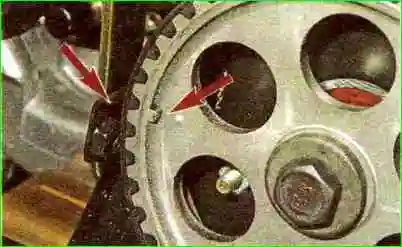
Turn the crankshaft clockwise by the bolt securing the alternator drive pulley until the mark on the camshaft pulley aligns with the setting bar on the back cover of the timing drive.
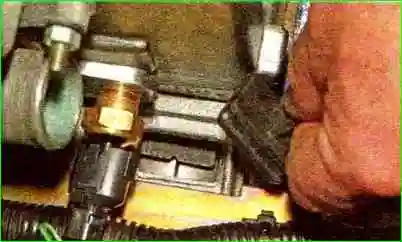
Remove the rubber plug of the inspection window at the top of the clutch housing.
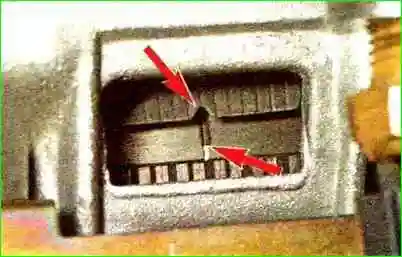
We make sure that the risk on the flywheel is located opposite the scale slot.
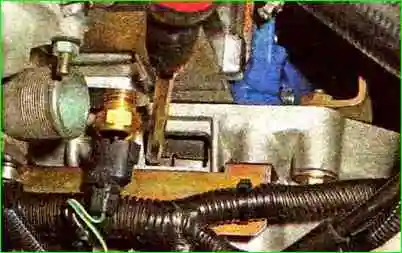
We fix the crankshaft from turning by inserting a screwdriver through the window in the clutch housing between the teeth of the flywheel.
Holding a screwdriver, turn off the bolt securing the generator drive pulley with a 17 head.
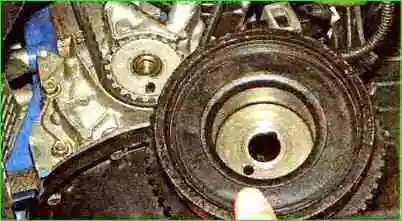
Remove the alternator drive pulley
Having loosened the tightening nut of the tension roller, we turn the roller to a position in which the belt will be as loose as possible.
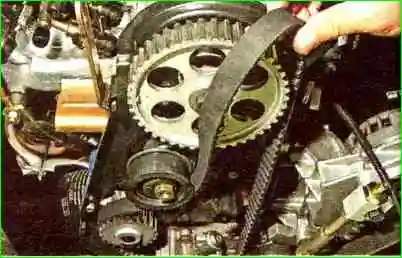
Remove the timing belt
To remove the tension roller, unscrew the nut of its fastening and remove the roller from the stud (a washer is installed under the roller).
The roller should rotate silently, evenly.
Otherwise, replace the roller.
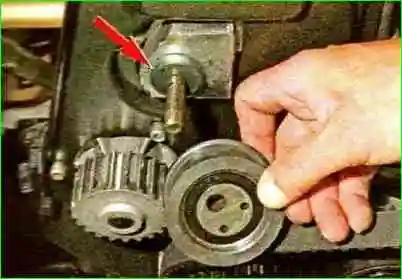
Install the timing belt in reverse order.
We put the belt on the toothed pulley of the crankshaft.
Tensioning both branches of the belt, we put the back branch on the coolant pump pulley and put it on the tension roller, and put the front one on the camshaft pulley.
If necessary, turn the camshaft pulley in the direction of the smallest stroke until the teeth of the belt coincide with the pulley cavities.
Slightly tighten the belt by turning the tension roller counterclockwise.
We screw the alternator drive pulley bolt into place and turn the crankshaft two turns clockwise by the bolt.
When installing and checking the belt tension, it is forbidden to turn the crankshaft by the camshaft pulley bolt.
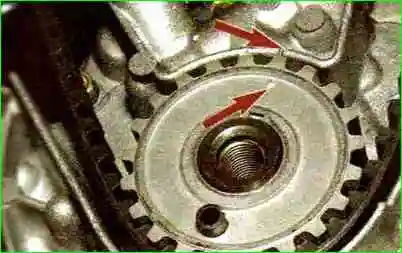
Check that the alignment marks of the crankshaft and camshaft match.
With the alternator drive pulley removed, it is convenient to control the position of the crankshaft by matching the marks on the crankshaft toothed pulley and the oil pump cover.
If the marks do not match, repeat the installation of the belt.
Adjust the tension of the belt.


