Removing the fan drive (see Fig. 1)
Remove the front harness bracket (2) (650.3724142) by unscrewing the bolt and nut
Unscrew the fan pulley bracket fastening nuts (1) and remove the fan drive assembly (fan pulley - 650.1308025, fan pulley bracket - 650.1308063).
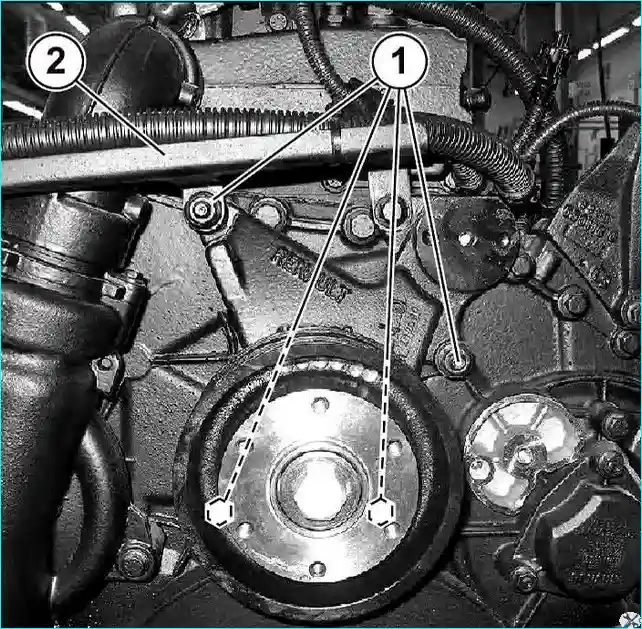
Fig. 1. Removing the YMZ-650 fan drive
Disassembling the fan drive
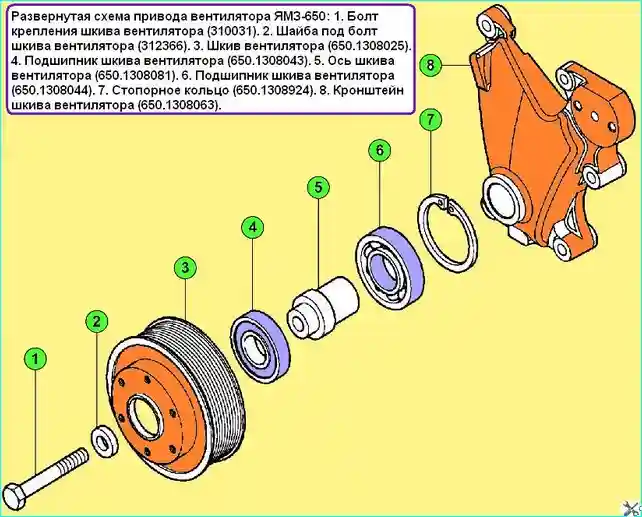
Fig. 2. Expanded diagram of the YMZ-650 fan drive: 1 - fan pulley mounting bolt; 2 - washer for fan pulley bolt; 3 - fan pulley; 4 - fan pulley bearing; 5 - fan pulley axis; 6 - pulley bearing; 7 - retaining ring; 8 - pulley bracket
The digital designations indicated in the text correspond to Fig. 2.
- 1. Unscrew the bolt (1).
- 2. Remove the washer (2).
- 3. Remove the fan pulley with the shaft assembly.
- 4. Remove the retaining ring (7).
- 5. Press out the fan pulley shaft (5) using a press.
- 6. Press in bearings (6) and (4).
Assembling the fan drive (see Fig. 3)

Fig. 2. Pressing in bearings of the fan drive
- 1. Using a press and device 3016 + 2363, press in bearing (4) until it stops (see Fig. 3-1).
- 2. Using a hydraulic press (see Fig. 3-2), install the fan pulley shaft (5).
- 3. Using the press and device 2513, press in the bearing (6) until it stops (see Fig. 3-3).
- 4. Install the retaining ring (7).
- 5. Install the fan pulley and tighten the bolt to a torque of Мкр = 150 ± 30 Nm.
Installing the fan drive
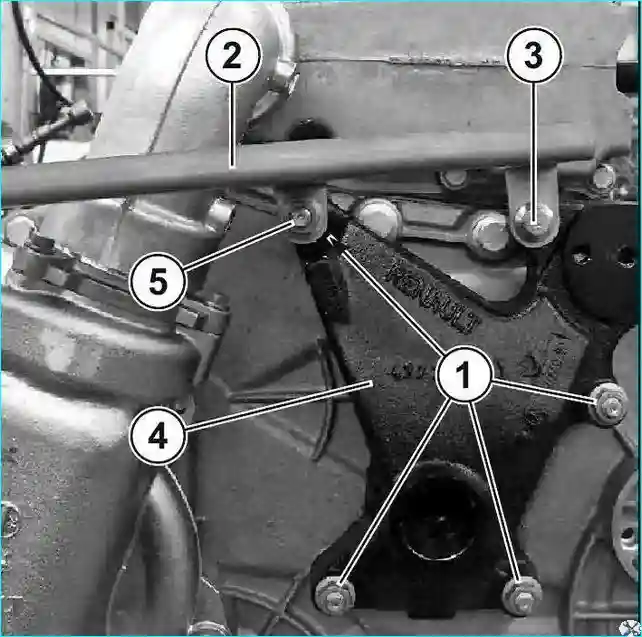
Fig. 4. Installing the YaMZ-650 Fan Drive
- 1. Install the fan drive in the reverse order of removal.
- 2. Screw on 4 M10 nuts (1) (311422) for fastening the fan drive (see Fig. 4) and tighten to a torque of Мкр = 60 ± 12 Nm.
- 3. Install the front harness bracket (2) (650.3724142) by screwing the M10-6gx25 bolt (3) (31020) into the hole in the fan pulley bracket (4).
- 4. Screw on the nut (5) for fastening the harness bracket onto the stud.
- 5. Tighten bolt (3) to torque Мкр = 40 ± 8 Nm and nut (5) to torque Мкр = 40 ± 8 Nm.
Fan drive repair tools
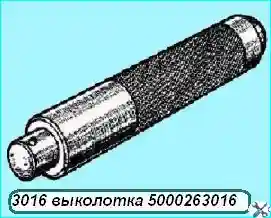
3016 drift 5000263016
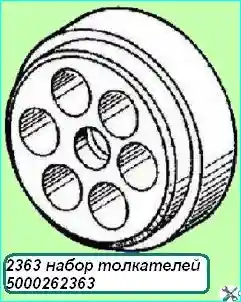
2363 pusher kit 5000262363


