Prepare the car for work. Install it on a viewing pit or lift.
Open the hood and disconnect the negative battery terminal.
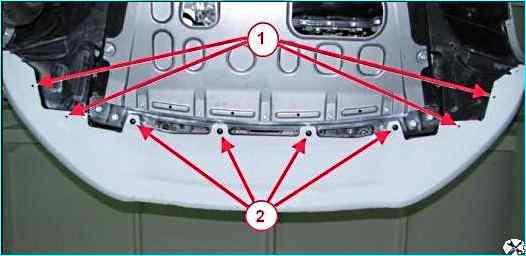
Using TorxT30, T20 heads, unscrew the four screws 2, figure 1 of the lower bumper mount to the body and four self-tapping screws 1 of the lower front wing shield mount to the bumper.
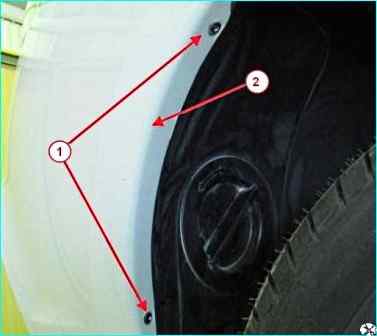
Using the TorxT20 head, unscrew the screws 1, figure 2, on the right and left sides of the side mount of the bumper 2.
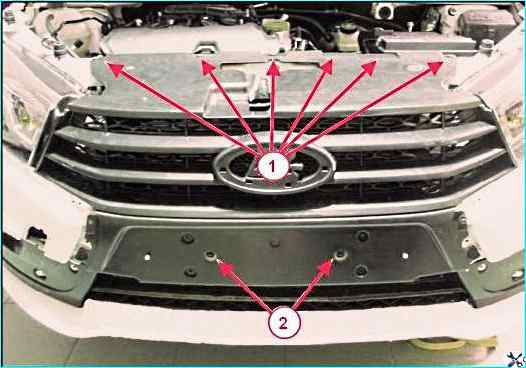
Using a TorxT30 head, unscrew the six bolts 1, Figure 3, of the upper fastening of the bumper to the body.
Using a TorxT20 head, unscrew the two screws 2 fastening the bumper to the bumper beam.
Disengage the bumper from the side brackets and remove the bumper.
Reinstall in the reverse order of removal.
Removing and installing the rear bumper
Prepare the car for work. Install on an inspection ditch or lift.
Open the hood and disconnect the negative battery terminal.
Remove the taillights.
Raise the car to a height convenient for work (if the car is on a lift).

Using a TorxT30,T20 head, unscrew the two bolts 1, Figure 4, of the lower bumper mount to the body and the self-tapping screws 2, of the mudguard apron 3, of the bumper.
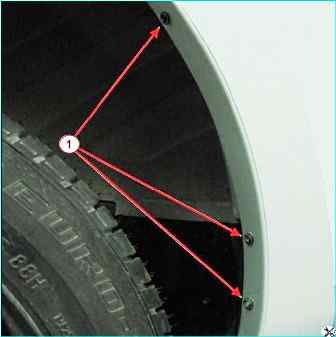
Using a TorxT20 head, unscrew the self-tapping screw 1, Figure 5, of the bumper mount to the wing on the right and left sides rear.
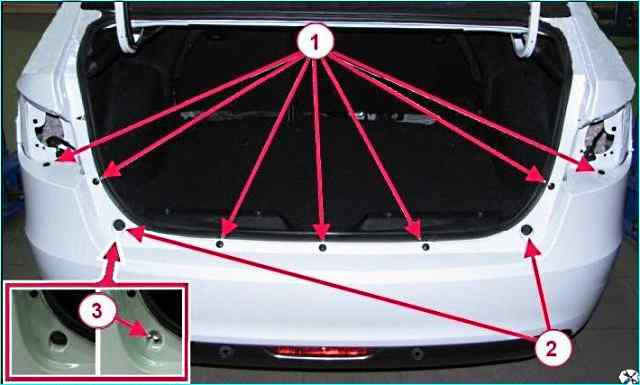
Using a TorxT30 head, unscrew the seven bolts 1, Figure 6, of the upper bumper mount.
Using a 13 head, unscrew the two bolts 3, having first removed the trunk lid bumper stop 2 installed on the bolt head using a screwdriver.
Disengage the bumper from the side brackets.

Remove the rear bumper by disconnecting harness 3, figure 7, of the bumper wires from the brackets on the bumper, and the wiring harness pads from the 1 safe parking sensors and the 2 fog lamp.
If it is necessary to dismantle the rear bumper trim, remove the safe parking sensors, unscrew the ten self-tapping screws securing the trim to the bumper, and remove the trim.
Installation should be carried out in the reverse order of removal.
")

")
")
")
")
")
")
")