To check the vacuum booster on a car, press the brake pedal 5-6 times
Then, holding the pedal down, start the engine
If you feel a downward push on the pedal, then the vacuum booster is working properly.
Otherwise, check the tightness of the connection of the vacuum hose with the check valve and the engine intake pipe fitting, as well as the tightness of the check valve mount in the booster housing.
If necessary, eliminate the leak. The serviceability of the valve can be assessed by blowing through it (for example, with your mouth) in both directions.
Air should flow in the direction from the booster to the receiver, but not in the opposite direction. Replace the faulty valve.
If this does not help, then the vacuum booster is faulty and needs to be replaced.
Removing the vacuum booster
Remove the soundproofing of the engine compartment and the windshield frame trims (article - Removing and installing windshield trims Lada Priora)
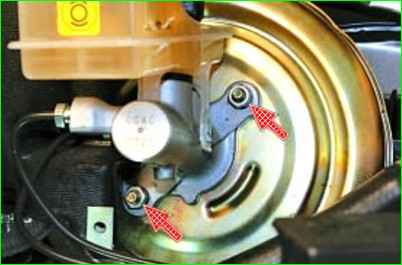
Using a 13 key, unscrew the two nuts securing the master cylinder to the vacuum booster
Move the master cylinder to side, trying not to bend the brake pipes
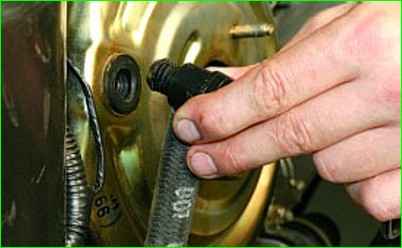
Disconnect the vacuum hose with the valve from the brake booster
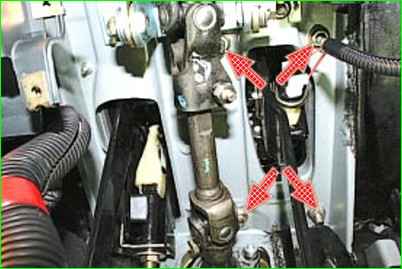
In the cabin under the panel instruments with a 13 key, unscrew the four nuts securing the brake pedal bracket
Remove the bracket with the pedal and the vacuum booster in the engine compartment
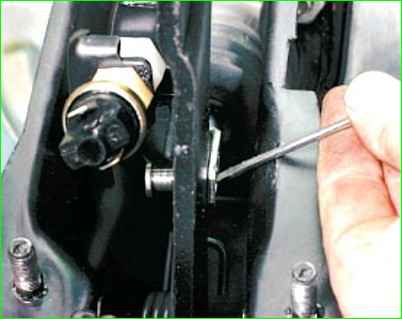
Pry off the finger lock plate with a screwdriver and, pushing out the finger, disconnect the vacuum booster pusher from the pedal
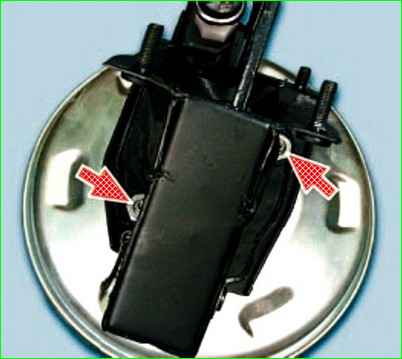
Using a 13 mm wrench, unscrew the two nuts securing the booster to the pedal bracket and, using a screwdriver, remove the booster from the bracket
Install the booster in the reverse order.
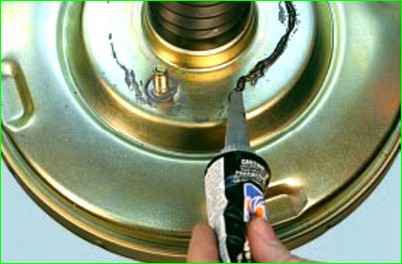
Apply sealant to the contact surface of the booster with pedal bracket.


