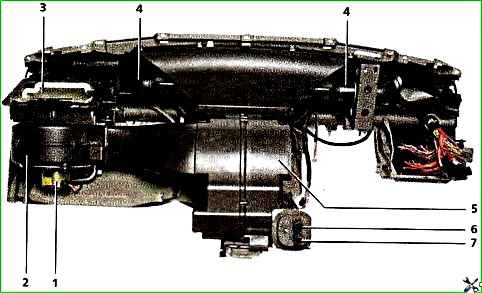
Remove the instrument panel assembly with the heater to replace the heater core, remove the heater fan motor, and also to remove the heater assembly
Disconnect the wire terminal from the “negative” terminal of the battery.
Drain the coolant from the cooling system.

Using a 8mm socket from the bottom of the car, loosen the clamps and disconnect the hoses from the heater radiator pipes passing through the front panel.

Using a high 10mm socket, unscrew the nut securing the heater to the front panel. We take out the cabin filter (see "Replacing the filter element of the ventilation and heating system").

Use a screwdriver to unscrew the four screws securing the filter housing.
Unscrew the nuts securing the steering column and lower the column to the floor.
Disconnect the wire ends from the brake light switch.
Remove the floor tunnel lining.

Disconnect the seven wiring harness blocks behind the relay and fuse box.

Using a 13mm socket, unscrew the bolts securing the console brackets to the floor tunnel on both sides.

Under the front seats, using a high socket, unscrew the nuts securing the air ducts that direct air to the feet of the rear seat passengers and remove the air ducts from the studs (for clarity, the seat has been removed).

Pry off the end cap with a screwdriver

Remove the end cap on the right side of the instrument panel and on the left side

Using a 13mm socket, unscrew two bolts securing the instrument panel on both sides.
Remove the left and right upholstery of the front pillars.

Use a Phillips screwdriver to unscrew the self-tapping screw of the right fastening of the front trim of the instrument panel.
We also unscrew the self-tapping screw of the left cladding fastening.

Remove the front trim of the instrument panel, overcoming the resistance of seven spring holders.
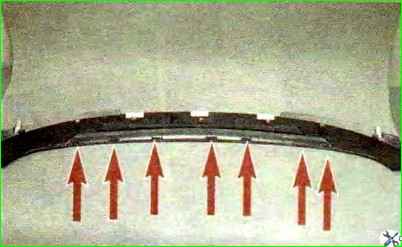
Using a 10mm socket, unscrew the seven nuts securing the instrument panel in front of the windshield (the three nuts on the left are not visible in the photo).


Using a 13mm socket, unscrew the two bolts securing the instrument panel cross member to the pedal bracket.

Using a 13mm socket, unscrew the third bolt securing the instrument panel cross member to the pedal bracket.

Using a 13mm socket, unscrew the two nuts (under the windshield) securing the instrument panel cross member to the body and remove the end of the “mass” wire from the stud.
Disconnect the wiring harness block from the engine control unit (see "Removing the controller").
We move the air ducts supplying air to the feet of the rear seat passengers to the rear of the car, disconnecting them from the heater.

Move the instrument panel away from the front panel

Disconnect the wiring harness block behind the heater
Remove the instrument panel assembly with the heater from the passenger compartment.
Remove the controller from the heater so as not to damage it during operation.
Install the instrument panel in reverse order.
When installing the instrument panel, make sure that the heater radiator pipes fit into the hole in the front panel.
Pour coolant into the cooling system and bring it to normal.
")

")
")
")
")
")
")
")