Removing and installing the fuel tank flap
Preparing the car for work
Using a 7 mm socket wrench, unscrew nut 1 securing the plug driver. Using a Phillips screwdriver, unscrew the two screws 2 securing the fuel tank flap
Remove the hatch.

Install the hatch in the reverse order.
Removing and installing the rear bumper
It is more convenient to do the work with an assistant.
For ease of operation, you can also remove the rear wheels.
We prepare the car for work.

Use a slotted screwdriver with a thin blade to pry...

- remove the holder clamp.

- remove the mudguard holder

Unscrew the two screws of the upper fastening of the mudguard

Use a Phillips screwdriver to unscrew the screw for the lower fastening of the mudguard

Remove the mudguard

Removing the rear lights (article on removing lights - Replacing alarm lamps and lampshades of a Lada Granta car)

Use a Phillips screwdriver to unscrew the bumper mounting screw
We also unscrew the screw in the rear wheel arch on the other side
Opening the trunk lid

Using a 10mm socket, unscrew the eight screws for the upper fastening of the bumper to the body
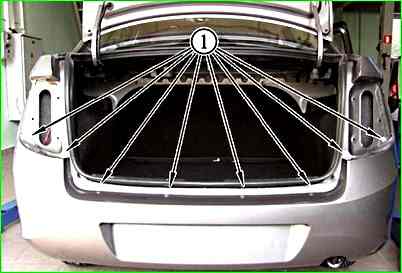
Location of the bolts for the upper bumper mounting of the car 2190
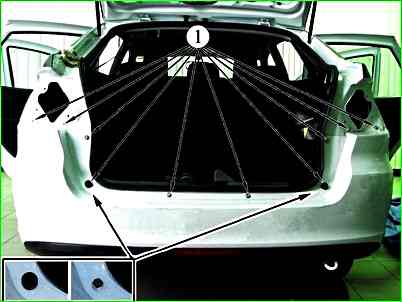
Upper mount for the bumper of a VAZ-2191
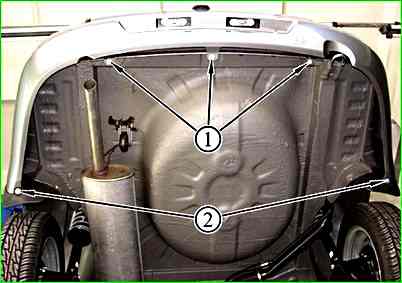
Using a 10mm socket, unscrew the three screws for the lower fastening of the bumper to the body


On both sides of the car, we remove the edges of the bumper from engagement with the rear wing and move the bumper away from the body.

From the hole in the body, remove the sealing plug for the wiring harness of the license plate lights.
Pull out the wiring harness and disconnect the pads.
If necessary, remove the license plate lights from the bumper.
Install the rear bumper in reverse order.
Replacing the trunk lock cylinder

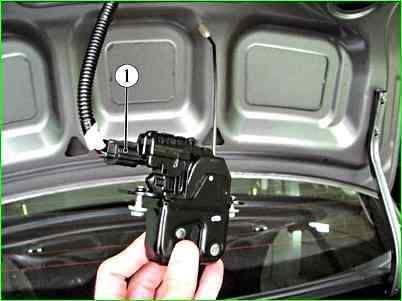
Having opened the luggage compartment lid, use a screwdriver to pry and disconnect the rod from the lock switch.

Use a 10 mm socket wrench to unscrew the two nuts securing the switch

Remove the switch
Installing the switch (cylinder) in reverse order
Install the switch (cylinder) in reverse order.
Replacing the trunk lock

Disconnect the rod from the lock switch.
Use an 8 mm socket wrench to unscrew the two bolts securing the lock.
Remove the lock from the door.

And, pressing the latch, disconnect the wire block
Install the lock in reverse order
Adjusting the trunk lock
Use an impact screwdriver with a Phillips head to loosen the two screws securing the lock retainer.
By moving the lock to the right or left, we ensure that its eye fits into the slot of the lock in the center (this can be seen from the interior by folding the back of the rear seat).

After completing the adjustment, tighten the screws securing the clamp.
")

")
")
")
")
")
")
")