The windshield cleaner and washer are removed for replacement and also for repairs
We prepare the car for the job. Disconnect the negative terminal of the battery.
Use a Torx T20 screwdriver to unscrew the screws and remove the right windshield trim
Use a felt-tip pen to mark the position of the wiper blades on the windshield

Pry up the decorative cap with a screwdriver and remove the cap from the brush lever

Using a 13mm socket, unscrew the nut securing the brush lever and remove the washer and lever together with the brush from the shaft

Use a Torx T20 wrench to unscrew the two self-tapping screws securing the left facing

Remove the left trim
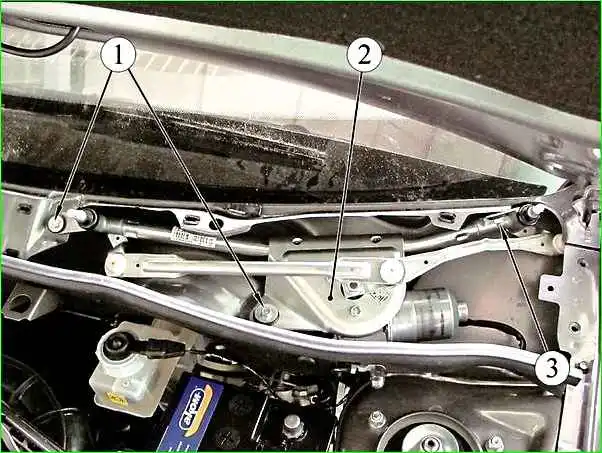
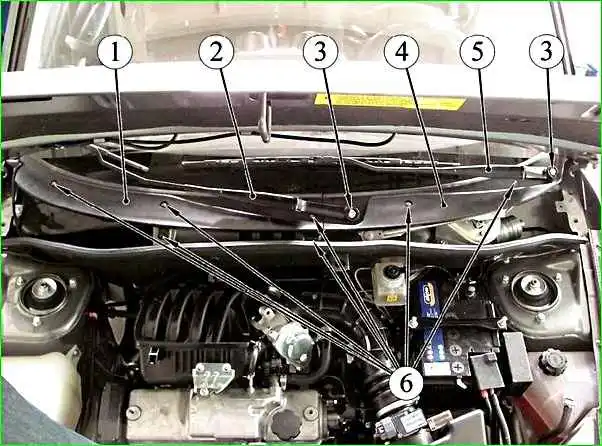
Windshield wiper mount

Press the block retainer and disconnect the gear motor wiring block from the instrument panel wiring block

Using a 10mm spanner, unscrew the nut securing the cleaner

Using a 10mm socket, unscrew the two bolts securing the purifier

Remove the windshield wiper from the plenum box

Remove the wire holder from the hole in the plenum box and remove the cleaner from the engine compartment

Use a felt-tip pen or marker to mark the position of the crank relative to the gear motor shaft

Goal Using a 13mm tool, unscrew the crank fastening nut

Remove the crank from the gear motor shaft

Using a 10mm socket, unscrew the three bolts securing the gear motor

Remove the gear motor from the bracket
Install the gear motor in reverse order.
To install the gear motor shaft in the correct position, connect the gear motor wire block.
Place the negative battery terminal on and turn on the gear motor using the steering column switch.
After this, turn off the gear motor and wait until the gear motor shaft stops.
In this position, install the crank according to the previously applied mark.

If we are installing a new gear motor, install the crank so that point “A” of the center line of the crank is in line with the centers “B” of the trapezoid hinge.
We perform further installation in reverse order.
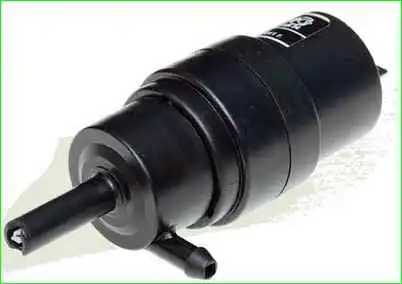
Removing the windshield washer pump and reservoir
Remove the pump and reservoir if the pump fails or the washer reservoir is damaged.

Disconnect the wire blocks from the pump terminals

Use a screwdriver to pry off the pump

Remove the pump from the tank hole

Remove the fluid supply hose to the washer nozzles
The pump is sealed in the tank with a rubber bushing

Install the pump in reverse order.
The pink wire should go to “+” and the black wire to “-”.
To replace the reservoir, remove the washer pump from it.

Using a 10mm socket, unscrew the nut securing the tank

Remove the washer reservoir

When installing the tank, the protrusion on the tank should fit into the hole in the mudguard of the engine compartment
")

")
")
")
")
")
")
")