Removing and installing the rear suspension spring of GAZ-3110
Disconnect the lower shock absorber mounting.
Unload the spring and install a stop under the rear axle.
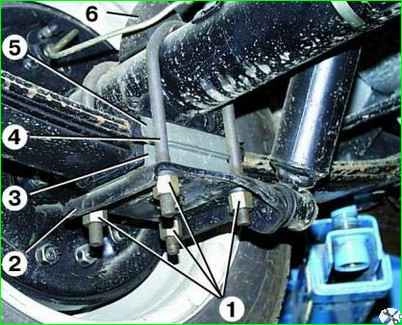
Unscrew the four nuts of 1 spring stepladders.
Remove spring lining 2, lower frame 3 with cushion, stepladders 4, rear suspension buffer 6 and upper cage 5 with cushion.
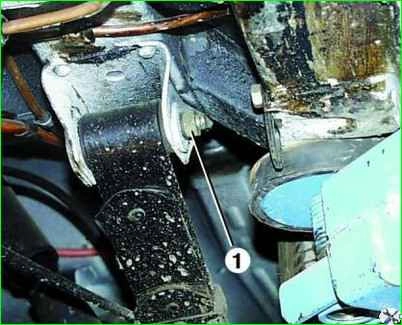
Unscrew nut 1 of the pin securing the front end of the spring to the body bracket and remove the spring washer.
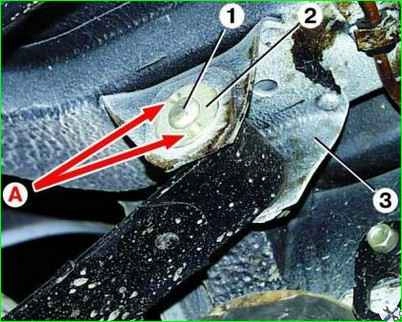
If necessary, center pin 1 and washer 2 with bracket hole 3.
Screw two technological bolts into threaded holes A of the pin washer.
Moisten the bushings and pin generously with soapy water or brake fluid.
Insert a pry bar or a powerful screwdriver between the technological bolts and, turning the pin in both directions, ensure that the pin rotates freely in the bushings.
Screw the nut onto pin 1 flush and use a hammer to knock out the pin until it touches the bracket nut 3.
Unscrew the nut and finally knock out the pin with the beard, applying force to the end of the pin.
Move the front end of the spring out of the bracket.
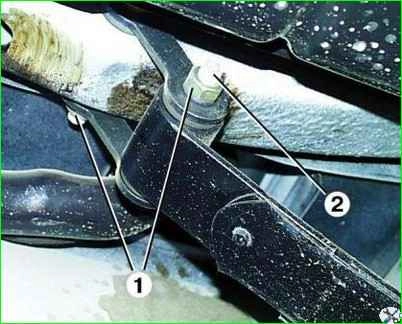
Unscrew the two 1 nuts securing the rear end of the spring.
Moisten the bushings and pins generously with soapy water or brake fluid.
Knock out lower pin 2 without damaging the thread.
Remove the spring. Remove the bushings from the spring lugs.
Knock out the top finger.
If the bushings remain in the bracket lugs, they must be removed.
Inspection of the spring
- 1. Clean the spring from dirt. Clean the spring lugs from rust.
- 2. Spring bushings must be replaced.
- 3. The fingers should not have visible signs of wear, deformation, corrosion, or dirt. The threaded part of the pins must not be damaged.
- 4. The spring earrings and the front pin washer must not be deformed.
- 5. The spring leaves must not have cracks. Anti-squeak washers must be installed between the sheets.
Disassembling the spring
Mark the orientation of the sheets in the spring.
Clamp the spring in a vice.
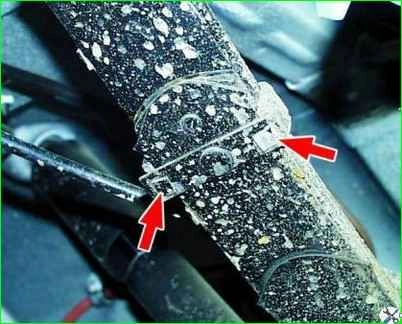
Remove the tie clamps.
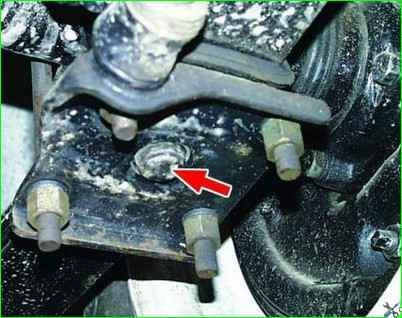
Unscrew the center bolt nut and remove the center bolt.
Slowly open the vice to gradually remove the load from the spring.
Assembling the spring
Assemble the spring in the reverse order of disassembly, having previously lubricated the sheets that do not have anti-creaking gaskets with graphite grease.
In this case, the holes of the sheets are centered using a metal rod, and then, after compressing the entire package, the rod is replaced with a center bolt. The bolt head should be at the bottom.
Installing the spring
Install the spring in the reverse order of removal.
When installing, take into account that the short end of the spring should be directed forward in the direction of travel of the vehicle.
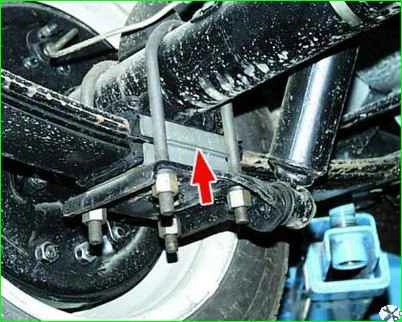
In this case, the stepladder nuts must be tightened until the flanges of the cushion cages touch (arrow in the photo).
Finally tighten the remaining threaded connections of the rear suspension with the car standing on the ground.
The two nuts of the earring pins must be tightened evenly to avoid distortion.


