We replace switches and switches for electrical devices due to their failure or when dismantling car body parts
Replacing switches and backlights on the instrument panel
We prepare the car for the job.
Disconnect the negative terminal of the battery.
To replace the trunk lock actuator switch, remove the mounting block cover from the instrument panel.
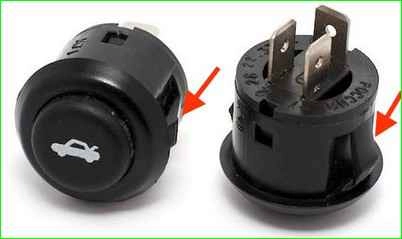

Squeeze the two switch latches with pliers

Remove the switch from the cover of the mounting block
Install the switch in the reverse order.
External lighting switch
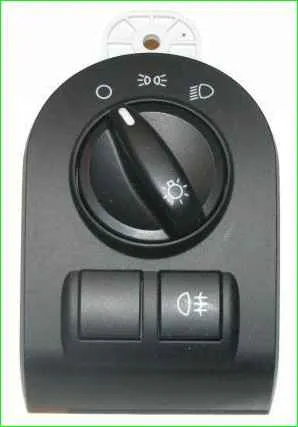
To replace the switch, remove the cover of the mounting block

Use a Phillips screwdriver to unscrew the screw securing the switch

We remove the switch from the instrument panel by tilting the upper part of the switch towards you

Squeeze the two clamps of the wire block

And disconnect the block from the switch
Install the switch in the reverse order.
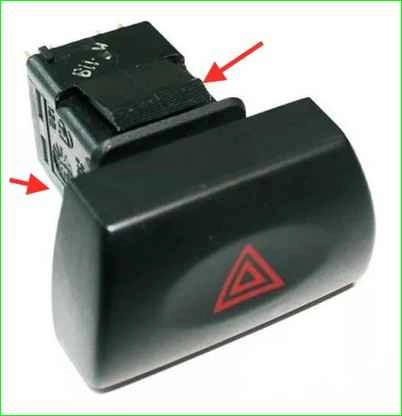
Hazard switch
To replace the switch, remove the central trim from the instrument panel

Disconnect the wire block from the switch

Squeeze the switch latches

Remove the switch from the instrument panel trim
Install the switch in the reverse order.
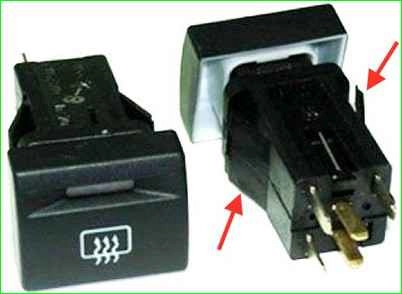
Heated rear window switch
To replace the switch, remove the central trim from the instrument panel

Disconnect the wiring harness block from the switch

Squeeze the switch latches

Remove the switch from the instrument panel trim
Install the rear window heating switch in the reverse order.
Replacing the backlight lamps of the heating and ventilation control unit
Remove the central trim of the instrument panel

Disconnect the wire block from the lamp socket terminals

Rotate the lamp socket clockwise

Remove the lamp socket from the instrument panel trim
Remove the lamp from the socket
We install the new W1.2W lamp in the reverse order.
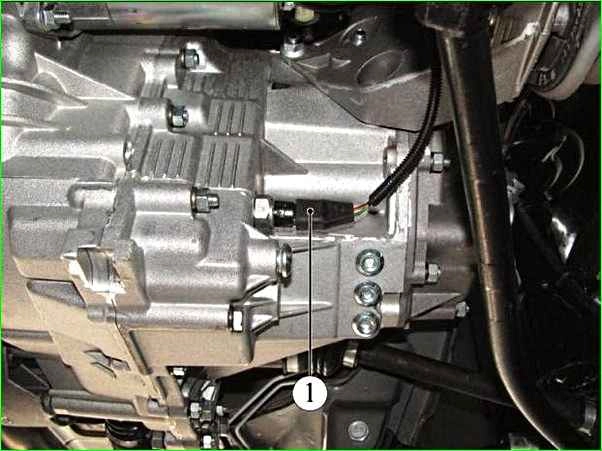
Replacing the reverse light switch
Before replacing the switch, you need to check the serviceability of the reverse lamp.
Remove the middle mudguard of the engine compartment

Disconnect the wire block from the switch.
To check the electrical circuit, turn on the ignition and use a piece of wire to close the contacts of the switch wire block.
If the reverse light does not light up, you should check the electrical circuit.
Otherwise, replace the reverse switch.

Use a 22 key to unscrew the reverse light switch.

Remove the switch from the hole in the gearbox housing.

The switch is sealed with a metal ring

connect the tester probes to the switch terminals in ohmmeter mode
For a working switch, when its rod is free, the tester should show infinity, and when the rod is recessed, the presence of a circuit.
Install the switch in reverse order.
If oil has been spilled, add oil to the correct level in the gearbox.
Replacing the brake light switch
Brake signal switch on a Lada Granta car is combined.
The switch housing contains a brake signal switch and a brake pedal position sensor.
We replace the switch if the switch or sensor is faulty.
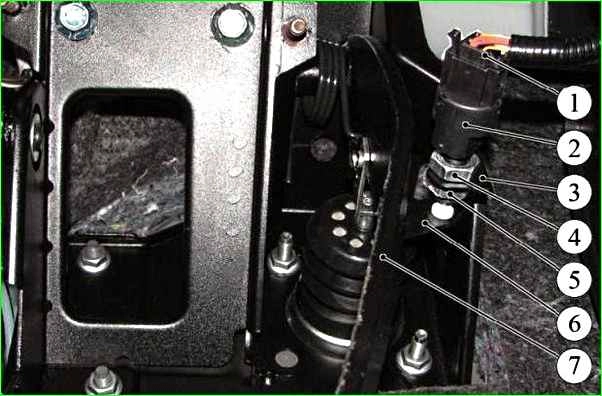
The switch is installed on the pedal assembly under the instrument panel.
Disconnect the negative terminal of the battery.

Press the lock of the wire block, disconnect the block from the brake signal switch

Use a 19 wrench to loosen the nut

Remove the switch, taking it out of the slot in the brake pedal bracket

When the rod is recessed, the switch contacts close
We install the switch in the reverse order, so that when the brake pedal is released, the switch rod is completely recessed, and when the pedal is pressed, the rod should completely come out of the switch body.
In this position of the switch, tighten the nuts securing it.
")

")
")
")
")
")
")
")