Removable elements of the front body are:
- - front bumper;
- - hood;
- - front fender liner;
- - lower trim of the windshield;
- - battery shelf;
Removing and installing the front bumper
The front bumper must be removed with the radiator grille.
We prepare the car for work.
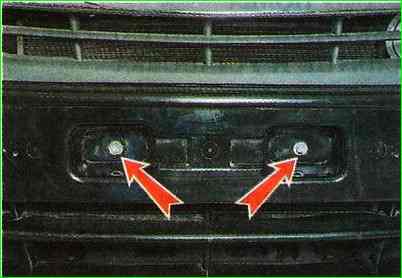
Remove the license plate.
Using a 10 mm socket wrench, unscrew the two bolts of the upper bumper mounting and the two bolts of the lower mounting
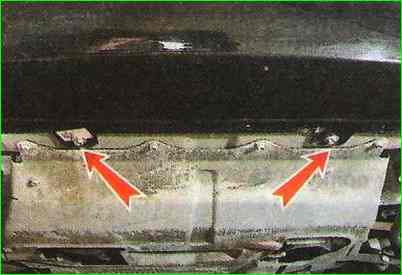
Unscrew the two screws from below that secure the fender liner to the bumper
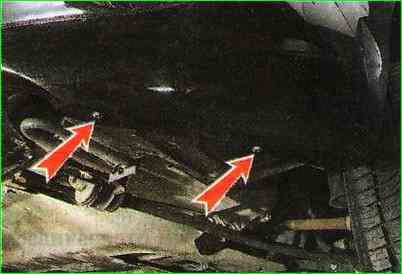
Unscrew the two screws on the side
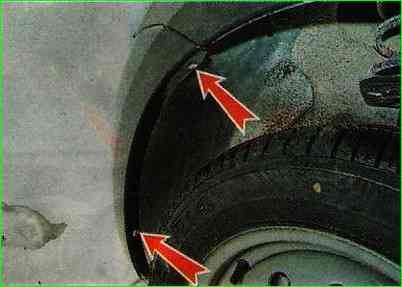
We unscrew the screws on the other side of the car in the same way.
On cars with fog lights, disconnect the wire connectors from them.
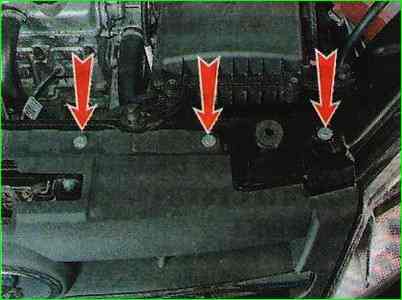
Using a 10 mm socket wrench, unscrew the six bolts of the upper fastening of the radiator trim (left side of the grille in the photo)
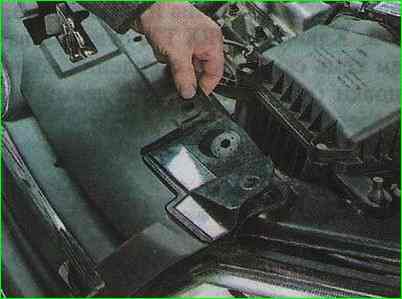
Remove the lining from the hood supports
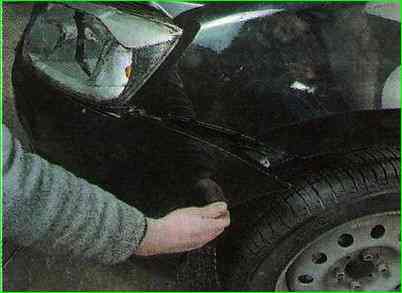
On both sides of the car, remove the edges of the bumper from engagement with the front fenders and remove the bumper.
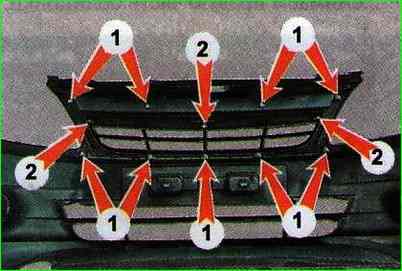
Using an 8 mm socket wrench, unscrew the nine nuts 1 securing the radiator grille to the bumper and remove the grille. To remove the decorative grille trim, unscrew three nuts 2
Assemble and install the bumper in reverse order
Removing, installing and adjusting the hood lock
Access to the lock is made difficult by the radiator grille.
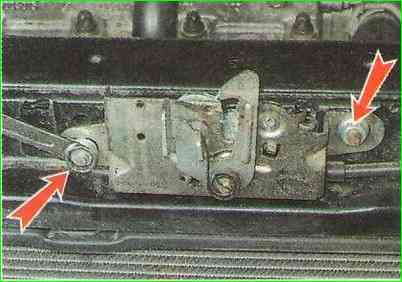
Remove the front bumper with the radiator grille. We use a marker to mark the position of the lock.
Use a 13 mm socket or socket wrench to unscrew the two nuts securing the lock.
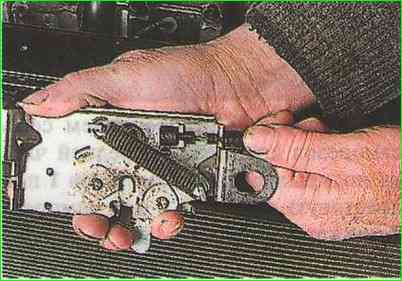
Remove the lock from the studs and disconnect the rod from the lock.
Install the lock in the reverse order in accordance with the mark made.
Before installing the front bumper, we check the operation of the lock.
For this:
Close the hood (the latch on the hood should fit into the slot of the lock in the center).
If necessary, loosen the fastening nuts and, moving the lock to the right or left, adjust its position.
Having adjusted the position of the lock, slam the hood (it should close tightly).
The tightness of the hood closure is adjusted by moving the lock up and down.
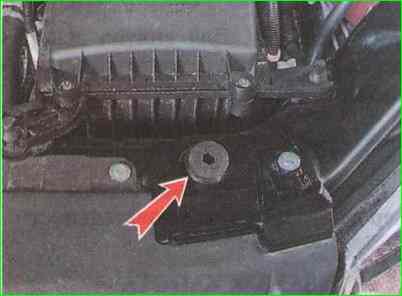
If necessary, adjust the height of the hood stops.
Removing and installing the front fender liner yla
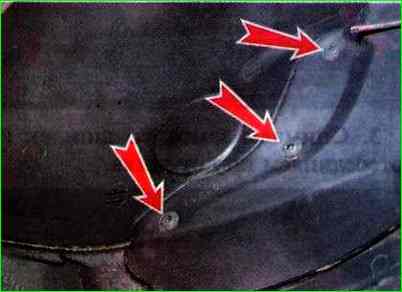
We prepare the car for work.
Remove the front wheel.
Unscrew the three screws securing the front fender mudguard and remove the mudguard.
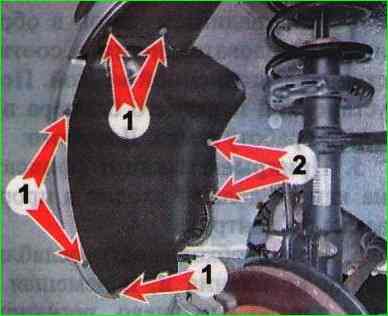
Using a screwdriver, unscrew the seven self-tapping screws securing the front part of the fender liner (five self-tapping screws 1 for a Phillips screwdriver and two self-tapping screws 2 for an 8 mm key).
Remove the front part of the fender liner.
Using an 8 mm socket wrench, unscrew the three self-tapping screws securing the rear part of the fender liner and remove it.
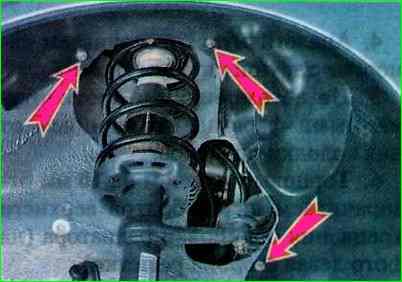
Installing the fender liner in reverse order
Removing and installing the lower windshield trim
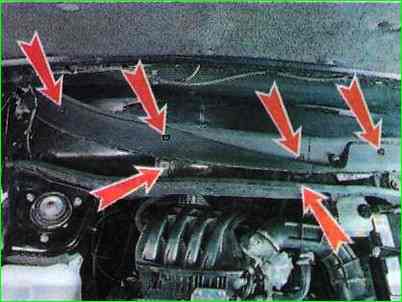
Remove the windshield wiper arms.
Unscrew the seven self-tapping screws securing the cladding (the leftmost self-tapping screw is not visible in the photo)
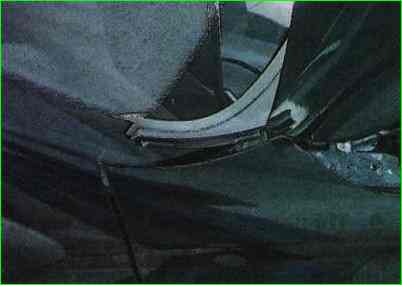
Disengaging from the wing, remove the right side of the lining
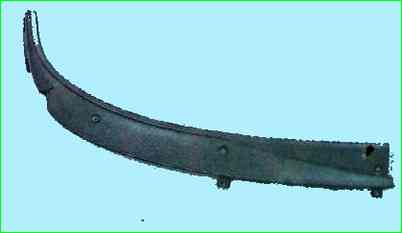
We also remove the left part of the cladding
Install in reverse order
Removing and installing the battery shelf
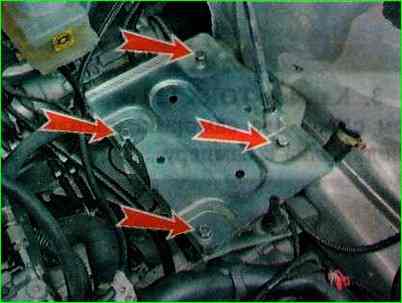
Remove the rubber mat from the shelf.
Using a 13 mm socket wrench, unscrew the four bolts securing the shelf to the brackets and remove the shelf
Disconnect the cooling system hose from the expansion tank
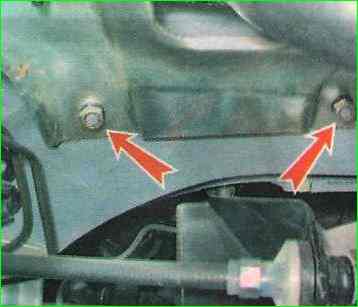
Using a 13 mm wrench, unscrew the two nuts securing the outer shelf bracket to the spar and remove the bracket, removing the bracket from its hole.
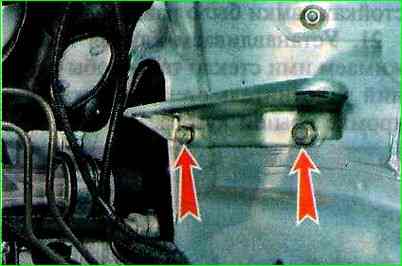
Use the same key to unscrew the two nuts securing the inner shelf bracket to the body mudguard
Install the shelf in reverse order.
Add coolant to normal level


