In this article we will look at disassembling the rear door of a car
Removing the rear door trim of the Lada Granta
We prepare the car for the job.
Disconnect the negative terminal of the battery.
Open the door and lower the glass to the bottom position.
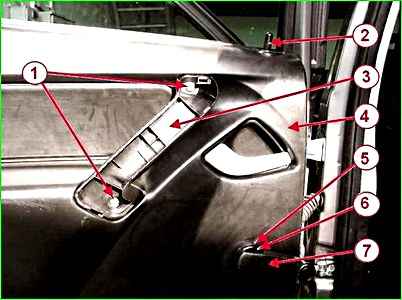
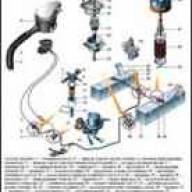
Attaching the rear door trim is shown in Figure 1.

Unscrew the door lock button by hand

Use a screwdriver to press out the power window handle socket

Pull out the latch and remove it

Remove the handle and socket from the window lift shaft

Use a flat-head screwdriver to pry off the outer door handle trim

Use a Phillips screwdriver to unscrew the two screws securing the handle

Remove the handle

Taking hold of the corner, we press the upholstery away from the door panel, overcoming the resistance of ten pistons

Continue to push the upholstery away from the corner in both directions.

After the upholstery has been pressed out, lift and remove the lock lock rod from the upholstery hole.

Remove the rear door trim
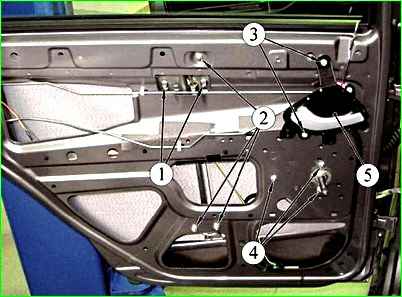
This is how the rear door trim pistons are located
Install the rear door trim in reverse order.
Removing the rear door interior handle
The inner handle must be removed when removing the door lock, as well as when replacing the handle itself.
Remove the rear door trim as described above.

Use a Phillips screwdriver to unscrew the two screws securing the base of the handle to the inner panel of the door

We remove the foot of the handle base from the hole in the inner panel of the door and move the handle away from the door

Remove the rubber clamp of the rod and remove its curved end from the handle lever.
Installing the handle in reverse order
Removing and installing rear door sliding glass
Remove the upholstery as described in step 1.

Loosen the screw fastening the outer corner decorative trim of the door

Remove the decorative trim

There is a slot in the corner of the lining. The self-tapping screw that secures the trim also secures the glass guide.

Pull the glass seal out of the rear guide.

Using a 8mm socket, unscrew the bolt securing the rear glass guide to the end of the door.

We remove the glass guide groove from the screw of the top fastening and remove the rear guide from the door panel

Overcoming the resistance of the piston of the outer glass seal, remove the piston from the door hole

By pulling out the rear seal insert and prying the outer seal, remove it from the edge of the outer door panel.

Pull the edge of the inner glass seal up and remove it from the door

Using the window regulator handle, install the glass so that the mounting bolts to the window regulator are located opposite the hole in the door panel.
Using a 8mm socket, unscrew the two bolts securing the glass holder

Take out the glass
If you have to change the glass and the purchased glass does not have a holder, then install the new glass in the holder using a strip of raw rubber soaked in gasoline.

Insert the glass holder onto the standing 160 mm from the front edge.

Putting the glass on a soft base, carefully press the holder onto the glass with a hammer.
Install the glass in reverse order.
We bring the glass holder to the window lifter slider and tighten the bolts of its fastening without tightening it.
Raise the glass all the way, and then tighten the glass mounting bolts.
Removing the rear door window lift mechanism
Remove the door trim as described in the first paragraph of the article.
Unscrew two bolts 1, Figure 1, holding the glass, install it in the upper position

Glass can be fixed with tape

You can fix the glass using two screwdrivers

Remove the foam gasket from the window handle shaft

Using a 8-mm socket, unscrew the three nuts securing the window lift mechanism

Using a 10mm socket, unscrew the two nuts of the lower fastening of the window lift mechanism guide

Unscrew the nut of the upper fastening of the window lift mechanism guide

We remove the window lift mechanism through the lower hole in the door panel.

Install the window lift mechanism in reverse order.
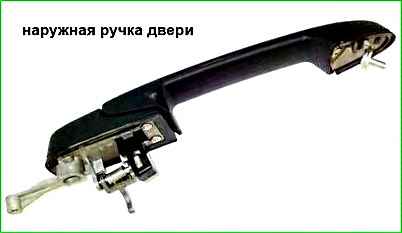
Removing the rear door outside handle
Install the glass in the upper position.
Remove the door trim as described above.

Using a 8mm socket, unscrew the rear handle mounting bolt

Using an 8-mm socket with an extension, unscrew the nut of the front handle fastening

Move the handle forward and remove it
Install the handle in reverse order.
Removing the rear door lock
Disconnect the negative terminal of the battery.
Remove the door trim as described in the first paragraph of the article.

Lifting the lock rods, remove them from the plastic holders

Use a Phillips screwdriver to unscrew the screw securing the intermediate lever of the locking rod

By moving the base of the lever, we remove the locking tab from the rectangular hole in the inner surface of the door panel

Remove the lever together with the rods, removing the lock rod from the plastic holder

Use a Phillips screwdriver to unscrew the three screws securing the door lock to the end.

Remove the electric lock through the hole in the inner door panel

Press the lock of the wire block, disconnect the block from the electric locking drive

Remove the lock with rods

Remove the rod from the lever

Power rear door lock.
Install the lock in reverse order.

")
")
")
")
")